
Fixing Brother Printer Paper Jam: Clear the Error Even With No Visible Jam
Resolve stubborn paper jam errors on your Brother printer, especially when no paper is in sight, with these safe and effective steps.
Few things are as frustrating as a Brother printer paper jam error appearing on your device’s display, only for you to find no visible paper lodged anywhere. This common issue, often referred to as a “ghost jam,” can stop your printing in its tracks, leaving you wondering how to proceed. While it seems counterintuitive, this error usually indicates that a tiny fragment of paper, a misaligned sensor, or another minor obstruction is triggering the printer’s detection system.
This comprehensive guide will walk you through the process of how to remove jammed paper from a Brother DCP printer and other Brother models, even when the jam isn’t obvious. We’ll cover safe removal techniques, highlight specific areas to check, and provide tips to prevent future occurrences. By following these steps, you can troubleshoot and resolve the Brother printer paper jam error and get back to seamless printing.
Understanding Your Brother Printer Paper Jam Error
When your Brother printer reports a paper jam but you can’t see any paper, it’s typically due to one of several reasons. The most common culprit is a small, torn piece of paper that remains lodged out of sight, often in the paper path or around critical sensors. These tiny fragments are enough to obstruct the optical or mechanical sensors that detect paper movement, leading the printer to believe a full jam is present.
Another possibility is a dirty or obstructed paper sensor, which may incorrectly signal a jam even when the paper path is clear. Additionally, issues with the paper’s condition or improper loading can sometimes trick the printer into sensing an obstruction. Understanding these underlying causes is the first step in effectively troubleshooting and resolving your Brother printer paper jam.
Safe Steps to Clear a Brother Printer Paper Jam
Attempting to clear a paper jam requires patience and a gentle touch to avoid damaging internal components. Always prioritize safety, especially when dealing with the printer’s hot fuser unit.
- Power Down and Cool Off: The absolute first step for any internal printer maintenance is to turn off your Brother printer and unplug it from the power outlet. Wait at least 10-15 minutes to allow the fuser unit, which can reach extremely high temperatures, to cool down. This is crucial for your safety and to prevent burns.
- Check the Paper Tray and Input Area: Pull out the paper tray completely. Remove all paper from the tray. Inspect the tray cavity for any loose sheets, bent corners, or small scraps that might have fallen in. Ensure the paper guides are correctly adjusted for the size of the paper you are using.
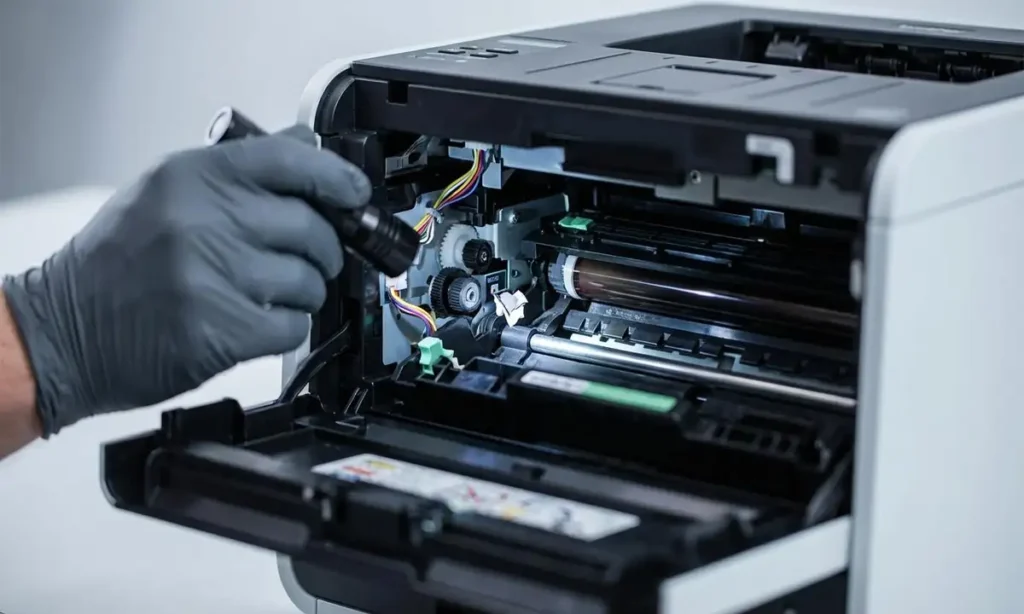
- Open Front Cover and Remove Drum/Toner Assembly: For many Brother models, especially Brother DCP printer series, you’ll need to open the front cover to access the internal components. Carefully remove the drum unit and toner cartridge assembly. Place it on a clean, flat surface, preferably on a piece of paper to protect against toner spills.
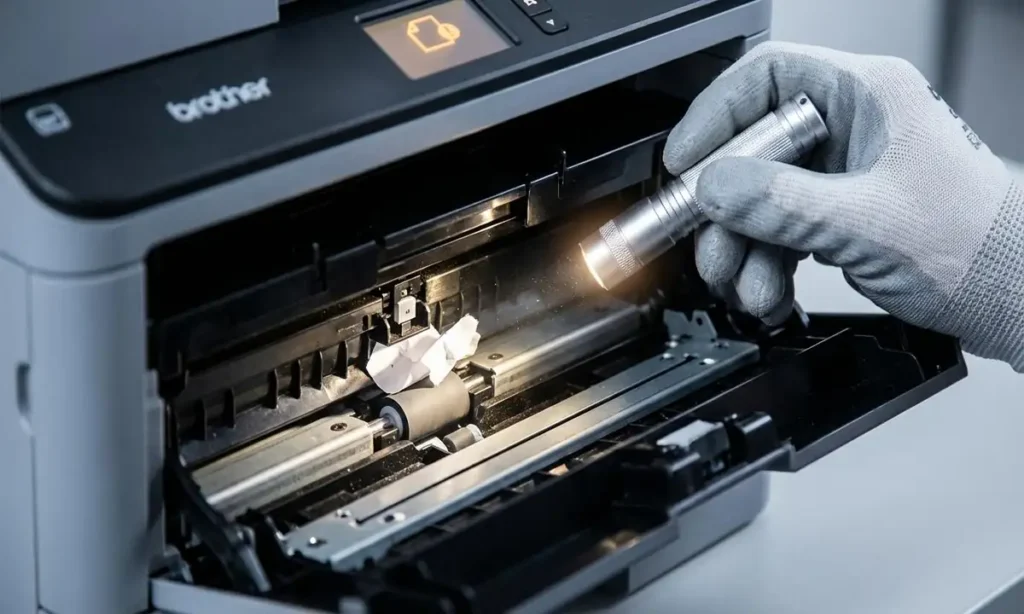
- Inspect the Internal Cavity: With the drum and toner out, use a flashlight to thoroughly inspect the printer’s interior. Pay close attention to the areas where paper normally travels. Look for small, torn pieces of paper stuck to rollers or tucked away in corners that might be difficult to see without extra light.
- Access the Rear and Fuser Area: Locate the jam clear cover at the back of your Brother printer. Open this cover. Inside, you will often find green tabs or levers associated with the fuser unit. Gently pull these tabs down or release them as instructed in your printer’s manual to reduce tension. This makes it safer and easier to check for a Brother printer paper jam rear.
- Gentle Paper Removal Technique: If you find any jammed paper, grasp it with both hands if possible. Pull the paper slowly and evenly in the direction of the paper path. Avoid pulling sharply or at an angle, as this can tear the paper and leave smaller, harder-to-remove fragments behind. If the paper tears, carefully remove all remaining pieces.
Advanced Techniques for Stubborn Jams and Hidden Debris
Sometimes, even after thorough inspection, the Brother printer paper jam error persists. These advanced methods can help you locate and clear those elusive “ghost jams.”
Using Specialized Tools for Inspection and Clearance
A small flashlight is your best friend when dealing with invisible jams. Shine the light into every accessible nook and cranny, looking for tiny slivers of paper, especially around the paper entry and exit points, and any visible sensors. Even the smallest piece can trigger the error.
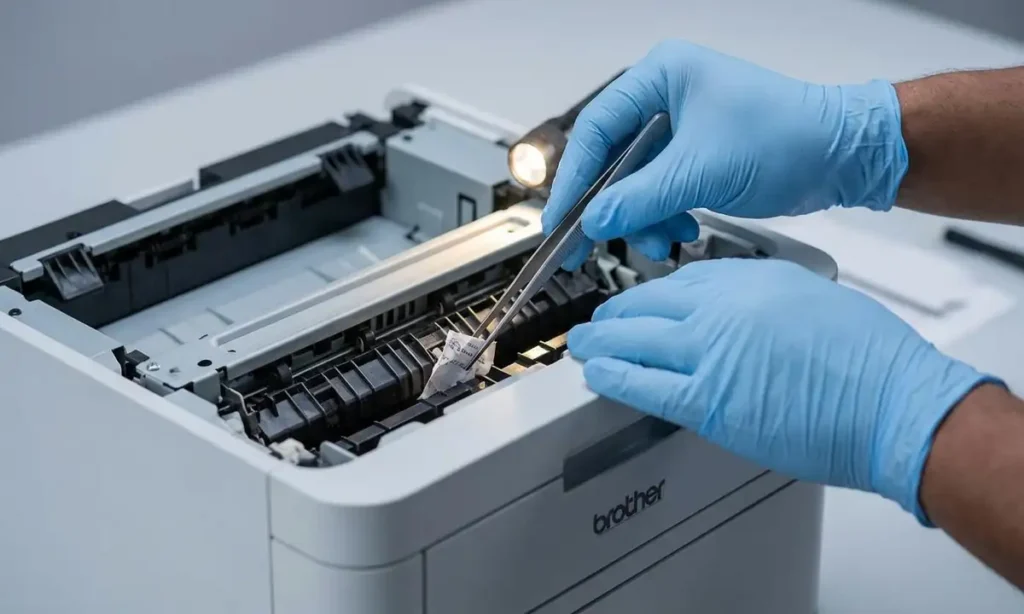
For very small, unreachable scraps, a pair of long, non-metallic tweezers can be useful. Exercise extreme caution; do not scratch internal rollers, the drum unit, or the clear encoder strip (a thin, transparent plastic strip often found near the print head in inkjet models) as this can cause permanent damage or new print quality issues.
Clearing Persistent Fragments with Cardstock
If you suspect tiny fragments are stuck but can’t see them, try feeding a single, thick sheet of plain cardstock or stiff glossy paper through the manual feed slot (if your printer has one). This can sometimes act as a “sweeper,” pushing out any hidden debris as it passes through the paper path. Ensure the cardstock is clean and free of kinks.
Sensor Cleaning for False Alarms
Paper registration sensors are small and can become dusty or obstructed over time, leading to false Brother printer paper jam errors. With the printer unplugged, locate these sensors (often small optical readers or mechanical levers along the paper path). Use a can of compressed air to gently blow away dust, or a soft, dry brush to carefully clean them. Be extremely gentle not to bend or damage any components.
Encoder Strip Care for Accurate Operation
The encoder strip, a thin, clear strip running across the printer’s width (primarily in inkjet models, but similar mechanisms exist in laser printers), tells the print head its position. If it becomes dirty, greasy, or scratched, the printer can misinterpret movement, leading to various errors, including perceived jams. Avoid touching it directly. If cleaning is necessary, use a lint-free cloth lightly dampened with water, but only if absolutely required and with extreme care.
Preventing Future Brother Printer Paper Jam Issues
A little proactive maintenance and proper handling can significantly reduce the likelihood of encountering future paper jams. By adopting good printing habits, you can extend the life of your printer and ensure smooth operation.
Proper Paper Loading Techniques
Always fan your paper stack before loading it into the tray. This separates individual sheets and prevents them from sticking together. Do not overfill the paper tray beyond the maximum fill line. Ensure the adjustable side guides are snug against the edges of the paper, but not so tight that they cause the paper to buckle. Incorrectly loaded paper is a leading cause of jams.
Using Appropriate Media
Always use paper that is recommended for your Brother printer model. Avoid using paper that is curled, wrinkled, torn, or has previously been printed on. Substandard or damaged media can easily get caught in the paper path. Ensure your paper is stored in a dry, cool environment to prevent moisture absorption, which can cause sticking and curling.
Regular Printer Maintenance
Periodically inspect your printer’s paper path for any signs of wear or accumulation of paper dust. While deep cleaning might require professional help, routine checks of accessible areas can prevent many issues. Keeping your printer’s drivers and firmware updated can also resolve known paper handling glitches.
Safety and Warranty Notice
Always remember to unplug your Brother printer from the power source before opening any covers or touching internal components. Avoid touching sensitive parts like the fuser unit (even after cooling), the drum unit’s surface, or internal circuit boards, as this can cause damage or injury. Attempting repairs beyond basic troubleshooting might void your printer’s warranty. If you are unsure or uncomfortable performing any step, it is best to contact Brother support or an authorized service center.
Common Questions About Your Brother Printer Paper Jam
Resolving a Brother printer paper jam error, especially when no paper is immediately visible, requires a methodical approach and attention to detail. By carefully following the steps outlined in this guide, from safe removal techniques to preventive measures, you can effectively clear hidden jams and restore your printer’s functionality. Remember that patience and gentle handling are key to tackling these common printer frustrations.