
Epson L3210 Smudge Problem Fixes
Stop frustrating smudges and ensure crisp prints on your Epson L3210 with these easy troubleshooting steps.
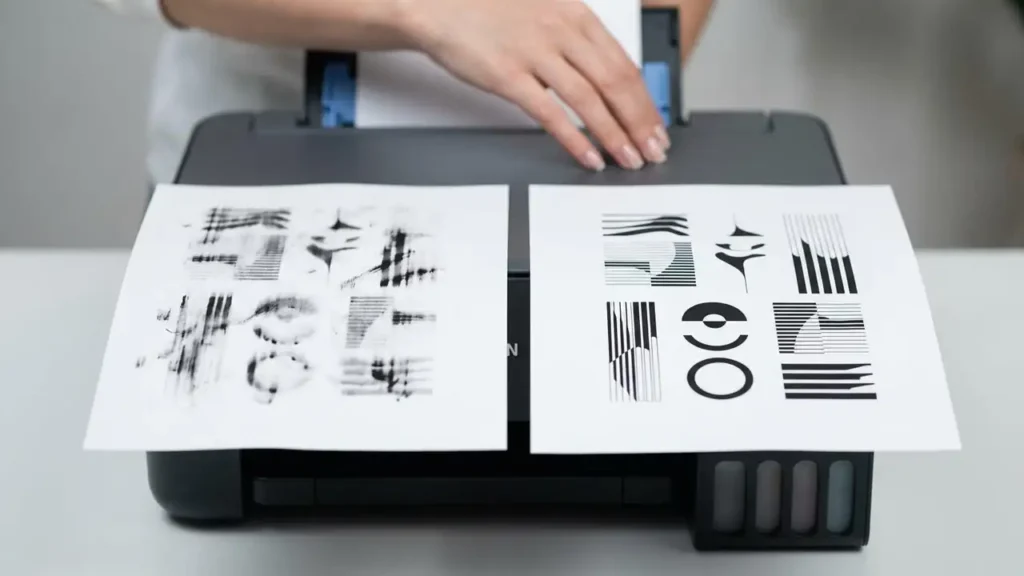
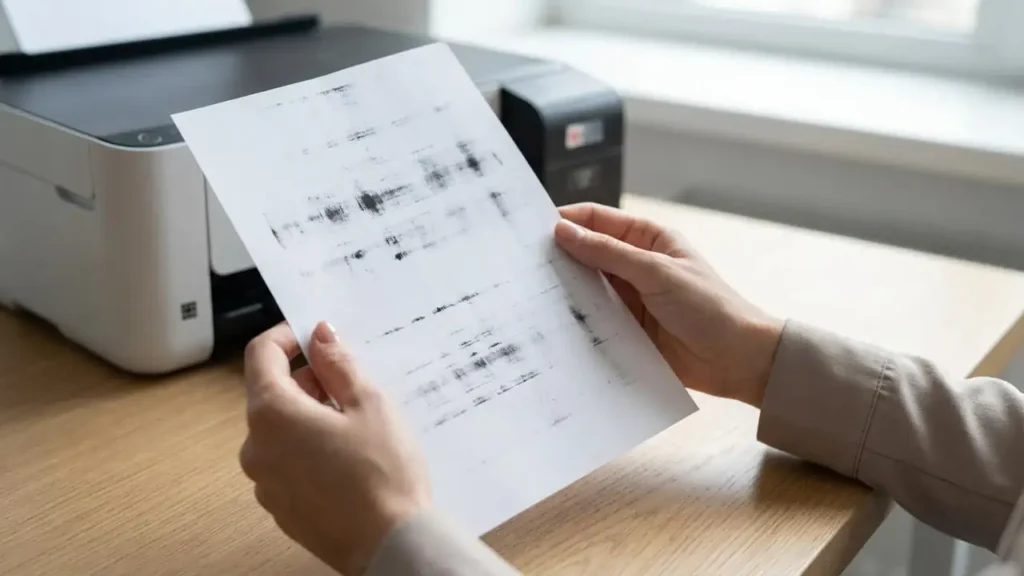
Smudges on your printed pages can be incredibly annoying, turning what should be clear text or vibrant images into messy, unusable documents. If your Epson L3210 is leaving ink marks, streaks, or smeared lines across your paper, you’re not alone. This common Epson L3210 smudge problem often stems from a few key areas within the printer’s paper path or ink delivery system.
Fortunately, most Epson L3210 smudge problem issues are fixable without needing a technician. This guide will walk you through simple, safe steps to diagnose and resolve smudges, helping you get back to printing perfectly clear pages. We’ll cover everything from checking your paper and settings to performing essential maintenance routines within the printer software.
Understanding the Causes of Epson Smudges
Smudges on prints from your Epson L3210 can appear as lines, streaks, or general ink blotting. These issues typically arise from either physical contamination in the paper path or a problem with the print head’s ink application. Understanding these root causes helps us target the right solutions.
Often, excess ink can accumulate on the printer’s rollers or the paper guide mechanism. This ink can then transfer to the paper as it passes through, creating those unwelcome smudges. Additionally, if the print head nozzles are partially blocked, ink might not be applied evenly, leading to faded areas or streaks that can look like smudges.
Epson L3210 Smudge Problem: Checking Paper and Loading
Before diving into printer maintenance, it’s crucial to rule out simple issues related to your paper and how it’s loaded. Using the wrong type of paper or loading it incorrectly can contribute significantly to print quality problems, including smudges. Ensure your paper is in good condition and properly aligned.
Always use paper that is flat, dry, and free from creases or damage. Damp or curled paper can stick to internal rollers or bend awkwardly, picking up ink from unintended surfaces. Check that the paper is loaded correctly in the input tray, with the edge guides snug against the stack to prevent skewed feeding, which can also cause print defects.
How to Clean the Epson L3210 Paper Path
One of the most effective ways to resolve an Epson L3210 smudge problem is by cleaning the internal paper path and rollers. Epson printers often include a built-in utility designed specifically for this purpose, which cleans the dark plastic strip and the accessible rollers. This utility helps remove any accumulated ink or paper dust that might be causing smudges.
To access this, you’ll typically use the Epson printer driver software installed on your computer. Navigate to the maintenance tab or section and look for an option like “Paper Guide Cleaning” or “Roller Cleaning.” Follow the on-screen prompts carefully, which usually involve printing a specific page or running a cleaning cycle.
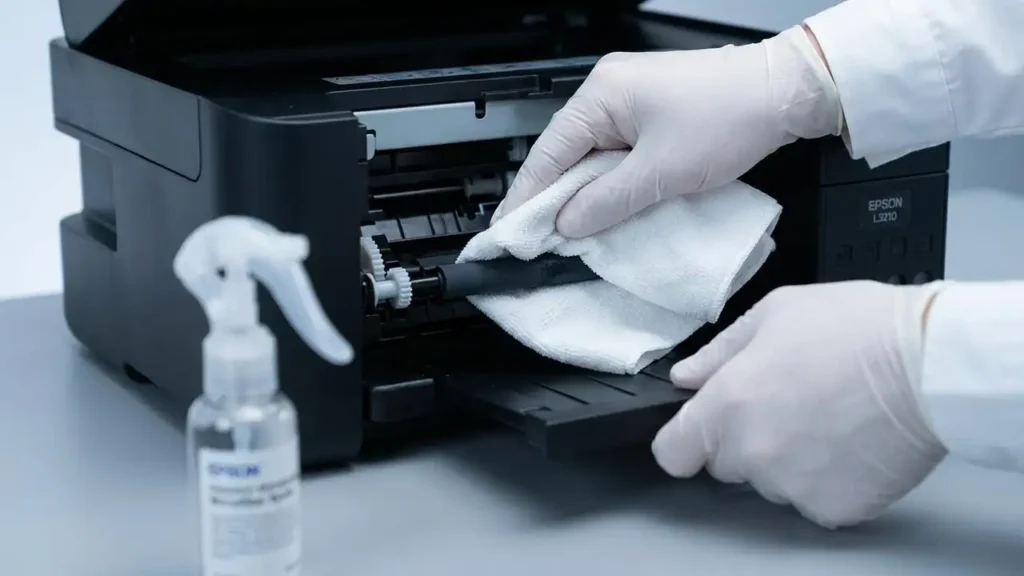
If the utility doesn’t fully resolve the smudges, and you’re comfortable, you can perform a gentle manual cleaning. With the printer turned off and unplugged, you can use a lint-free cloth slightly dampened with distilled water to carefully wipe the white rollers visible inside the paper path. Be extremely gentle to avoid damaging any printer components.
Addressing Clogged Print Head Nozzles
A clogged print head is another common culprit behind smudged or imperfect prints. When ink nozzles become partially blocked, the printer may not dispense ink correctly, leading to gaps, faded lines, or uneven ink distribution that can be mistaken for smudges. Running a nozzle check pattern is the best way to identify this issue.
To perform a nozzle check, access the printer’s maintenance settings via your computer’s printer driver. Select “Nozzle Check” and print the pattern. If you see gaps or missing segments in the pattern, it indicates clogged nozzles. The next step is to run a Head Cleaning cycle from the same maintenance menu.
If a standard head cleaning doesn’t fix the issue, and the nozzle check still shows problems, you might need to perform a Power Cleaning. Be aware that Power Cleaning uses a significant amount of ink, so it should only be used if absolutely necessary. After a Power Cleaning, it’s advisable to wait at least 12 hours before printing again, allowing the print head to recover.
Adjusting Print Settings for Smudge Prevention
Sometimes, the print settings you’re using can contribute to smudges, especially on certain types of media. For instance, using a setting that applies too much ink for plain paper can lead to bleeding or smearing. Ensuring your software settings match your paper type and print quality expectations is vital for clean output.
When printing, open the print dialog box and look for options related to paper type and print quality. Select “Plain Paper” if you’re using standard copy paper. For glossy photo paper, ensure you select the appropriate glossy paper setting. This tells the printer how much ink to apply and how to manage drying time, reducing the likelihood of ink transfer and smudges.
For double-sided printing, if you notice smudges on the second side, consider printing the lighter side first. This allows the ink on the first side more time to dry thoroughly before being fed through the printer again, minimizing the risk of smearing. Always ensure your ink tanks are filled to the upper line, as printing with critically low ink can sometimes lead to inconsistent ink flow.
Epson L3210 Smudge Problem: Maintenance and Longevity
Regular maintenance is key to preventing recurring Epson L3210 smudge problem issues and ensuring your printer continues to perform optimally. By performing routine checks and cleanings, you can preemptively address many common causes of smudges and other print quality defects. This proactive approach saves time and ink in the long run.
Besides using the Paper Guide Cleaning and Head Cleaning utilities, consider running a printer cleaning cycle every few months, especially if you don’t print very often. This helps keep the ink flowing and prevents dried ink from accumulating in the print head. Always use genuine Epson ink for the best results and to avoid potential compatibility issues that could lead to poor print quality.
Safety and Warranty Considerations
When performing any internal cleaning or maintenance on your Epson L3210, safety should be your top priority. Always turn off and unplug the printer before attempting to clean any internal components or paper paths. Avoid touching sensitive electronic parts or the print head directly with your fingers, as oils and dirt can cause damage.
While these troubleshooting steps are designed to be safe for home users, be aware that opening printer panels or performing manual cleaning might affect your printer’s warranty. If you are uncomfortable with any of the steps, or if the problem persists after trying these solutions, it is best to contact an authorized Epson service center for assistance.
Common questions about Epson L3210 smudge problem
By following these steps, you can effectively troubleshoot and resolve most instances of an Epson L3210 smudge problem. Maintaining your printer’s paper path and print head regularly will ensure you continue to get high-quality prints.