
Addressing the Paper Jam 0 Error on Samsung Xpress M2020/M2070
Samsung Xpress M2020 and M2070 printers can sometimes display a Paper Jam 0 error message, even when there is no visible paper obstruction in the paper path. This “phantom jam” can be frustrating, as typical paper clearing methods don’t apply. This guide outlines real fixes for this specific issue, focusing on often-overlooked internal components and sensors.
When your Samsung Xpress printer reports a Paper Jam 0 without any obvious blockage, the cause is usually an unacknowledged sensor trigger or a tiny, hidden piece of debris. Addressing this requires a systematic approach, starting with basic safety precautions before inspecting internal mechanisms.
Initial Steps for Paper Jam 0 Resolution
Before beginning any troubleshooting for a Paper Jam 0 error, always turn off your printer and unplug it from the power source. This ensures safety and prevents any electrical hazards while you are inspecting internal components. The Paper Jam 0 error frequently indicates a sensor flag is stuck or a minuscule scrap of paper is obstructing the paper path, rather than a significant blockage.
Many users find that the issue isn’t a physical jam but rather a miscommunication within the printer’s detection system. The following steps will guide you through checking the critical areas that typically cause this specific error on Samsung Xpress M2020/M2070 models. Prepare a flashlight for better visibility inside the printer’s compartments.
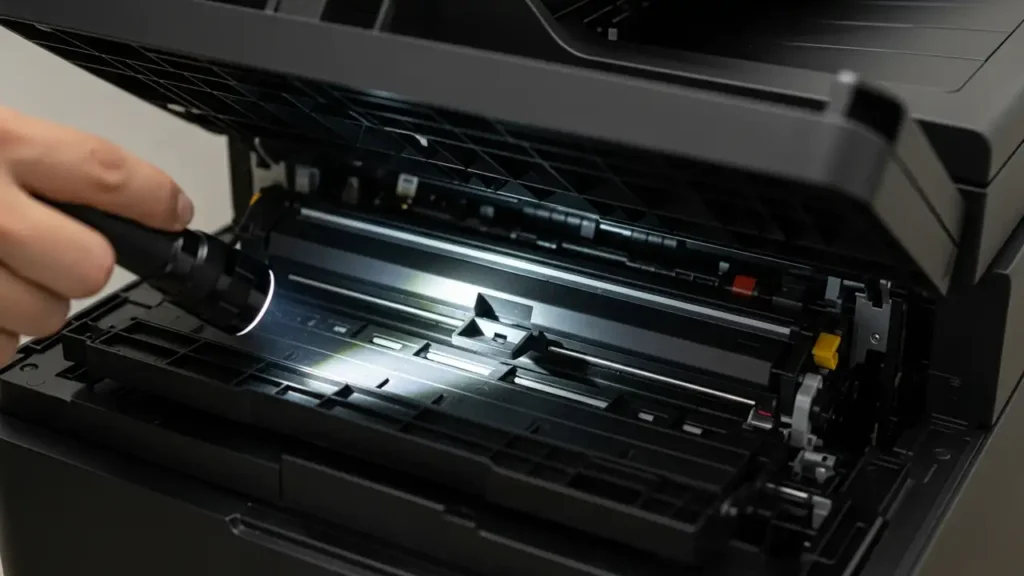
Examining the Rear Fuser Unit for Hidden Obstructions
Even the smallest piece of paper can trick your printer into reporting a Paper Jam 0. The fuser unit, located at the back of the printer, is a common place for these tiny scraps to hide.
- Open the back cover of your Samsung Xpress M2020 or M2070 printer. This cover provides access to the fuser unit and the rear paper path.
- Carefully inspect the fuser rollers. Look closely for any minute, almost invisible scraps of paper or other debris that might be lodged within the rollers or along the paper path. These can be difficult to spot without sufficient light.
- Gently pull out any debris you find. Use tweezers if necessary for small fragments, being careful not to damage any components. Ensure the fuser area is completely clear before proceeding.
Resolving Paper Jam 0 by Clearing the Paper Sensor
One of the most frequent causes of a Paper Jam 0 error is a paper sensor that is stuck or obstructed. This sensor often uses a small plastic lever, or “flag,” to detect paper presence. If this flag remains in the “up” position, the printer will assume paper is jammed, even if none is present.
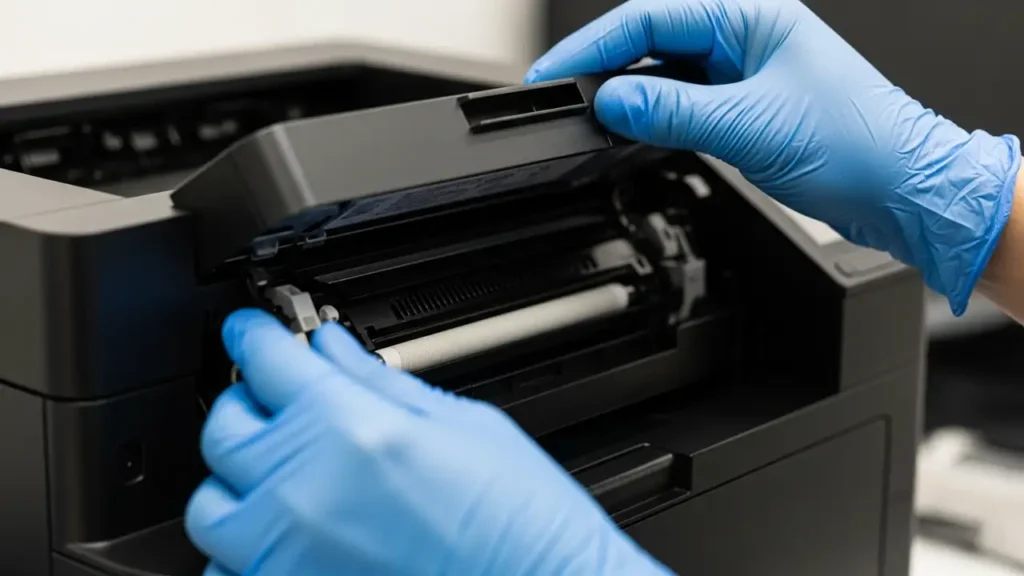
- Turn off the printer completely and remove the toner cartridge. Taking out the toner cartridge provides better access and visibility to the internal paper path.
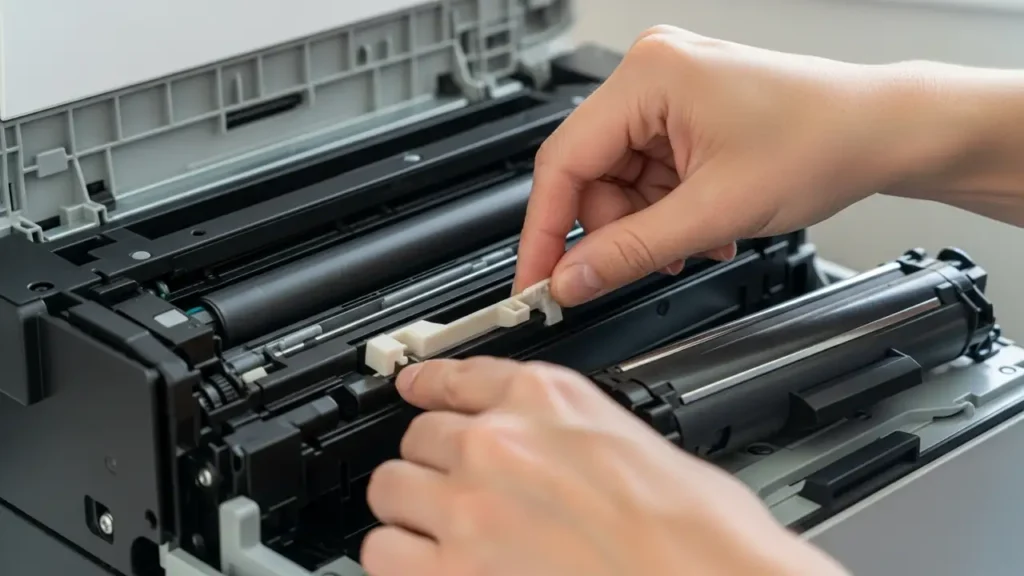
- Look inside the printer for a small plastic lever, commonly referred to as a sensor flag, located near the main roller path. This component is designed to detect the passage of paper.
- Gently push this lever to ensure it moves freely and without resistance. Confirm that it isn’t stuck in an elevated or “up” position, which would trigger the Paper Jam 0 error. Make sure it can return to its resting state without impediment.
Resetting the Sensor with Thick Paper to Clear Paper Jam 0
Sometimes, a direct physical action can help dislodge any unseen material or reset the sensor that is causing the Paper Jam 0. This method utilizes a sheet of thick paper to clear the path.
With the printer still turned off, gently push a sheet of thick paper or glossy paper through the paper path from the input tray side. Guide it carefully until it emerges from the output tray. This action helps to force out any hidden scraps of paper or can physically reset the internal paper switch, which might be stuck, thereby resolving the persistent Paper Jam 0 message. Ensure the paper moves smoothly without meeting significant resistance.
Printer Reset and Toner Cartridge Check
If clearing the physical path and sensor doesn’t resolve the Paper Jam 0, performing a full printer reset can clear any lingering software errors. Additionally, verifying the proper installation of the toner cartridge is a crucial, often overlooked step.
- To reset the printer: First, turn the printer off. Then, press and hold down the Stop/Cancel button. While continuing to hold this button, turn the printer back on. Keep the Stop/Cancel button held down for approximately 10-15 seconds until the printer’s LEDs begin to flash. Once the lights flash, you can release the button. This process initiates a system-level reset.
- Check toner alignment: Ensure that the toner cartridge is properly and securely seated within its designated compartment inside the printer. An improperly seated toner cartridge can sometimes cause a false jam reading, leading to the Paper Jam 0 error message, as it might interfere with paper flow or sensor functionality. Push on the cartridge gently to confirm it’s fully engaged.
Safety and Maintenance
Always prioritize safety when performing internal checks on your printer. Before attempting any of these steps, ensure the printer is completely turned off and disconnected from the power outlet. Avoid forcing any components or touching sensitive electronic parts, especially near the fuser unit, which can retain heat. If you are unsure about any specific step or encounter resistance, it is advisable to consult a professional service technician to prevent further damage to your device or to avoid voiding your warranty. Regular, gentle cleaning of the paper path can also help prevent future phantom jams.
Paper Jam 0 Frequently Asked Questions (FAQ)
Conclusion
Resolving the Paper Jam 0 error on your Samsung Xpress M2020 or M2070 printer typically involves systematically checking for hidden obstructions within the fuser, ensuring the paper sensor moves freely, and performing a basic printer reset. By carefully following these real fixes, you can often clear the persistent Paper Jam 0 message and restore your printer’s full functionality without needing professional assistance.