
Resolving streaks after replacing toner in Laser Printers
Fix vertical lines, shadows, and image defects after a cartridge swap
Experiencing visual defects like streaks after replacing toner is a common issue that typically stems from installation errors or contaminated internal components. While a new cartridge is expected to produce crisp documents, improper handling of packaging materials or a lack of maintenance during the swap can lead to immediate print quality degradation. If your pages show vertical marks or repeating patterns, you must isolate whether the cause is the toner unit itself, the drum, or the fuser assembly.
When you notice streaks after replacing toner, the first priority is to verify that the environment and the supplies are handled correctly. Laser printing technology relies on precision interactions between light, heat, and static electricity. Any disruption to these elements—such as a smudge on a roller or a piece of leftover shipping tape—will manifest as a visible flaw on the final output. Identifying the specific visual pattern on the page is the most effective way to determine which internal part requires attention.
Addressing streaks after replacing toner involves a systematic inspection of the hardware and a review of your software configurations. By following established cleaning protocols and verifying your paper settings, you can eliminate these artifacts without the need for professional service. This guide provides the necessary decision logic to diagnose and fix these common laser printing problems using only approved maintenance techniques.
Initial Checks for streaks after replacing toner
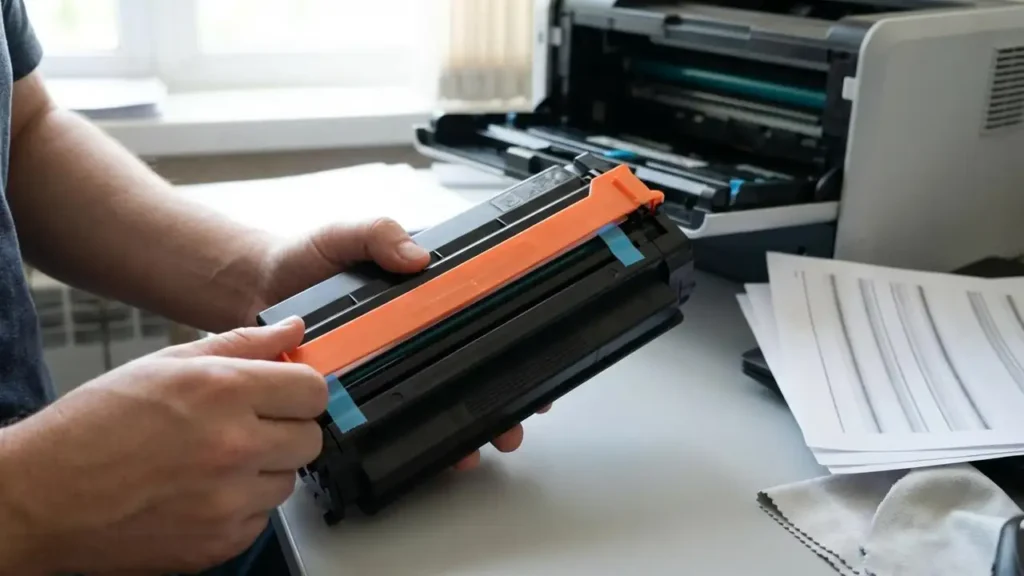
The most frequent cause of immediate print defects after a supply change is the presence of residual packaging materials. Every new toner cartridge comes equipped with protective elements designed to prevent powder leakage during transit. If these are not fully extracted, they can obstruct the path of the laser or prevent the roller from distributing powder evenly. You must remove the cartridge and verify that every orange plastic pull-tab, transparent sealing film, and protective paper insert has been discarded.
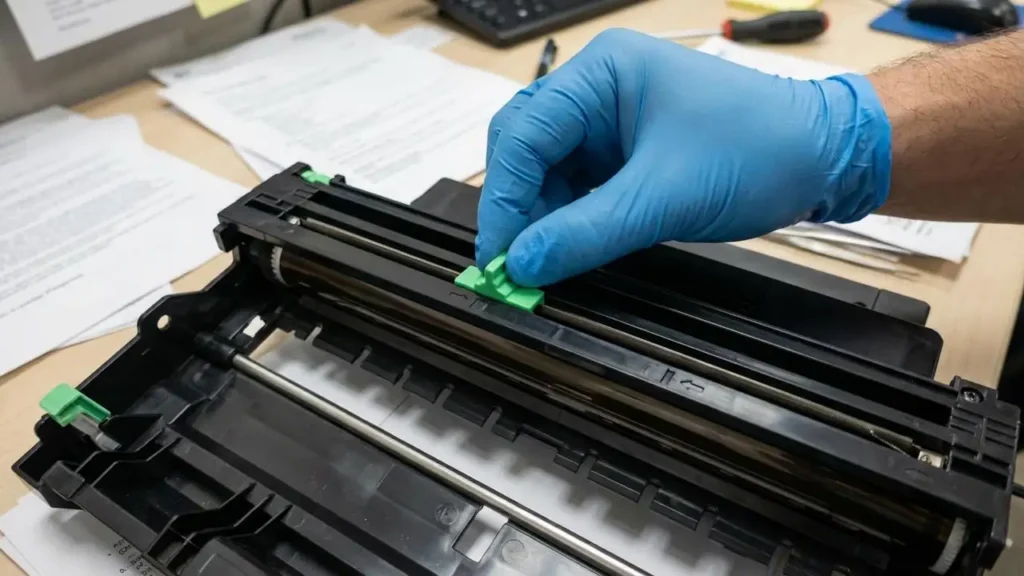
If the output contains sharp, fine lines, the issue often relates to the drum assembly. On printers where the drum is a separate unit from the toner, such as various Brother models, the primary corona wire may have accumulated dust or debris during the swap. To resolve this, locate the colored slider—typically blue or green—on the drum unit. Tug this cleaning tab across its track repeatedly to clear the wire of contaminants. You must ensure you return this slider to its starting notch, which is designated by a small arrow. Failure to seat the slider in its original home position will cause a permanent solid black line to appear on every page.
If the lines persist after cleaning the corona wire, a physical inspection of the drum is required. If you can see fine scratches or localized dirt on the surface of the cylinder, it will directly translate into streaks after replacing toner. For drums that are not integrated into the toner cartridge, you can attempt to gently wipe the surface using a dry cloth that is entirely lint-free. Do not use liquids or abrasive materials, as the drum surface is extremely sensitive to physical damage and light exposure.
Inspecting the Drum for streaks after replacing toner
When the drum cylinder is the source of the defect, the marks on the page are usually very consistent and sharp. If the drum is dirty, the toner will adhere to the contaminated spots and transfer them to the paper. Removing the drum and viewing it under a soft light can reveal the exact location of the buildup. Use a soft, dry cloth to dab away any visible toner clumps. If the surface has deep physical scratches, cleaning will not suffice, and the drum unit will likely require replacement to restore full clarity to your documents.
Addressing Ghosting and Image Repetition
Ghosting occurs when a faint replica of a previously printed image appears further down the same page. This phenomenon indicates that the toner from the first pass was not entirely transferred or fused to the paper, leaving a “shadow” on the rollers that is redeposited on the next rotation. One primary factor is the fuser unit, which is responsible for melting the toner powder into the fibers of the paper. If the fuser fails to reach the necessary operating temperature or is physically worn out, it cannot bond the particles correctly.
Another critical factor in preventing ghosting is the alignment of your software settings with the physical media in the tray. If you are using heavy stock or labels but the printer properties are set to “Plain Paper,” the fuser will not stay hot enough for the thickness of the material. You must navigate to your print properties and select the appropriate paper type, such as “Thick Paper,” to ensure the heating assembly adjusts its thermal output. This adjustment often eliminates the shadow effect by ensuring a complete bond during the first pass of the fuser.
Environmental conditions also play a significant role in how toner interacts with the page. High humidity can cause paper to become slightly damp, which significantly hinders the electrostatic transfer of the toner powder. Damp paper does not hold the charge required to pull the toner from the drum efficiently, leading to poor adhesion and subsequent ghosting. Always store your paper in a cool, dry location and ensure the paper tray is not exposed to excessive moisture. If you suspect the paper is the issue, replace the current stack with a fresh, dry ream to see if the image repetition disappears.
Eliminating Random Stains and Residue
Sometimes the issue is not a structured line but rather random spots or splotches of powder scattered across the page. This often happens if excess toner escaped the cartridge during the installation process. If powder has spilled into the internal cavity of the printer, the movement of the paper will pick up these loose particles. To fix this, you should clean the interior using a dry cloth. If the spill is significant, utilize a specialized toner vacuum. Do not attempt to use a standard household vacuum cleaner, as the fine toner particles can pass through most domestic filters and be redistributed into the air or cause a static discharge that damages the vacuum motor.
The transfer rollers are also susceptible to grease and dust buildup, which can cause irregular stains. These rollers are responsible for moving the paper through the various stages of the printing process. If they become slick or dirty, they may fail to grip the paper or may leave marks on the back or front of the sheet. You can clean these drive rollers by lightly dampening a cloth with isopropyl alcohol and wiping the surface of each roller. This removes the accumulation of oils and ensures the paper moves smoothly without picking up unwanted residue.
If the stains appear to be a result of uneven powder distribution inside the cartridge, you can try a manual redistribution. Remove the toner unit and hold it firmly with both hands. Shake the cartridge from side to side several times to ensure the internal powder is level. This is particularly helpful if the cartridge was stored on its side or in an uneven position before being installed. Once redistributed, the toner should flow more consistently to the developer roller, reducing the likelihood of blotchy or faded sections.
Maintenance Cycles and Manual Cleaning
Most modern laser printers include built-in maintenance routines designed to clear the internal path of debris. If you are seeing streaks after replacing toner, check the maintenance or service menu on the printer control panel. Look for options labeled “Drum Clean” or “Clean Page.” When initiated, the printer will run a specialized cycle—often requiring you to insert a single sheet of paper—to scrub the internal rollers and the drum of any loose particles. This is a non-invasive first step that can resolve minor contamination issues without manual disassembly.
In addition to the software-based cleaning, printing a series of blank pages can help clear the system. Send a print job of 10 to 20 completely blank pages to the device. As the paper passes through the fuser and across the rollers, it acts as a mild abrasive that can pick up and carry away stray toner dust that may be causing the streaks. This process is often enough to “break in” a new cartridge and clear out any residue left behind by the previous unit.
If none of these steps resolve the issue, you may need to evaluate the integrity of the fuser or the transfer belt. If these components have reached the end of their service life, they will continue to produce defects regardless of how new the toner cartridge is. Check the printer’s status report for the remaining life percentages of these parts. If the fuser is worn, it will require a physical replacement to ensure the heat is distributed evenly across the page. Always prioritize safety by powering off and unplugging the printer before touching any internal parts, and avoid the fuser area immediately after printing, as it remains extremely hot.

Resolving streaks after replacing toner: FAQs
By following these maintenance steps, you can eliminate streaks after replacing toner and restore professional print quality. Consistent cleaning of the corona wire, adjusting fuser settings for the correct paper type, and ensuring all packaging is removed are the most effective ways to maintain a clean output.