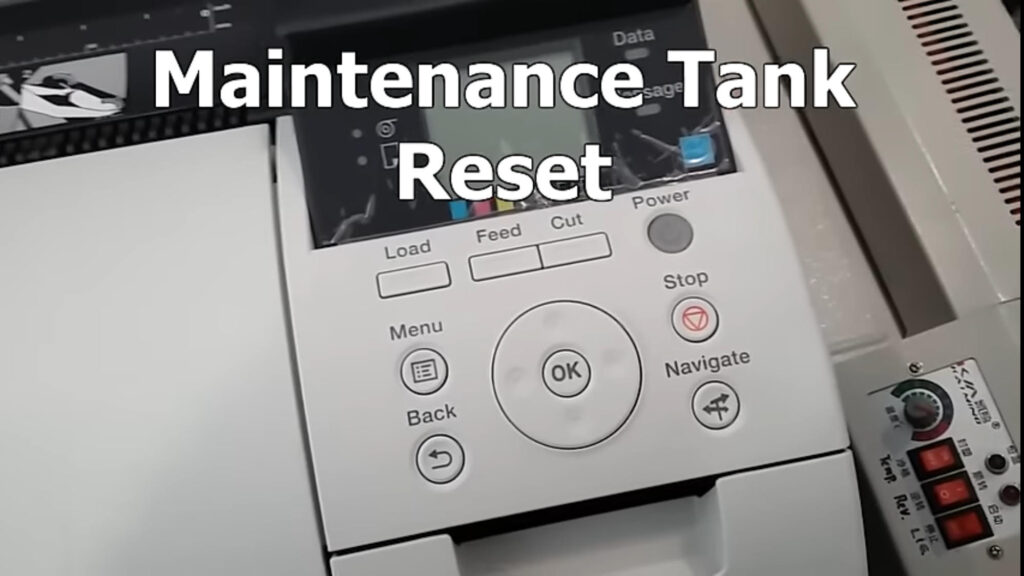
Maintaining your printer is crucial for optimal performance, and one essential aspect is managing the maintenance tank. In this guide, we will walk you through the steps to reset the maintenance tank on the Canon EPF 670 printer. Following these instructions will help ensure your printer continues to function efficiently.
Regular printer maintenance, including resetting the maintenance tank, not only ensures consistent print quality but also extends the life of your printer. This guide will provide you with a step-by-step process to reset the maintenance tank, helping you avoid unnecessary interruptions in your printing tasks.
Understanding the Maintenance Tank
What is the Maintenance Tank?
The maintenance tank in your Canon EPF 670 printer collects excess ink during the printing process. This tank plays a crucial role in keeping your printer clean and ensuring that ink doesn’t leak or overflow. Over time, the tank will fill up, and once it reaches its capacity, the printer will notify you to take action.
Why Reset the Maintenance Tank?
Resetting the maintenance tank is essential because, once full, the printer will stop functioning until the tank is addressed. Regularly monitoring and resetting the maintenance tank when needed can prevent downtime and keep your printer running smoothly. This process is a key part of maintaining your printer’s health and longevity.
Steps to Reset the Maintenance Tank
Step 1: Enter Service Mode
To begin the reset process, you need to enter the service mode on your Canon EPF 670 printer. Follow these steps:
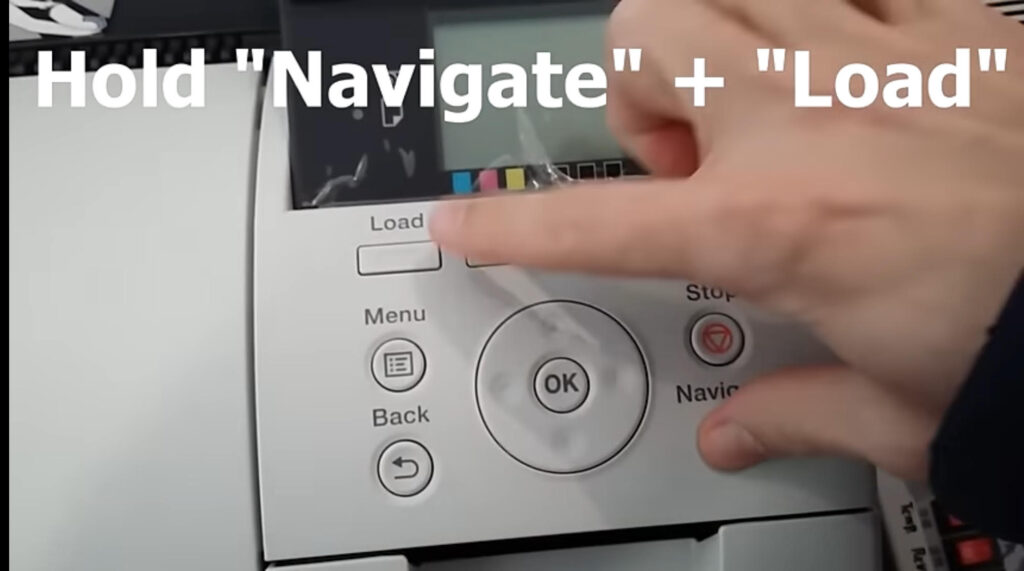
- Hold Down the Navigate and Load Buttons: Simultaneously press and hold the Navigate and Load buttons on your printer’s control panel.
- Press the Power Button: While holding the Navigate and Load buttons, press the Power button to turn on the printer.
- Wait for the Canon Logo to Disappear: Continue holding the buttons until the Canon logo disappears from the screen.
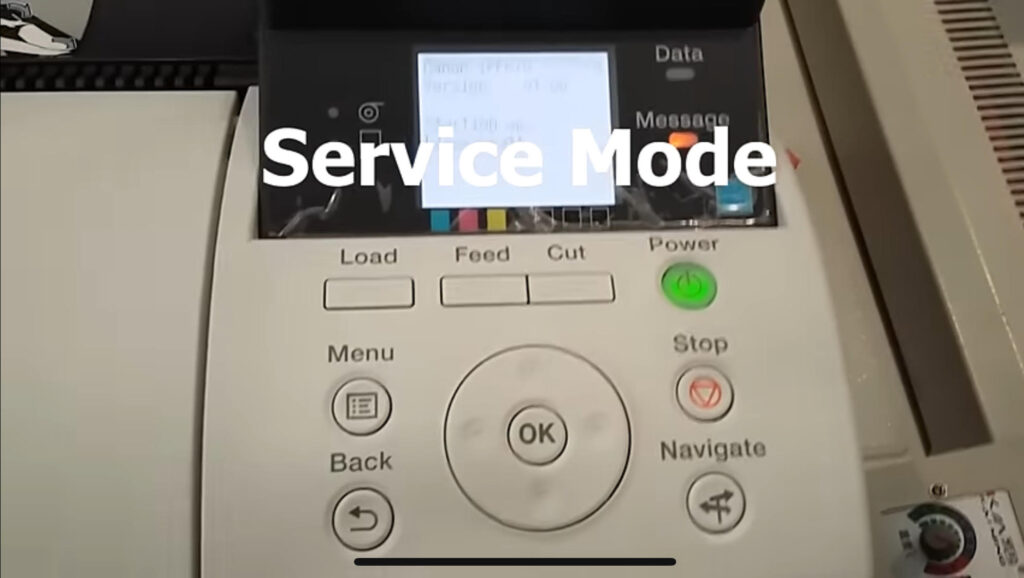
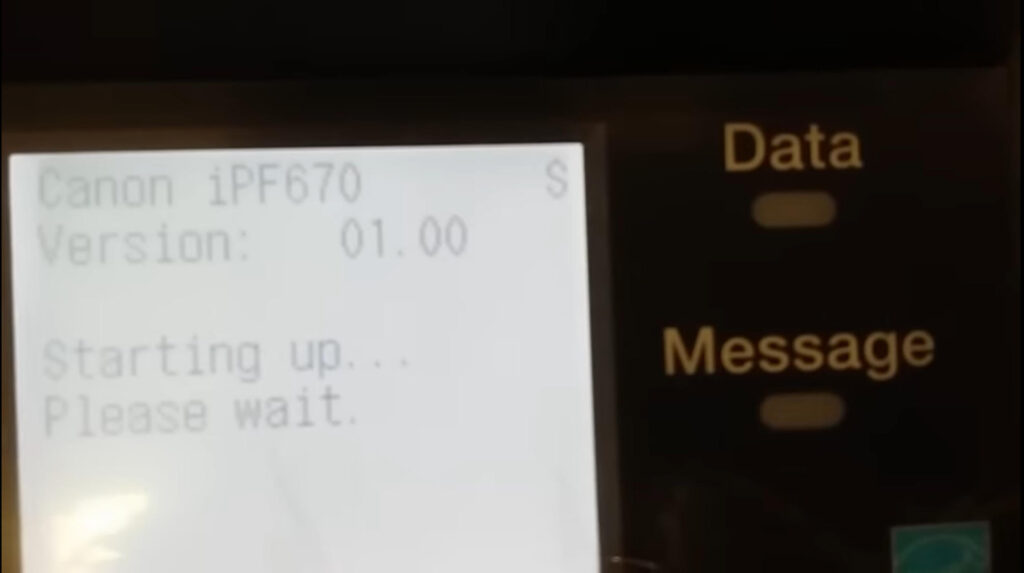
- Release the Buttons: Once the logo disappears, release all buttons. You should see a small “S” in the corner of the display, indicating that the printer is now in service mode.
Allow the printer to power on fully before proceeding to the next step.
Step 2: Access Maintenance Tank Settings
Once the printer is in service mode, you can access the maintenance tank settings:
- Navigate the Menu: Use the navigation buttons on the control panel to scroll through the menu options.
- View the Maintenance Tank Percentage: Locate and select the option that displays the maintenance tank percentage. If it shows 100%, this indicates that the tank is full and ready for a reset.
Step 3: Reset the Maintenance Tank
To reset the maintenance tank, follow these steps:
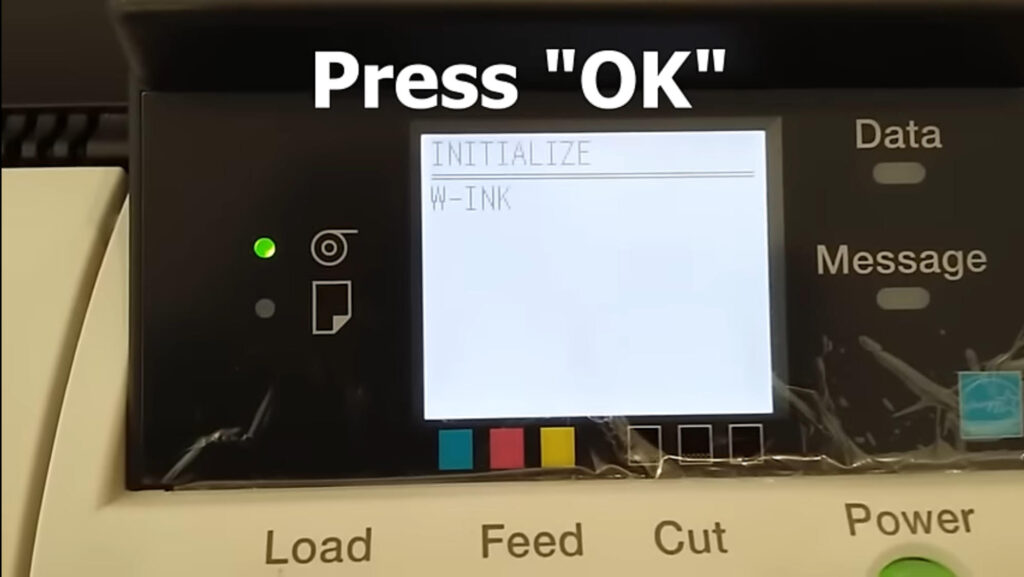
- Enter Service Mode Options: Press the OK button to enter the service mode settings.
- Find the Initialize Option: Use the navigation buttons to scroll to the right until you find the “Initialize” option.
- Locate the “W” Label: Scroll down the menu until you find an option labeled with “W” – this corresponds to the maintenance tank reset function.
- Press OK to Reset: Press the OK button. You will see an equal sign (=) appear, confirming that the maintenance tank has been successfully reset.
Step 4: Confirm the Reset
To ensure that the reset was successful:
- Check the Maintenance Tank Status: Navigate back to the maintenance tank settings and check the percentage. It should now display 100% remaining, indicating that the reset was effective.
Step 5: Exit Service Mode
To return the printer to normal operation:
- Hold Down the Power Button: Press and hold the Power button until the printer shuts off completely.
- Turn the Printer Back On: Power the printer back on. The “S” indicator should no longer be present, confirming that you have exited service mode.
Your printer is now ready for regular use.
Important Considerations
Timing the Reset
It is vital to perform the maintenance tank reset before the tank becomes completely full. Waiting until the tank is entirely full may prevent the reset from being executed successfully, potentially leading to more complicated issues that require professional servicing.
Regular Checks
Regularly checking the maintenance tank status can help avoid unexpected disruptions in your printing tasks. Keeping an eye on the tank’s capacity ensures that you can perform a reset in a timely manner, maintaining the efficiency of your printer.
Conclusion
Resetting the maintenance tank on your Canon EPF 670 printer is a straightforward process that can significantly impact its functionality. By following the steps outlined in this guide, you can maintain your printer’s performance and extend its lifespan. For further questions or assistance, feel free to leave a comment below. If you found this information helpful, consider subscribing for more tips and tricks.
Keywords for SEO
- Reset Canon EPF 670 maintenance tank
- Canon printer maintenance guide
- How to reset Canon maintenance tank
- Canon EPF 670 service mode instructions
- Prevent printer downtime Canon EPF 670
- Maintenance tank management Canon printer
- Extend Canon printer lifespan
- Troubleshooting Canon EPF 670 maintenance
- Optimize Canon printer performance
- Canon EPF 670 reset process
To communicate directly with us, please contact us from here

