
Epson 0x9A Fix: Your Ultimate Guide to Clearing This Error
The epson 0x9a fix is often required when your printer abruptly stops, accompanied by flashing lights and an error message on your screen. This error indicates a critical problem: the printhead carriage is jammed or its movement is obstructed. While this can halt your printing tasks, the solution is typically mechanical and can be performed at home with a few simple steps. This guide provides a proven method to diagnose and resolve the 0x9A error safely.
- Error Meaning: The printer’s internal sensors cannot detect proper printhead carriage movement.
- Common Causes: Paper jams, foreign objects, a dirty encoder strip, or debris on the carriage rail.
- Required Tools: Lint-free cloth, flashlight, and optionally, a pair of non-metallic tweezers.
Table of Contents
- Understanding the Epson 0x9A Error
- Safety & Preparation Before You Start
- Step-by-Step Guide to the Epson 0x9A Fix
- When the Error Code Persists
Understanding the Epson 0x9A Error
The Epson error code 0x9A is a motion-related fault. During startup and printing, your printer constantly monitors the position of the printhead carriage—the component that holds the ink cartridges and moves back and forth. If the printer’s logic board sends a command to move the carriage and a sensor reports it hasn’t moved correctly, the 0x9A error is triggered. This is a protective measure to prevent damage to the motor or other delicate parts.
The root cause is almost always a physical obstruction preventing free travel along the carriage rail.
Safety & Preparation Before You Start
Before opening your printer, always prioritize safety to protect both yourself and the device. Turn the printer off using the power button, then unplug it completely from the wall outlet. Wait at least 60 seconds for any residual electrical charge in the internal components to dissipate. This prevents any risk of shock and protects the printer’s mainboard from accidental shorts.
Step-by-Step Guide to the Epson 0x9A Fix
Follow these steps in order, from simplest to most involved. Most 0x9A errors are resolved by the third step.
Step 1: Power Cycle and Initial Inspection
The first step is the simplest. With the printer unplugged for at least a minute, plug it back in and turn it on. Watch and listen carefully during its startup sequence. Note if you hear any grinding noises or if the carriage attempts to move but stops abruptly. Sometimes, a simple power reset is enough to clear a temporary glitch. If the error returns immediately, proceed to the next step.
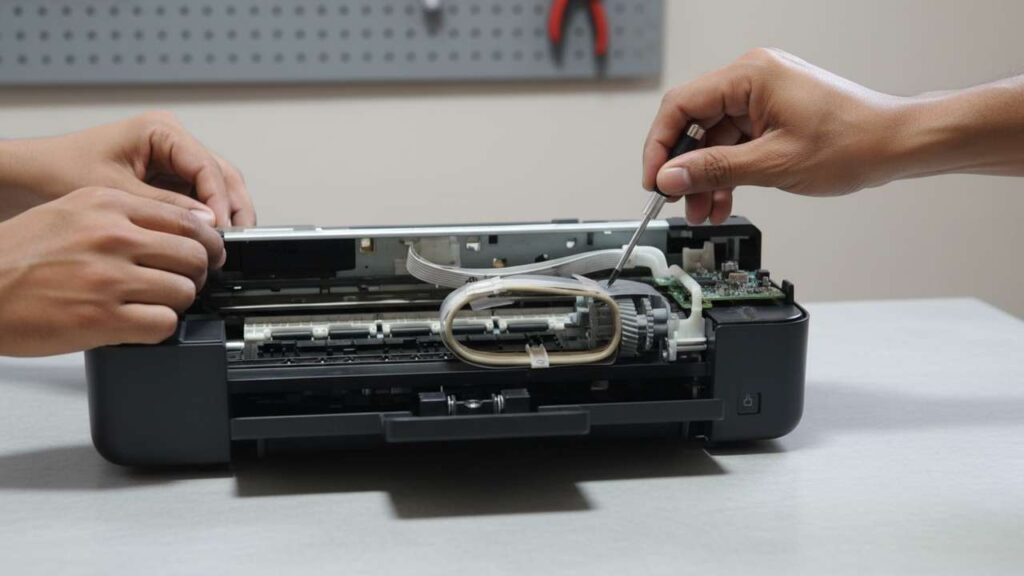
Step 2: Manually Check the Printhead Carriage
With the power off and the unit unplugged, open the main cover or scanner unit to access the printer’s internals. Gently try to slide the printhead carriage by hand from one side to the other. If it moves freely, the problem likely lies with the encoder strip. If it is stuck, use a flashlight to look for the obstruction. Common culprits include torn pieces of paper, a paperclip, or other small debris. Carefully remove any foreign objects you find.
Step 3: A Proven Epson 0x9A Fix: Clean the Encoder Strip
The encoder strip is the most common cause of the 0x9A error. This is a thin, semi-transparent plastic strip that runs the width of the printer, usually located just above or behind the metal carriage rail. It contains thousands of tiny, precise vertical lines that a sensor on the carriage reads to determine its exact position. If this strip is smudged with ink, dust, or grease, the sensor misreads the position, triggering the error.
| Step | Action | Why it helps | Time |
|---|---|---|---|
| 1 | Gather Supplies | You will need a clean, lint-free cloth (like a microfiber cloth for eyeglasses) and a small amount of distilled water or isopropyl alcohol. | 1 min |
| 2 | Lightly Dampen Cloth | Apply a very small amount of liquid to the cloth. It should be damp, not wet. Never spray liquid directly into the printer. | 1 min |
| 3 | Gently Wipe the Strip | Supporting the strip with your fingers on the back side, gently pinch it with the damp cloth and wipe from one end to the other. Repeat 2-3 times. | 3 min |
| 4 | Dry and Test | Allow the strip to air dry completely for a few minutes before closing the printer, plugging it in, and testing. | 5 min |
Step 4: Inspect the Carriage Rail and Parking Pad
The metal rail that the carriage slides on can also accumulate dust and dried ink, causing excess friction. Wipe the rail clean with a dry, lint-free cloth. Additionally, inspect the “parking pad” area, typically on the far right side where the printhead rests. Small scraps of paper can get lodged here, preventing the carriage from seating correctly.

When the Error Code Persists
If you have thoroughly cleaned the carriage path and encoder strip but the error continues, the issue may be more complex. An outdated printer driver or firmware can sometimes lead to sensor misinterpretations, though this is less common for motion errors. You can check the official Epson support website for any available updates for your specific model.
In rare cases, the encoder sensor itself may have failed or the encoder strip could be physically scratched or damaged, which requires professional service. Before seeking service, consider trying the comprehensive epson 0x9a fix one more time from the beginning. If the issue remains, it may be time to consult an authorized technician, as the problem could be related to the main logic board. Our guide on contacting [Premier Link (1.4)] can help. If you need more details on cleaning internal components, see our post on [Related internal anchor (1.6)].
Ultimately, a persistent epson 0x9a fix points away from simple obstructions and toward a potential hardware component failure.