
Your Comprehensive Guide to 3D Printing Troubleshooting
Navigate common FDM and Resin print failures with expert solutions for successful results.
Embarking on the journey of 3D printing can be incredibly rewarding, yet it often comes with a steep learning curve. From FDM filament issues to intricate Resin (SLA/DLP) anomalies, encountering print failures is a normal part of the process. This guide provides actionable insights for 3D printing troubleshooting, helping you diagnose and resolve the most common problems you’ll face.
Understanding the root cause of an issue is the first step toward a successful fix. We’ll explore typical symptoms for both types of printers and offer clear, step-by-step solutions. Whether your prints are failing to stick or showing unexpected imperfections, this resource aims to simplify your 3D printing troubleshooting journey.
FDM Printer Troubleshooting: Tackling First Layer Failures
Many FDM print issues stem from problems during the crucial first layer. Proper adhesion and bed leveling are paramount for a stable foundation. Without a good first layer, the entire print is likely to fail or suffer from structural weaknesses.
- Print Not Sticking to Bed:
- Symptom: Your print detaches from the build plate, often curling up at the edges, or the filament doesn’t adhere evenly.
- Cause: The print bed is unlevel, or the nozzle is too far from the bed. Insufficient bed temperature can also be a factor.
- Solution: Re-level your print bed meticulously at multiple points, ensuring consistent nozzle-to-bed distance across the entire surface. Adjust the Z-offset to a negative value in your slicer or printer firmware to increase “squish” on the first layer, typically until the filament appears slightly flattened.
- Warping:
- Symptom: Corners or edges of your print lift away from the build plate, especially noticeable on larger prints.
- Cause: Uneven cooling of the plastic, causing internal stresses as different parts of the print shrink at varying rates. Low bed temperature exacerbates this.
- Solution: Increase your heated bed temperature by 5-10°C, if available, to maintain warmth. Apply an adhesive such as a glue stick, hairspray, or specific 3D printing adhesion sheets to the build plate. For models with large base areas, add a brim or raft in your slicer settings to increase the surface area touching the bed, distributing adhesion forces.
- Elephant’s Foot:
- Symptom: The initial layers of your print bulge outwards, resembling an elephant’s foot.
- Cause: The nozzle is too close to the build plate on the first layer, squishing the plastic excessively, or the first layer is over-extruded.
- Solution: Slightly increase the initial layer height in your slicer. Alternatively, add a small chamfer or fillet to the base of your 3D model (e.g., 0.2mm at 45 degrees) to compensate for any slight squish.
Advanced FDM 3D Printing Troubleshooting Challenges
Beyond initial layer issues, FDM printers can exhibit various other problems impacting print quality. These often require fine-tuning of temperature, speed, or filament flow. Effective 3D printing troubleshooting involves systematic adjustments to these settings.
- Layer Shifting:
- Symptom: Layers of your print are misaligned, creating a stepped or offset appearance.
- Cause: Loose timing belts on the X or Y axes, high print speeds causing motors to skip steps, or physical obstructions.
- Solution: Power off your printer and manually check the tension of the X and Y axis belts. They should be taut enough to have a slight pluck but not over-tightened. Lower your print speed in your slicer, particularly for infill and outer walls, to reduce stress on the motors. Ensure print head movement is unobstructed.
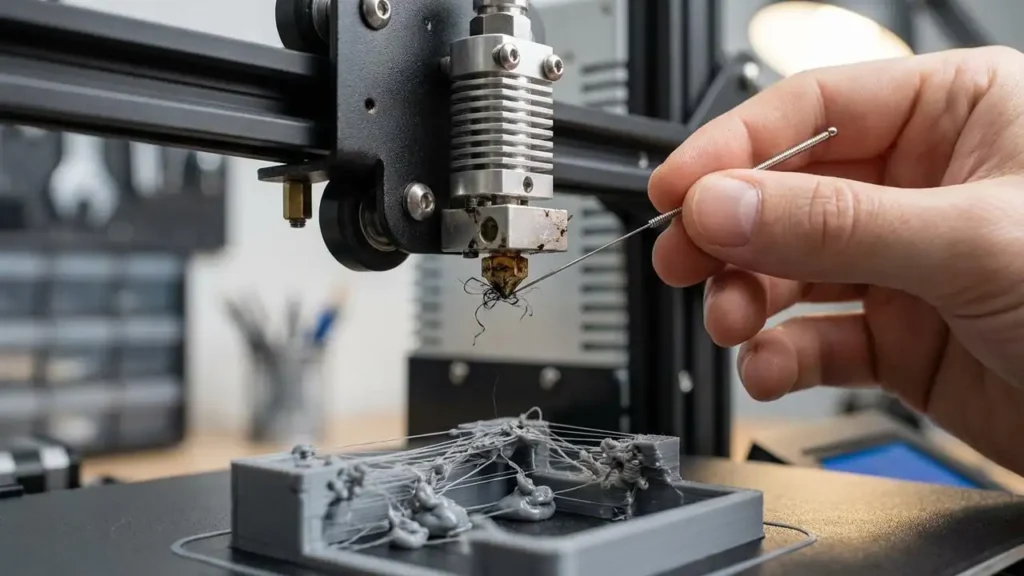
- Stringing / Oozing:
- Symptom: Fine strands of plastic are left between different sections of your print as the nozzle moves.
- Cause: The print temperature is too high, or retraction settings are insufficient, allowing molten filament to ooze out during non-printing moves.
- Solution: Enable or increase retraction distance (e.g., in 0.5mm increments) and retraction speed in your slicer. Conduct a temperature tower test and lower your nozzle temperature in 5°C steps until stringing is minimized.
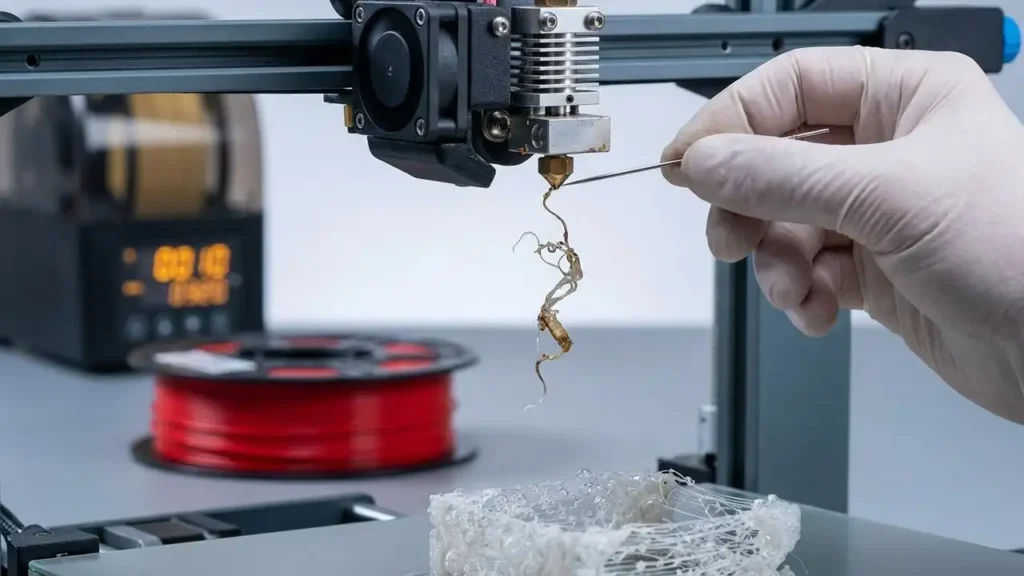
- Clogged Nozzle:
- Symptom: No filament comes out of the nozzle, or extrusion is inconsistent, leading to thin or missing layers.
- Cause: Dust or debris in the filament, carbonized plastic inside the nozzle, or heat creep causing a clog in the hotend.
- Solution: Perform the “Cold Pull” (Atomic Pull) method: heat the nozzle to operating temperature, push filament through, then cool to around 90-120°C (depending on filament) and quickly pull the filament out. This grabs debris. Alternatively, use a thin acupuncture needle to clear the nozzle orifice while it’s hot.
- Under-Extrusion:
- Symptom: Prints appear weak, have gaps between layers, or individual lines of filament are too thin.
- Cause: Partial clog, incorrect filament diameter setting in the slicer, or insufficient flow rate.
- Solution: First, rule out a partial clog using the cold pull method. Verify the filament diameter in your slicer settings matches your actual filament (e.g., 1.75mm or 2.85mm). Increase the flow rate or extrusion multiplier in your slicer by 5-10% and test results.
Resin (SLA/DLP) 3D Printing Troubleshooting Issues
Resin printing, while offering incredible detail, has its own unique set of challenges. Proper environment, build plate preparation, and support structures are vital for success. Effective 3D printing troubleshooting for resin involves addressing these specific factors.
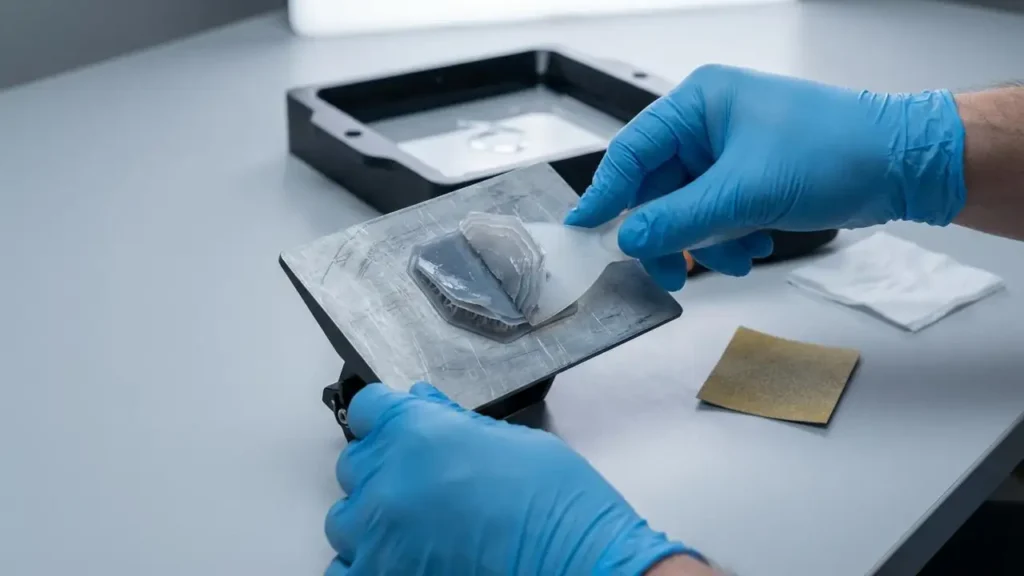
- Print Not Sticking to Build Plate:
- Symptom: The cured resin stays stuck to the FEP film in the vat, or parts detach from the build plate early in the print.
- Cause: Unlevel build plate, insufficient bottom exposure time, or a smooth build plate surface.
- Solution: Re-level the build plate precisely according to your printer’s instructions. Increase the bottom exposure time in your slicer by 10-20% (e.g., from 30s to 33-36s) to ensure a strong initial bond. For better grip, lightly scuff the surface of your build plate with fine-grit sandpaper (e.g., 220-400 grit) to give the resin more to adhere to.
- Delamination (Layers Splitting):
- Symptom: Layers within your print separate, creating visible lines or causing the print to fall apart.
- Cause: Lift speeds are too fast, creating excessive suction forces that pull layers apart, or the resin temperature is too low.
- Solution: Slow down the lift speed in your slicer to around 60mm/min or less, especially for larger cross-sections. Ensure your resin is at room temperature, ideally between 20–25°C (68–77°F), as colder resin is thicker and more prone to delamination.
- Failed Supports:
- Symptom: Support structures print partially or fail entirely, causing sections of your model to collapse or deform.
- Cause: Supports are too thin or too sparse to hold the weight of the model during printing, or exposure time is too low.
- Solution: In your slicer software (e.g., CHITUBOX or Lychee), increase the support density significantly. Also, increase the tip thickness of the supports to create a stronger connection point to the model. Consider increasing the normal exposure time by 0.5-1 second.
- Ragging (Cured Bits in Vat):
- Symptom: Partially cured resin flakes or blobs appear suspended in the resin vat, sometimes sticking to the FEP or obstructing prints.
- Cause: Light leaks from the environment, a failing LCD screen with dead pixels, or incorrect exposure settings.
- Solution: Ensure your printer is shielded from ambient UV light sources. Perform a “dry run” or screen test: without the resin vat in place, initiate a print or a screen test pattern to visually check for dead pixels or flickering on the LCD screen. If dead pixels are present, the LCD may need replacement. Filter your resin if you notice cured bits.
Quick Fix Checklist for Any Printer Type
Before diving deep into individual issues, these fundamental checks can often resolve many common 3D printing troubleshooting headaches. A systematic approach saves time and filament.
- Level the Bed: This is crucial for both FDM and Resin printers. An unlevel build plate accounts for approximately 70% of first-layer failures. Re-leveling should be your first step for adhesion issues.
- Dry Your Filament (FDM): Hydroscopic filaments absorb moisture from the air. Wet filament causes pops, bubbles, excessive stringing, and weaker prints. Use a filament dryer or dehydrator for several hours before printing.
- Check Slicer Settings: Always double-check that your material profile (filament type, resin type), nozzle diameter, and layer height in the slicer match your actual setup and desired print. Incorrect settings are a frequent source of errors.
- Clean the Surface: For FDM, wipe your build plate with isopropyl alcohol (IPA) to remove oils and residues. For resin, ensure your build plate and FEP film are clean and free of cured resin bits.
Safety and Warranty Considerations
Always unplug your 3D printer before performing any maintenance that involves opening panels or accessing internal components. Be cautious not to touch hot components like the nozzle or heated bed on FDM printers, or expose your skin to uncured resin without gloves on SLA/DLP printers. Modifying your printer or using non-approved parts may void your manufacturer’s warranty. If you are unsure about a repair or encounter complex electrical issues, it is always best to contact an authorized service center.
Common Questions about 3D printing troubleshooting
Mastering 3D printing troubleshooting is an ongoing process that refines your skills and yields better results. By understanding the common issues for both FDM and Resin printers and applying the systematic fixes outlined here, you can overcome many obstacles. Don’t be discouraged by failed prints; view them as opportunities to learn and fine-tune your process for future success.