

Fix HP 59 F0 Error on Your LaserJet Printer
Quickly resolve transfer belt alienation issues and restore print quality.
Encountering an HP 59 F0 error on your HP LaserJet printer can be a frustrating experience, bringing your printing operations to a halt. This specific error code, often displayed as 59.F0, indicates a problem with the Intermediate Transfer Belt (ITB) alienation mechanism. Essentially, the printer is struggling to properly engage or disengage the ITB, which is crucial for transferring toner to the paper. Models like the HP Color LaserJet CP4025, HP Printer M477, and HP LaserJet 700 Color MFP M775 are known to display this issue.
The underlying cause of the HP 59 F0 error can range from a simple software glitch to a mechanical issue with the ITB, a faulty sensor, or a sticky solenoid. Understanding these potential culprits is the first step towards an effective resolution. Fortunately, many common causes can be addressed with straightforward troubleshooting steps, allowing you to get your printer back up and running.
Understanding the HP 59 F0 Error and its Causes
The HP 59 F0 error is a diagnostic code that points to a “transfer alienation failure.” This means the mechanism responsible for moving the ITB (Intermediate Transfer Belt) in and out of position is not functioning correctly. The ITB is a critical component in color laser printers, collecting toner from all four color cartridges before transferring it to the paper. If it cannot engage or disengage properly, the printing process stops, and the error appears.
Common reasons for this failure include the ITB getting physically jammed, a sensor (like SR9 or SR17) becoming blocked or faulty, or a solenoid that controls the alienation mechanism becoming sticky. Over time, toner dust can accumulate, or the internal components of the solenoid can degrade, leading to intermittent or persistent HP 59 F0 error messages. Identifying the exact cause is key to applying the correct fix.
Initial Steps: Power Reset and Firmware Update
Before delving into more complex mechanical checks, always start with the simplest solutions. A thorough power reset can often clear transient errors, while a firmware update can address known software bugs that might trigger the HP 59 F0 error. These steps require no tools and are safe for any user to perform.
Performing a Printer Power Reset
A power reset can clear temporary glitches in the printer’s memory and control circuits. It’s a fundamental troubleshooting step for many printer errors.
- Turn Off the Printer: With the printer still powered on, press the power button to shut it down.
- Unplug from Wall: Disconnect the printer’s power cord directly from the wall outlet. Avoid power strips or surge protectors for this step, as they can sometimes prevent a full power cycle.
- Wait: Allow at least 60 seconds for any residual power to dissipate.
- Reconnect and Power On: Plug the power cord back into the wall outlet and then turn the printer on. Check if the HP 59 F0 error persists.
Updating Printer Firmware
HP often releases firmware updates to improve printer performance, fix bugs, and address known error codes. The brief specifically mentions updates designed to help the DC controller ignore sensor microresistors that might falsely trigger this error.
- Identify Your Model: Note the exact model number of your HP LaserJet printer (e.g., HP Color LaserJet CP4025, M477, M775, CP5225).
- Visit HP Support: Go to the official HP support website.
- Search for Drivers & Software: Enter your printer model number to find its dedicated support page.
- Download Latest Firmware: Look for the “Firmware” section and download the latest available version. Ensure it’s compatible with your operating system.
- Install Firmware: Follow the on-screen instructions provided by HP to install the firmware. This usually involves connecting the printer via USB and running an executable file. Do NOT turn off the printer during this process.
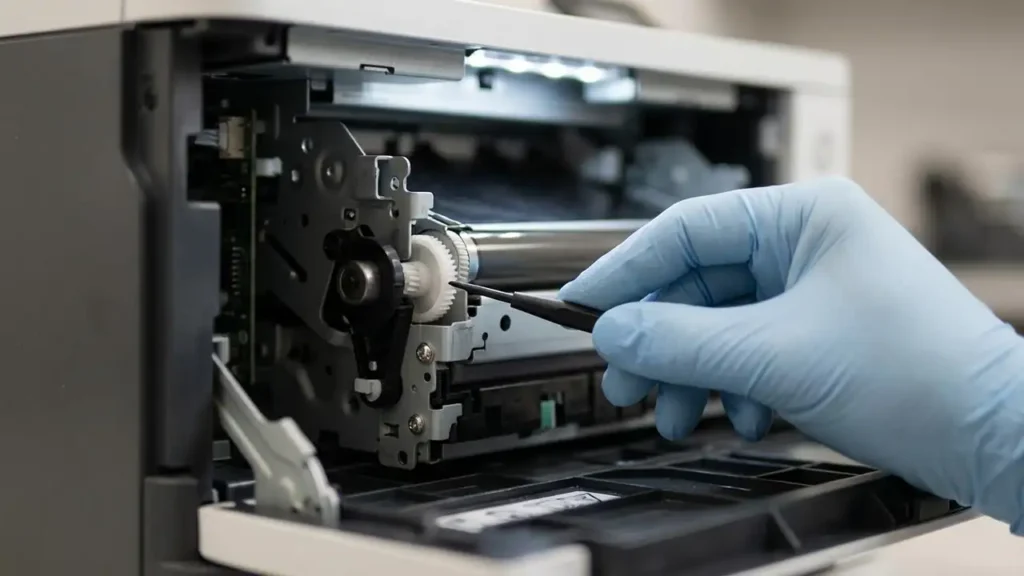
Manual ITB Test to Diagnose Transfer Alienation Failure
If the error continues, the next step is to physically inspect the ITB itself. The manual ITB test helps determine if the transfer belt mechanism is mechanically stuck or if a sensor flag is not moving freely. This step involves carefully removing the ITB.
- Open Printer and Remove ITB: Refer to your printer’s service manual or quick start guide for the exact procedure to open the front cover and safely remove the Intermediate Transfer Belt (ITB). Typically, this involves opening a front or side door and unlatching the ITB assembly.
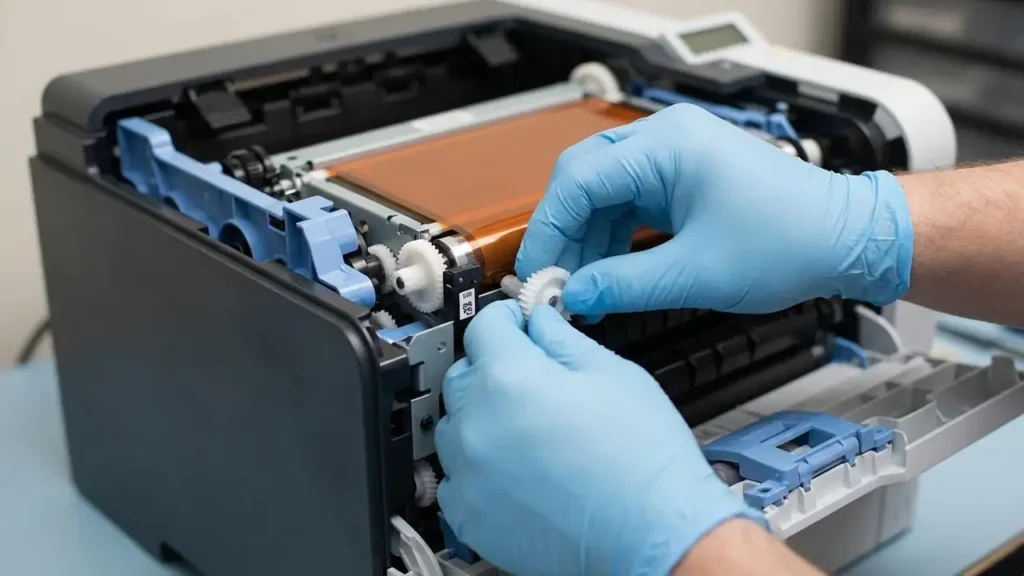
- Locate the White Gear: Once the ITB is out, look for a small, white plastic gear on one side of the assembly. This gear is part of the alienation mechanism.
- Manually Rotate the Gear: Gently rotate this white gear by hand. As you rotate it, observe the internal components of the ITB. You should see a small sensor flag or lever moving freely inside the assembly.
- Check Sensor Flag Movement: If the sensor flag remains stuck, moves sluggishly, or does not move at all, it indicates a mechanical problem within the ITB unit itself. In this scenario, the ITB is likely faulty and needs to be replaced to resolve the HP 59 F0 error.
Unblocking the SR9/SR17 Sensor
A common cause of the HP 59 F0 error is a blocked or stuck sensor lever, often designated as SR9 or SR17 depending on your specific HP LaserJet model. These sensors detect the position of the ITB alienation mechanism. Toner dust or debris can accumulate around these small levers, preventing them from moving correctly.
- Power Off and Unplug: Always power down the printer and unplug it from the wall outlet before reaching inside.
- Remove ITB and Fuser: Carefully remove the ITB as described in the previous step. For better access, you might also need to remove the fuser assembly. Consult your printer’s manual for fuser removal instructions, as this component can be hot if the printer was recently in use.
- Locate the Sensor Lever: Look inside the printer’s cavity where the ITB and fuser normally sit. The SR9 or SR17 sensor lever is usually a small, thin plastic or metal flag that protrudes into the path of the ITB mechanism. It’s often near the right or left side of the ITB’s position.
- Inspect and Clear: Examine the sensor lever. It often gets stuck in the “up” position. Gently prod and move it with your finger to ensure it swings freely without resistance. Use compressed air or a soft, lint-free cloth to carefully clean any toner dust or debris that might be obstructing its movement.
- Reassemble and Test: Once you confirm the sensor lever moves freely, reinsert the fuser (if removed) and the ITB. Close all covers, plug in the printer, and power it on to see if the HP 59 F0 error has been cleared.
Addressing Sticky Solenoids (Advanced Fix for HP 59 F0 Error)
If the HP 59 F0 error persists, even after replacing the ITB or clearing sensors, the culprit is often a sticky solenoid. Solenoids are electromagnetic switches that control mechanical actions, and in this case, they manage the ITB alienation. Over time, the damping foam pads used in these solenoids can degrade, becoming gooey and sticky. This prevents the solenoid’s armature from releasing properly, leading to the alienation mechanism remaining engaged or disengaged incorrectly. This is a more advanced fix, often recommended for users comfortable with detailed mechanical work.
- Power Off and Unplug: Ensure the printer is completely powered off and unplugged.
- Gain Access to the Solenoid: This is the most challenging part, as the solenoid controlling the ITB alienation mechanism can be located deep within the printer’s chassis. You may need to remove multiple covers, circuit boards, and other components to reach it. Specific locations vary greatly by model (e.g., HP Color LaserJet CP4025, M477, M775, CP5225), so refer to a detailed service manual for your exact printer model.
- Locate the Problem Solenoid: Once inside, identify the solenoid associated with the ITB alienation. It will typically have a small plunger or arm that moves when activated.
- Inspect and Clean: Examine the solenoid. You’ll likely find a small foam pad on the solenoid’s armature or the printer’s frame where the armature rests. This foam will appear sticky or gooey. Carefully remove the old, degraded foam using isopropyl alcohol and a cotton swab. Ensure all sticky residue is gone.
- Apply New Damping Material: Cut a small piece of electrical tape, Kapton tape, or thin felt pad to the exact size of the original foam. Apply this new material to the metal contact point where the solenoid’s armature strikes or rests. The goal is to prevent direct metal-to-metal contact and provide non-sticky damping. Do not use too thick a material, as it can affect the solenoid’s travel distance.
- Reassemble and Test: Carefully reassemble the printer, ensuring all connectors and components are correctly put back. Plug in the printer, power it on, and check if the HP 59 F0 error has been resolved.
Safety and Warranty Considerations
Always exercise caution when performing internal maintenance on your printer. Ensure the device is unplugged from the power source before opening any covers to prevent electrical shock. Avoid touching sensitive components like the fuser (which can be very hot) or the ITB transfer surface directly with your bare hands, as oils and contaminants can affect print quality. Opening the printer and performing internal repairs may void your warranty. If you are unsure about any step, especially the advanced solenoid fix, it’s best to consult an authorized HP service technician.
Common Questions about Fixing HP 59 F0 Error
Conclusion
The HP 59 F0 error can be a challenging issue, but with a systematic approach, it is often resolvable. By starting with basic steps like a power reset and firmware update, then progressing to physical checks of the ITB and its associated sensors and solenoids, you can identify and correct the root cause. While some fixes, like addressing a sticky solenoid, require a more advanced comfort level with printer mechanics, most users can successfully tackle the initial diagnostic and repair steps. Persistent troubleshooting will help restore your HP LaserJet printer to full working order.