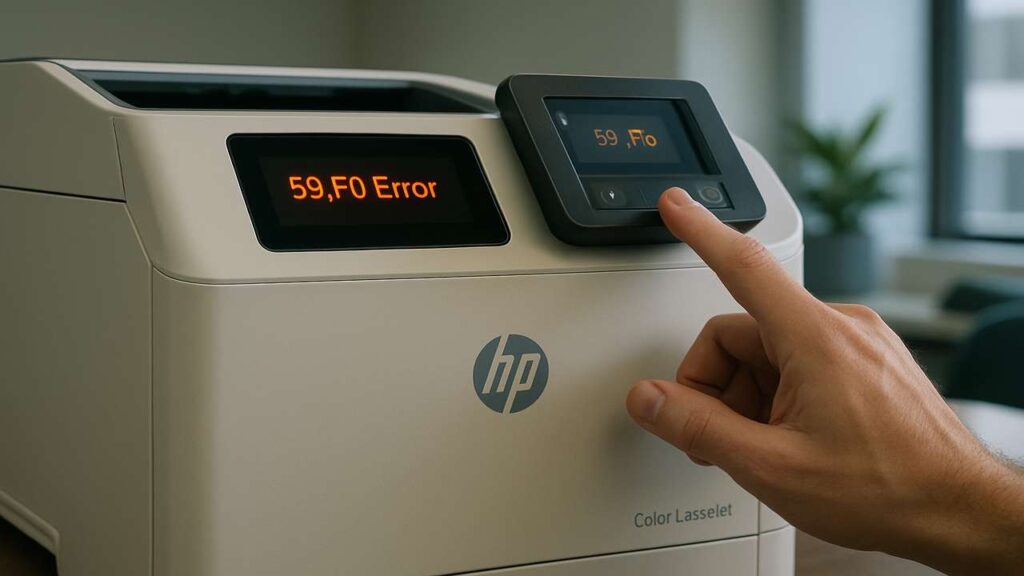
hp 59.f0 error fix — transfer belt & solenoid test
hp 59.f0 error fix is what you need when a Color LaserJet stops with “59.F0,” usually after startup or during calibration. This guide walks you through transfer belt checks, the alienation solenoid test, and simple motor isolation so you can restore printing quickly and safely.
hp 59.f0 error fix — what the code really points to
The 59.F0 family typically indicates a transfer drive problem: the intermediate transfer belt (ITB) doesn’t spin or “engage/disengage” correctly, or the main/ITB motor is stalled by a jammed gear or stuck solenoid. Easy culprits include:
-
ITB not seated, belt binding, or worn/stripped drive gear
-
Alienation solenoid sticking (can’t lift/lower the transfer belt against the drums)
-
Fuser or cartridge gear drag stalling the drive train
-
Debris around the ITB home/position sensor or sensor flag
Safety & tools
-
Power off and unplug the printer; let it cool 10 minutes.
-
Lint-free cloth, isopropyl alcohol (for sensors), flashlight, small Phillips screwdriver.
-
Nitrile gloves to avoid toner transfer.
Quick wins (often enough)
-
Power-drain reset: unplug 60 seconds, then power on.
-
Reseat supplies: remove all toner cartridges, lift out the ITB assembly (if your model allows), reseat firmly until it clicks, reinstall cartridges.
-
Clear hidden scraps: check under the ITB/fuser path for tiny paper bits or label glue.
-
Spin test by hand: with the ITB out, gently rotate its drive gear. It should turn smoothly with light resistance—no crunching or tight spots.
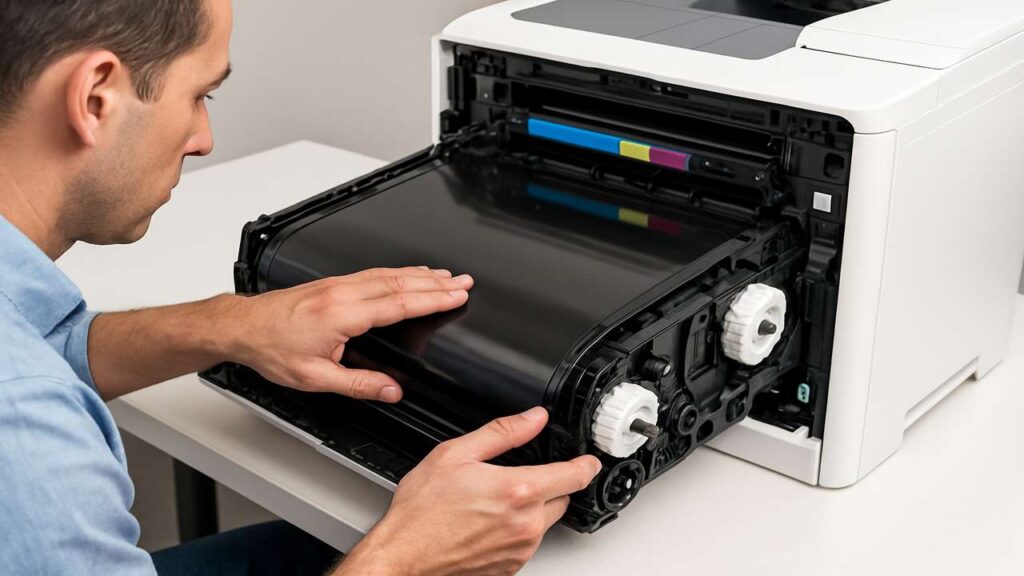
Transfer belt checks that matter
-
Belt surface & seams: Inspect for tears, melted spots, or a lifted seam—any damage can bind the belt.
-
Drive gear & idlers: Look for rounded teeth or plastic dust. A stripped gear causes instant 59.F0 when the motor loads.
-
Home/position sensor: Clean the small optical window and ensure the sensor flag moves freely. A sticky flag makes the printer think the belt never “homed.”
-
Seat & latch: Reseat the ITB flat—front tabs misaligned by 1–2 mm can throw the whole drive out.
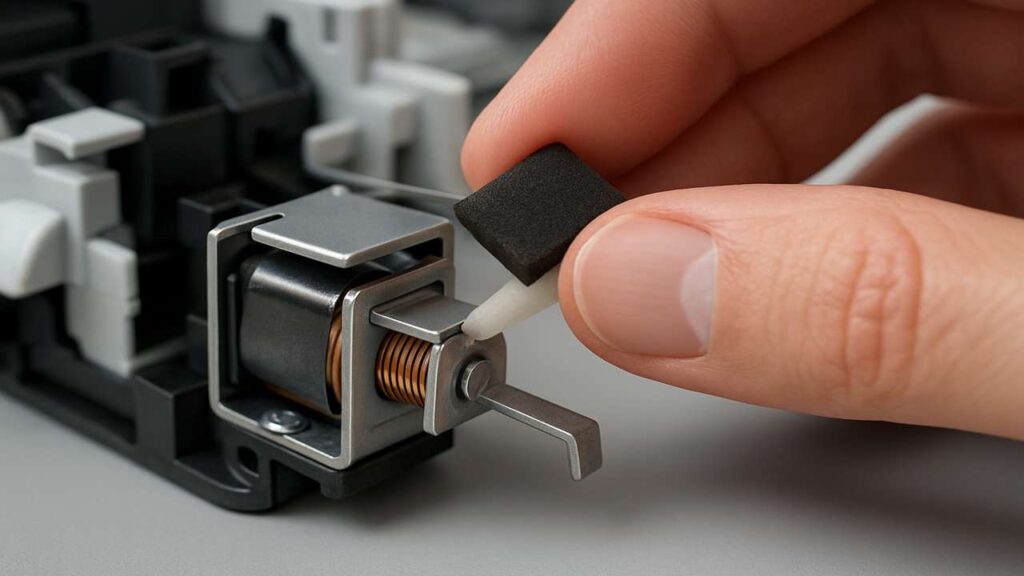
Solenoid test — the silent troublemaker
The alienation solenoid engages/disengages the transfer belt against the cartridges. When its original foam pad degrades, it becomes tacky and sticks—the belt won’t move into position, and the motor faults with 59.F0.
How to check:
-
With covers off as your model allows (or from service/diagnostic menus), start a component test or calibration and listen for a crisp solenoid click. A dull or delayed click suggests sticking.
-
If accessible, observe the lever/arm the solenoid pulls. It should spring back instantly when de-energized.
-
If stuck: remove the solenoid, clean off the old foam, and replace with a thin non-adhesive pad or a small strip of high-temp tape so the metal face doesn’t glue itself down. Reassemble and retest.
Isolate the stall — which part is dragging?
-
Remove the fuser (if your model allows) and power-on test. If 59.F0 disappears without the fuser, the fuser bearings/sleeve or its drive gear may be binding.
-
Engine/component tests: Run the ITB motor or “paper path” test if available. A failure only when the ITB is commanded = ITB/solenoid/sensor path.
-
Cartridge drag: Swap in one cartridge at a time; a seized developer gear in a single color can stall the train.
Clean and re-align sensors
-
Wipe the ITB patch sensor and any exposed optical sensors with a light alcohol damp on a lint-free swab; dry completely.
-
Verify sensor flags move freely and return under spring tension. Bent or slow flags cause false “no-move/home” readings.
Reassembly, then calibrate
-
Refit the ITB squarely; ensure all doors fully latch.
-
Power on and run a color calibration/align routine.
-
Print a supplies/config page and a full-color test page to confirm stable drive (no squeals, no immediate re-fault).
Prevention so it doesn’t come back
-
Keep the printer in a clean, low-humidity environment; dust accelerates gear and sensor wear.
-
Replace worn pickup/transfer rollers on schedule; excessive jams stress the drive.
-
If you’ve serviced the solenoid once, use a durable pad—don’t reinstall sticky foam.
-
Avoid forcing doors closed; mis-latched covers misalign the ITB.
Troubleshooting by symptoms
-
59.F0 at power-on, before print → Stuck solenoid or ITB not homing; check sensor flag and solenoid pad.
-
Noise + 59.F0 during print → Stripped ITB gear or fuser drag. Remove fuser to test; inspect ITB gear teeth.
-
Intermittent 59.F0 after long idle → Solenoid stickiness worsens when warm; replace the pad.
-
59.F0 only after replacing cartridges → A cartridge’s drive gear is binding; swap cartridges one by one to find the culprit.
FAQs
Does 59.F0 always mean a bad motor?
No. Motors fail, but far more common is binding in the drive train or a stuck solenoid that prevents engagement.
Can I lubricate gears to fix it?
Avoid grease on plastic gears near the ITB; it attracts toner and dust. Replace worn gears/rollers instead.
Is the ITB user-replaceable?
On many models, yes. If the belt has damage or the gear is stripped, replacing the ITB unit is faster than chasing intermittent stalls.
What if the code returns after a few prints?
Re-check the solenoid pad, sensor flag movement, and fuser drag. Intermittent returns almost always trace to one of these.
Quick checklist
-
Power-drain reset, supplies reseated
-
ITB removed, spins smoothly; gear teeth intact
-
Sensor window/flag cleaned and free
-
Alienation solenoid clicks crisply; sticky pad replaced
-
Fuser/cartridge drag ruled out via isolation tests
-
Calibration run; test page printed without noise or fault
Conclusion
A successful hp 59.f0 error fix is about freeing the transfer system: seat the ITB, clean its sensor, ensure the solenoid isn’t sticking, and rule out fuser or cartridge drag. Tackle those in order and the printer should return to quiet, reliable operation.