
epson ink pad end of life — e-11/e-12 reset & pad care
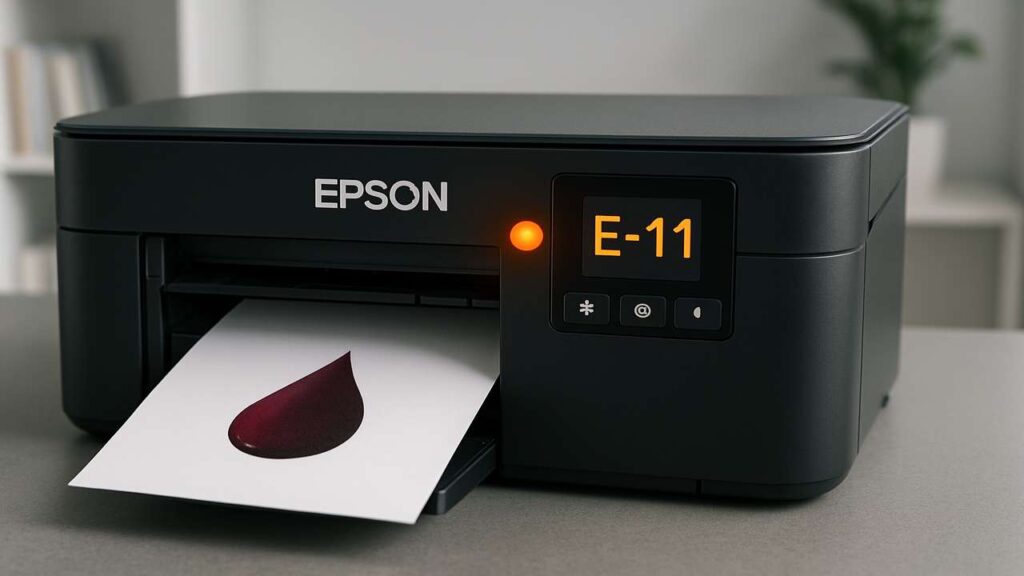
epson ink pad end of life is the warning behind errors like E-11 or E-12 when your printer decides the waste-ink pads are saturated. Use our epson ink pad end of life guide to clear the counter safely, refresh or replace pads, and keep printing without leaks.
epson ink pad end of life — what the error really means
Inside your Epson are absorbent pads that collect waste ink during head cleanings and start-up cycles. The printer tracks these flushes with a software counter. When the counter hits a limit, it throws E-11/E-12 and blocks printing to prevent overflow. Your plan has two parts:
-
Reset the counter (software) so the printer unlocks.
-
Service the pads (hardware) so ink doesn’t spill later.
Safety and prep
-
Power off and unplug the printer; place it on absorbent paper or a mat.
-
Have lint-free cloths, nitrile gloves, and a small container for rinsing pads (if your model allows removal).
-
If the device recently ran heavy cleanings, let it sit 10–15 minutes before you open anything—pads can be saturated.
epson ink pad end of life — quick checks before reset
-
Look for visible leakage around the service bay or rear access—if you see wet ink, prioritize pad service first.
-
Record counters if your menu offers a maintenance/status page; it helps track future service windows.
-
Confirm model behavior: some EcoTank/WorkForce units expose maintenance items in the regular menu; others require a service mode or utility.
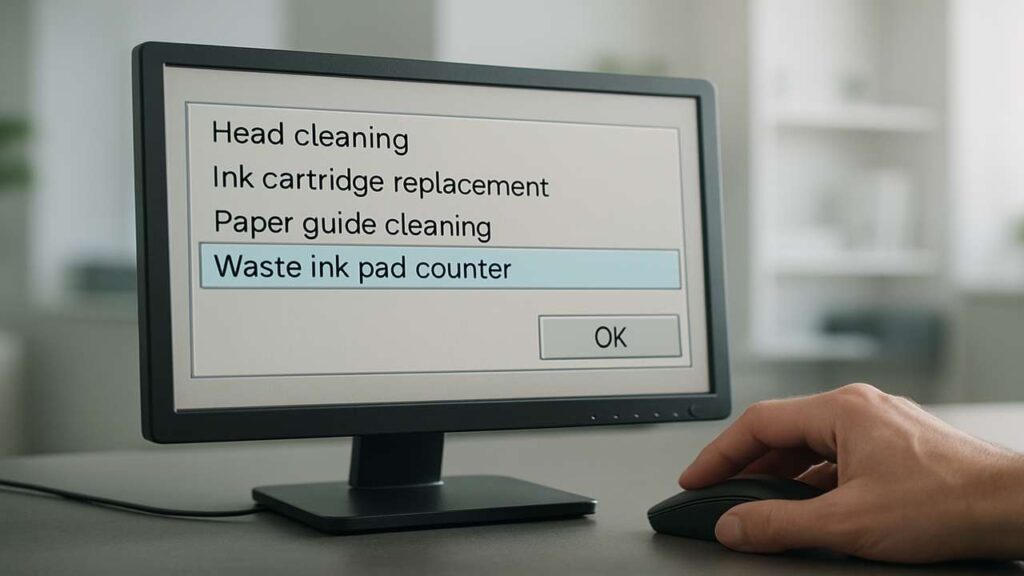
Counter reset paths (choose what your model supports)
Button/menu reset (model-dependent)
On models that expose maintenance resets:
-
Enter Setup → Maintenance/Service and choose Ink Pad/Counter Reset (names vary).
-
Confirm, then power cycle.
If you don’t see this entry, your unit likely needs a service utility or professional reset.
Service utility reset (advanced, when menu option isn’t available)
-
Connect the printer via USB to a Windows PC.
-
Use a model-appropriate service utility to reset the waste ink counter.
-
After a successful reset, power cycle the printer.
Important: Only run the counter reset after you’ve inspected/serviced pads, otherwise you risk overflow.
Pad care options — pick the right level
Light-use refresh (quick clean)
-
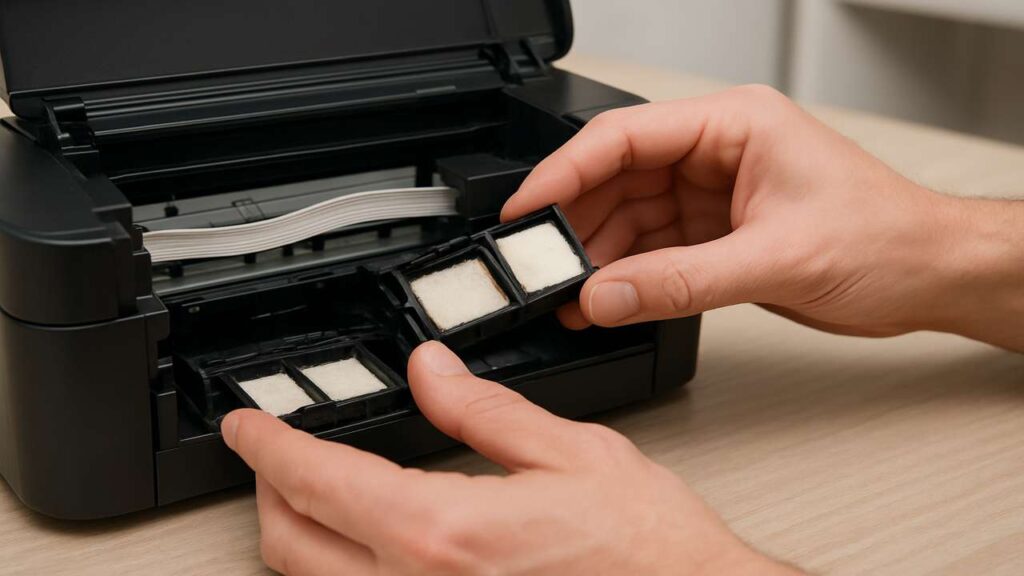
Remove the maintenance cover to access the main pad stack (varies by model).
-
Lift pads carefully with tweezers; place them in warm water until the water runs clear.
-
Gently squeeze out excess water—do not wring—then let the pads air-dry 24–48 hours.
-
Reinstall fully dry pads and reassemble covers.
Replace pads (best long-term)
-
Install a new absorber kit compatible with your model.
-
Seat each pad flat; a mis-seated pad channels ink poorly and can cause smears or overflow.
-
Note the service date on a small label inside the cover.
External waste bottle mod (pro tip, if your model allows a tube)
-
Some models have a waste-ink tube you can route to a sealed external bottle.
-
Secure the tube, keep the bottle below the printer, and check it periodically.
-
Even with a bottle, keep pads installed as a backup—don’t leave the internal path open.
epson ink pad end of life — verification after reset
-
Power on and confirm the error is gone.
-
Print a nozzle check; run one cleaning only if lines are missing.
-
Inspect the service bay—no fresh pooling should appear.
-
Log the service date and expected interval (light home use: 1–2 years; heavy use: sooner).
Reduce future waste-ink buildup
-
Print small pages weekly to avoid aggressive prime cycles after long idle periods.
-
Use quality ink matched to your model; poor ink increases head cleanings.
-
Avoid power-cycling repeatedly; each start-up adds waste ink.
-
Keep firmware stable; only update if a release fixes issues you actually face.
Troubleshooting by symptoms
-
E-11/E-12 returns immediately after reset → Counter didn’t save or pads are still flooding. Re-run reset, recheck connectors, and prioritize pad service.
-
Ink trails under prints → Pads saturated or not seated; service/reseat.
-
Error during head cleaning → The flush filled saturated pads; stop cleaning cycles, service pads, then reset.
-
Smell or damp bottom panel → External leak; clean the area, check tube connections, and ensure pads are firmly in place.
FAQs
Is it safe to reset without touching the pads?
Only as a temporary measure. If the pads are truly saturated, you risk leaks. Service pads as soon as possible.
Can I dry pads in an oven or with a hair dryer?
No. Heat can deform foam structure. Air-dry only.
Will a reset affect print quality?
No. The reset just clears the counter. Quality depends on head health, ink, and maintenance.
How do I know when pads need replacement again?
Track the date and your usage. If you do frequent cleanings or heavy prints, expect shorter intervals.
What if my model has no obvious pad access?
Use the utility reset and schedule a professional pad replacement. Some compact units hide pads deep in the frame.
Quick checklist
-
Inspect for leaks; lay protective paper
-
Service pads (clean/dry or replace) or add waste bottle if supported
-
Perform counter reset via menu or service utility
-
Power cycle; print nozzle check; limit to one cleaning
-
Log service date and reduce aggressive cleanings
Conclusion
A reliable epson ink pad end of life recovery balances software and hardware: reset the counter to clear E-11/E-12, and service or replace the pads to manage real ink volume. Do both, keep cleanings reasonable, and your Epson will run smoothly without surprise shutdowns or messy leaks.
which reset utility do I use for the epson et-2850?
how do i reset the e-11 i just changed the absorvent pads but cant reset the e-11 error