
Replace Drum on Brother Printer: What It Means & How to Reset (After Replacement)
If your Brother printer displays “Replace Drum”, it usually means the printer’s drum counter reached its limit. In many cases, you must replace the drum unit and then reset the drum counter so the message clears.
This guide explains what the message means and shows safe reset steps used across many Brother models.
Quick Answer (Start Here)
-
If you did NOT replace the drum unit yet: replacing the drum is the correct fix in most cases.
-
If you already replaced the drum unit: you likely need to reset the drum counter.
-
Resetting the drum counter without replacing the drum may cause poor print quality and can hide real maintenance needs.
👉 Back to the main hub:
Brother Printer Messages Fix Center
What “Replace Drum” Means
Brother printers track drum usage with a counter (based on pages printed and operating conditions). When the counter reaches its threshold, the printer shows Replace Drum to protect print quality and prevent repeated defects like:
-
faded prints
-
streaks/lines
-
background gray / ghosting
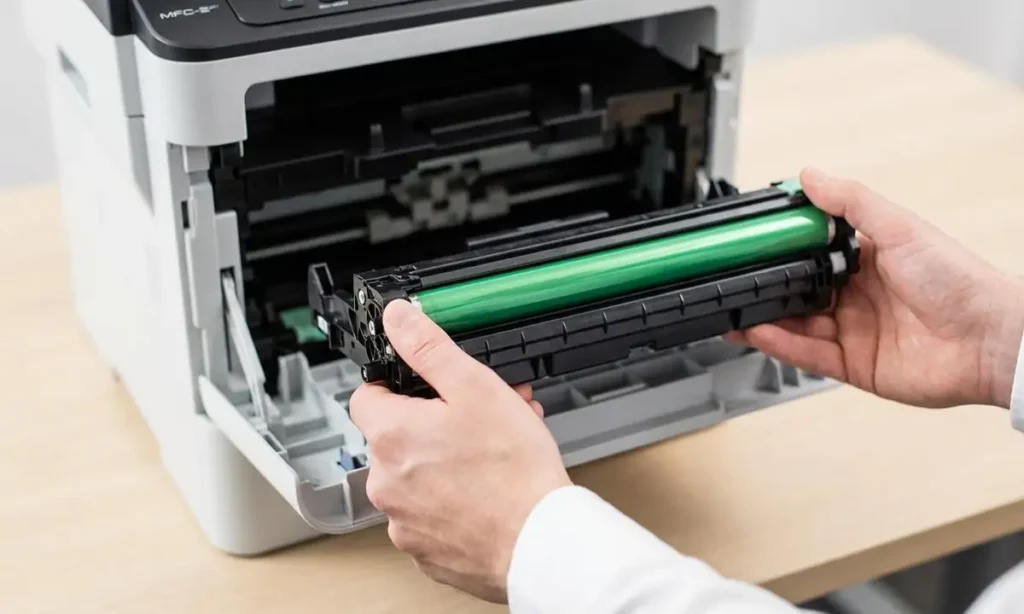
Before You Reset: Confirm the Drum Was Replaced
A Brother drum unit is different from the toner cartridge:
-
Toner = holds toner powder
-
Drum = imaging unit that transfers toner to paper
On many Brother printers, the toner cartridge clips into the drum unit.
If you only replaced toner, that usually will not clear a Replace Drum message.
Safe Drum Reset (Common Methods)
Brother has different reset methods depending on the model family. Try Method A first. If it doesn’t match your menu/buttons, use Method B.
Method A (Most Common for Many Models with Front Panel)
-
Make sure the printer is ON.
-
Open the front cover (where toner/drum is installed).
-
Press and hold OK (or sometimes Go) for about 2–5 seconds.
-
You should see a prompt like “Replace Drum?” or “Drum Reset?”
-
Select Yes to reset.
-
Close the front cover.
Method B (Menu Reset on LCD Models)
-
Press Menu.
-
Go to Machine Info / Information (wording varies).
-
Find Parts Life or Drum.
-
Choose Reset → confirm Yes.

Method C (Models with “Clear/Back” + Numeric Keypad)
Some models allow:
-
Open front cover.
-
Press Clear/Back.
-
When prompted, choose 1 (Yes) to reset.
If your model shows a different sequence, don’t worry—Brother families vary. The key pattern is always: open cover → drum reset prompt → confirm.
If the Message Comes Back Immediately
If Replace Drum returns right after reset, check:
-
Drum unit is seated correctly (remove and reinstall firmly).
-
Toner is properly clicked into the drum.
-
Drum contacts are clean (dry lint-free cloth only).
-
The drum unit is actually a compatible model for your printer.