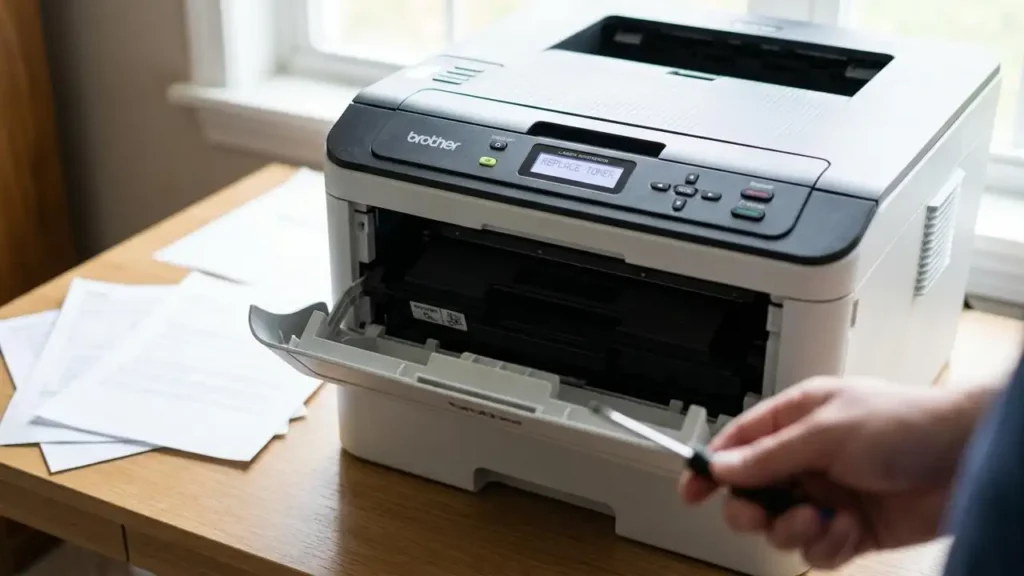
You just unpacked a brand-new, cost-effective compatible toner cartridge, carefully slid it into your Brother laser printer, and closed the cover—only to be greeted by the exact same, infuriating flashing message: “Replace Toner” or “Toner Low.”
Before you assume you received a defective third-party product or throw the cartridge in the trash, you need to understand that your printer is lying to you. Your toner is 100% full, but a complex misalignment between the physical hardware and the smart chip encryption has trapped your device in an artificial software loop.
This exhaustive technical blueprint will pull back the curtain on why this happens and give you the exact steps to Fix Brother Printer Replace Toner Error without spending a single penny on original OEM replacements.
The Quick Answer: How to Force Your Printer to Recognize New Toner Immediately
If you are trapped in an emergency printing situation and need to bypass the error right now, follow this universal control panel override sequence:
-
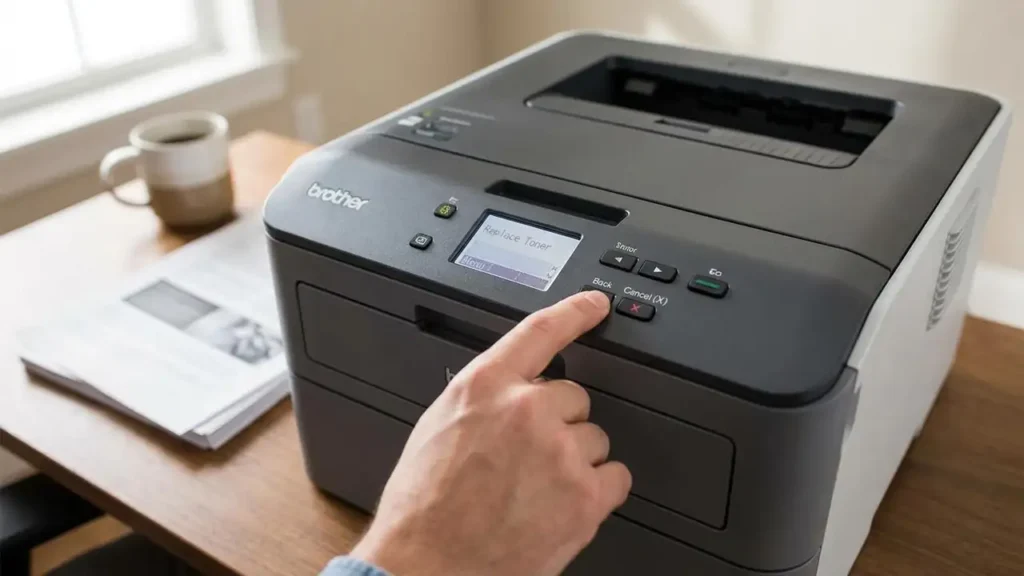
Open the front toner access door of your Brother printer while the power is ON.
-
Press the Back and Cancel (X) buttons at the exact same time, release them, and immediately press the Back button again.
-
A hidden Reset Menu will appear on the LCD screen (e.g., K.TNR-STD or TNR-HC).
-
Select your toner color and capacity type, then press Yes or OK to clear the error message.
-
Close the front cover. The printer will cycle, and you can now print normally.
The Technical Anatomy: Why Compatible Brother Cartridges “Ghost” Your Printer
To successfully maintain a printing setup using third-party components, you must understand the dual-detection ecosystem that Brother utilizes. Unlike other brands that rely solely on microchips, Brother uses a hybrid verification method:
1. The Physical Flag Gear (The Mechanical Sensor)
Inside the side panel of every Brother toner cartridge (such as the TN-830, TN-760, or TN-2420 series), there is a spring-loaded, white plastic wheel known as the Flag Gear. When a factory-fresh cartridge is inserted, the printer spins a motor. The physical tooth of this gear trips an internal micro-switch inside the printer carcass exactly once. This mechanical action tells the printer’s motherboard: “A brand-new, full cartridge has arrived.”
2. The Smart IC Chip (The Electronic Security)
On newer generations of printers, Brother added a secondary layer of defense: an encrypted microchip. This chip transmits digital cryptographic data to verify authentication.
Why the Error Triggers on Compatible Toners:
When third-party manufacturers mass-produce compatible cartridges, two primary technical errors frequently occur during factory packaging:
-
The Gear Misalignment: During shipping vibrations, the physical flag gear can slip out of its precise “home index position.” When inserted, the printer fails to detect the physical mechanical click, assuming the old cartridge is still inside.
-
The Cryptographic Time Lag: If your printer is connected to Wi-Fi, Brother regularly pushes background firmware updates. If your compatible chip contains an older version of emulation code, it fails the digital handshake, defaulting the printer back to the “Replace Toner” state even if the physical gear tripped correctly.
Comprehensive Step-by-Step Repair Guide to Fix Brother Printer Replace Toner Error
If the quick control panel override did not clear the status screen, you must execute a manual reset of the physical and electronic sensors. Follow these three advanced methods sequentially.
Method 1: Re-Indexing the Physical Flag Gear Manually
If the factory packaged the cartridge with the plastic gear turned even a few millimeters past the starting position, you must reset it manually.
[Correct Home Position Indicator]
         |
    (=========) <-- White Plastic Flag Gear
     \  |    /
      \ v   /   <-- Small Notch Must Point Match Case Index Mark
-
Step 1: Remove the toner cartridge from the drum unit assembly.
-
Step 2: Look at the left flank of the cartridge. Locate the exposed white plastic gears held in place by a small plastic plate secured by two Philips screws.
-
Step 3: Notice the specific gear that has a small, protruding plastic tooth or notch.
-
Step 4: Using a small flathead screwdriver, gently rotate this specific gear counter-clockwise until the spring tension clicks and locks the tooth directly opposite its default position (aligning with the small indentation mark molded onto the black cartridge casing).
-
Step 5: Reinsert the toner into the drum, place it back into the machine, and listen for the extended initialization cycle.
Method 2: The Secret Continuous Menu Reset for Touchscreen Models
For advanced Brother laser models featuring color touchscreens (e.g., MFC and HL series), the physical button override will not work. You must access the hidden engineering system.
-
Turn the printer on and ensure no computer cables are sending print jobs.
-
If an error message fills the screen, press the Cancel (X) button to show the main layout menu.
-
Press and hold the Home button (the house icon) firmly for 5 to 7 seconds.
-
The screen will shift to display your printer’s serial number and firmware build information.
-
Locate the blank, unlabelled rectangular space at the very bottom right-hand corner of this specific menu screen. Press and hold this blank space for 3 seconds.
-
A numerical keypad will pop up on the display screen.
-
Type in the secret engineering code:
*2864(or#2864depending on your exact regional market layout). -
The printer will enter Maintenance Mode. Type
01to trigger a complete parameter and sensor initialization reset, then type99to safely reboot the machine back to standard operational mode.
Cartridge & Model Reset Reference Matrix
| Cartridge Model | Common Printer Series | Primary Override Trigger Code | Ideal Reset Method |
| TN-730 / TN-760 | HL-L2350DW, MFC-L2710DW | Front Cover Open + Back/Cancel Combo | Control Panel Menu |
| TN-830 / TN-830XL | HL-L2460DW, MFC-L2920DW | Hidden Home Button Press | Maintenance Mode Code |
| TN-2410 / TN-2420 | HL-L2375DW, MFC-L2750DW | Front Cover Open + Clear/Stop Combo | Mechanical Flag Gear |
| TN-2510 / TN-2510XL | HL-L2400DWE series | Touchscreen Corner Hold | Control Panel Menu |
Crucial Maintenance Pitfalls to Avoid During Reset
Attempting to force a printer past its default safety warnings can sometimes cause peripheral issues if done incorrectly. Protect your hardware by observing these expert protocols:
-
Never Touch the Microchip Contacts Barehanded: The natural oils and static electricity on human fingertips can permanently short-circuit or corrupt the delicate CMOS memory chip on compatible toners. Always handle cartridges by their center plastic grip handles.
-
Do Not Force the Gears: If you are performing Method 1 and feel heavy mechanical resistance when turning the white flag gear, stop immediately. Forcing it past its structural stop barrier will snap the internal internal plastic guide pin, permanently breaking the cartridge mechanism.
-
Clean the Corona Wire: Often, a false “Replace Toner” error is actually triggered by microscopic toner dust shadowing the internal optical sensors inside the drum unit. Every time you change cartridges, slide the bright green tab on the drum unit back and forth 5 times to clean the built-in corona wire. Crucial: Ensure you return the green tab to its original home starting position (indicated by the small matching triangles) before reinserting.