

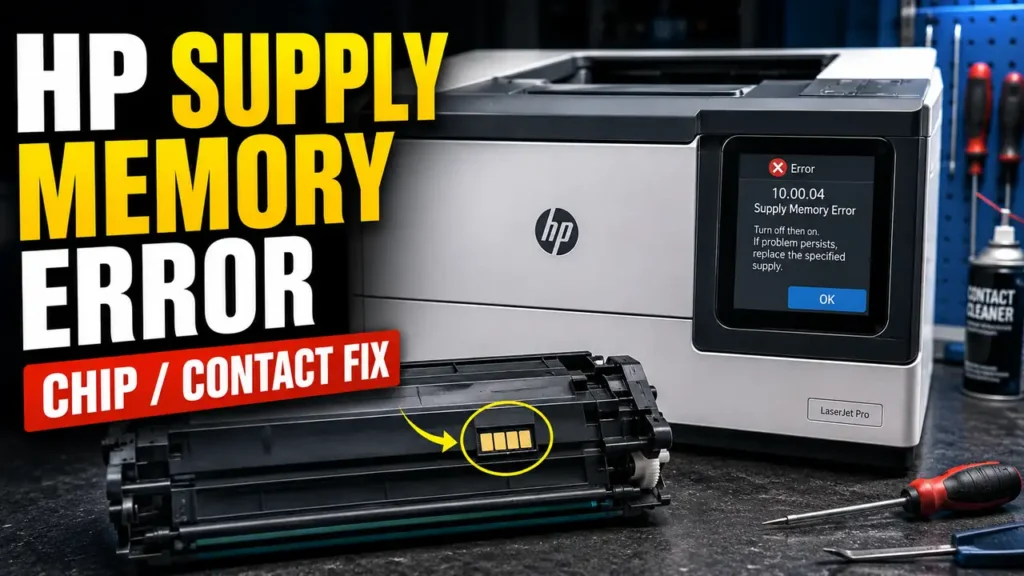
An HP Supply Memory Error Fix is a highly requested diagnostic procedure within the global printer maintenance community.
When HP LaserJet models halt and display a “10.00.00” or “10.00.04” alphanumeric code, the printer is typically detecting a cartridge memory-chip communication problem, authentication issue, or supply contact failure.
The printer relies on a supply memory-chip handshake to identify the cartridge and read its supply data. When this handshake fails, the printer locks out the consumable.
By isolating the physical contact pins, evaluating the chip’s seating, and reviewing cartridge policy, cartridge protection, and firmware update settings, technicians can determine the root cause.
This technical manual details a comprehensive approach for an HP Supply Memory Error Fix, moving from physical decontamination to configuration management.
Safety Warning and Official Stance: According to HP, non-original cartridges or chips may trigger supply errors. The software adjustments described below may alter security configurations. This guide is intended strictly for educational and troubleshooting purposes. Proceed at your own risk.
Prerequisites and Diagnostic Limitations
To align with professional diagnostic standards, please review the following limitations before attempting this procedure:
-
Dynamic Security limitations: On Dynamic Security-enabled models, a cartridge that previously worked may stop being accepted after a firmware update if its chip is no longer recognized by the printer.
-
Contamination risk: Removing toners exposes the organic drum cylinder (OPC) to light. Keep the cartridge covered during testing to prevent UV degradation.
-
Variable outcomes: Success is not guaranteed. If the microchip itself has short-circuited, or if the printer’s internal contact array is severely damaged, replacement hardware is mandatory.
Recommended Diagnostic Tools
To perform a thorough evaluation, having the following items on your workbench is highly advised:
-
99% Isopropyl Alcohol (IPA) and lint-free cleanroom swabs.
-
A focused LED penlight for internal cavity inspection.
-
A precision dental pick or micro-hook (for realigning bent contact pins).
-
A network-connected PC to access the printer’s IP interface.
Supported Printer Architectures
This physical and digital isolation method has been commonly reported by repair communities across several HP LaserJet families.
Different models utilize different chip shapes and communication protocols (such as standard 2-pin vs. complex I2C arrays).
| Printer Series | Notable Models (Community Reported) | Communication Type |
| HP LaserJet Pro 400 | M402, M404, M428 | 2-Pin / 4-Pin Contact |
| HP Color LaserJet Pro | M252, M255, M452, M479 | I2C Protocol Chip |
| HP LaserJet Enterprise | M506, M527, M608 | High-Security Contact |
| HP Neverstop Laser | 1000, 1200 series | Imaging Drum EEPROM |
Understanding the EEPROM Handshake Failure
Modern toner cartridges utilize microscopic smart chips to transmit cartridge identity, supply status, estimated yield, and authentication data.
The printer reads this data via tiny, spring-loaded wire contacts located deep inside the toner cavity.
If these pins are bent, or if the cartridge chip is slightly misaligned in its plastic slot, the electrical circuit is broken.
Furthermore, over-the-air firmware updates often introduce aggressive Dynamic Security protocols. These protocols are designed to detect and block unverified chips.
Understanding this digital and mechanical barrier is crucial before executing the diagnostic procedure.
Phase 1: Physical Cartridge and Chip Evaluation
To successfully initiate an HP Supply Memory Error Fix, you must first rule out physical surface obstruction or chip misalignment on the cartridge itself.
-
Power down the printer and open the primary access door.
-
Extract the toner cartridge and place it on a flat, static-free surface.
-
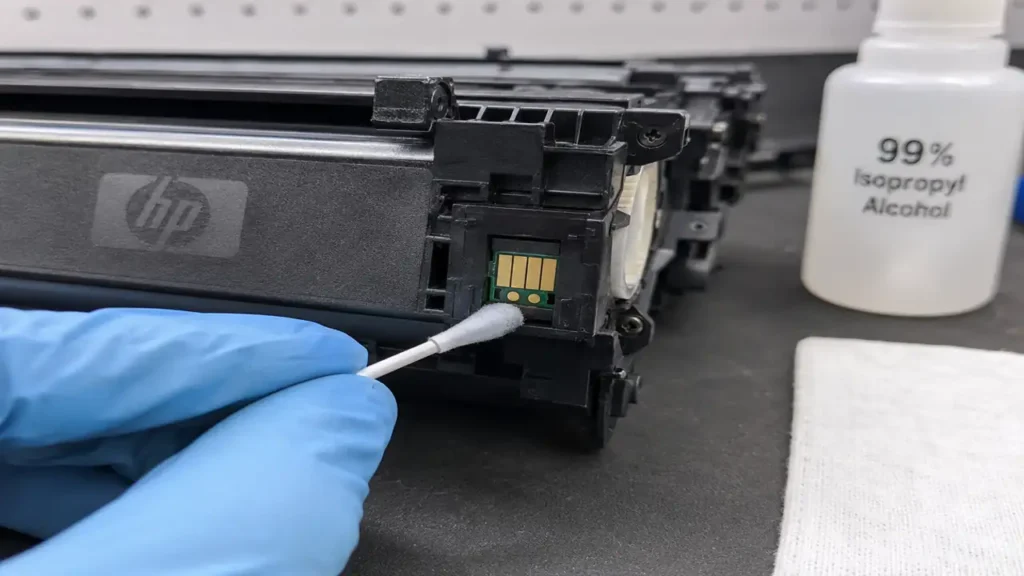
Locate the microchip on the flank or top edge of the cartridge. It is typically a small PCB board featuring golden contact pads.
-
Alignment Check: Ensure the chip is seated completely flat. Third-party aftermarket chips are sometimes glued poorly and may sit at an angle, preventing flush contact with the printer.
-
Lightly saturate a cleanroom swab with 99% Isopropyl Alcohol (IPA).
-
Gently polish the gold contact pads to remove any invisible adhesive residue, finger oils, or oxidized carbon dust. Allow it to flash-evaporate completely.
Phase 2: Internal Contact Array Realignment
If the chip is clean and properly aligned, the next step requires inspecting the printer’s internal chassis for mechanical damage.
-
Verify the printer remains completely powered off and unplugged to prevent shorting the low-voltage rails.
-
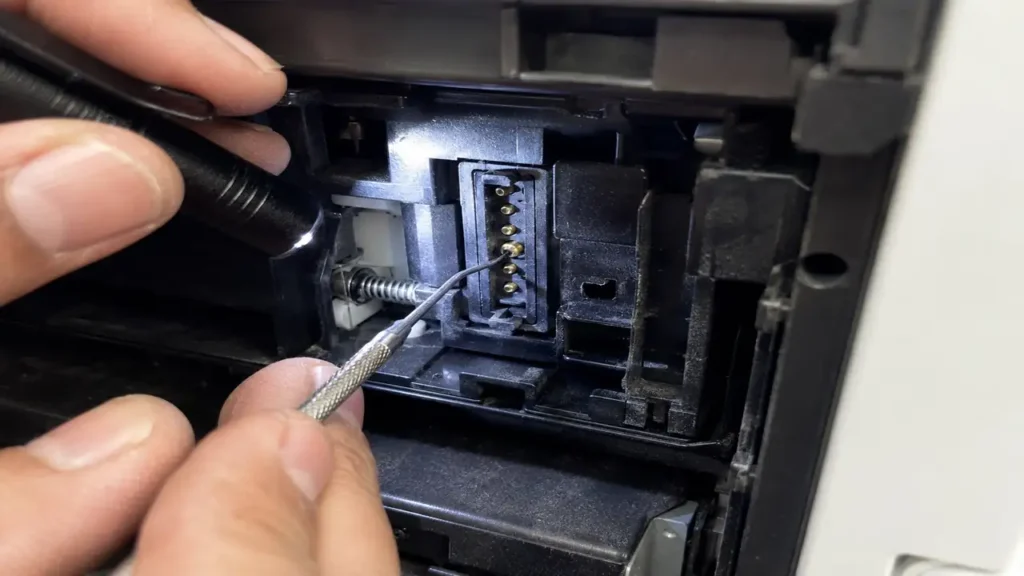
Use a focused LED penlight to illuminate the internal toner cavity.
-
Locate the chip reader block. This is a small plastic extrusion housing several golden wire-spring pins.
-
Visually inspect the alignment of these delicate pins. They must protrude evenly and parallel to each other.
-
If one pin is bent sideways or pushed permanently into the plastic housing, the motherboard cannot complete the data handshake.
-
A recessed pin often requires carefully extracting the pin block and realigning the tension spring with a precision micro-pick.
Phase 3: Control Panel Security Reconfiguration
If the hardware contacts are pristine, the fault may involve firmware policies.
-
Reinstall the toner cartridge and power the printer on.
-
Navigate to the printer’s control panel menu (using the touchscreen or physical keypad).
-
Go to System Setup > Supply Settings.
-
Locate the Cartridge Policy setting and change it from “Authorized HP” to “Off”.
-
Locate the Cartridge Protection setting and also toggle it to “Off”.
-
These settings may not override Dynamic Security restrictions on unsupported chips. They mainly control authorized-cartridge policy and cartridge protection behavior during an HP Supply Memory Error Fix.
Phase 4: Embedded Web Server (EWS) Isolation
Completing the diagnostic often requires reconfiguring the network settings.
-
Print a network configuration page to locate the printer’s IPv4 address.
-
Type this IP address into a desktop web browser to access the HP Embedded Web Server (EWS).
-
Navigate to the Settings or Security tab (login as Administrator if prompted).
-
Review automatic firmware update settings and decide whether future updates should be manual or administrator-controlled.
-
Disable optional usage-data sharing if the setting is available and if this aligns with your privacy or fleet-management policy.
-
Save the configuration and perform a final power cycle to apply the settings.