Fix a Ringing 3D Print
Eliminate unsightly ripples and improve your print quality.
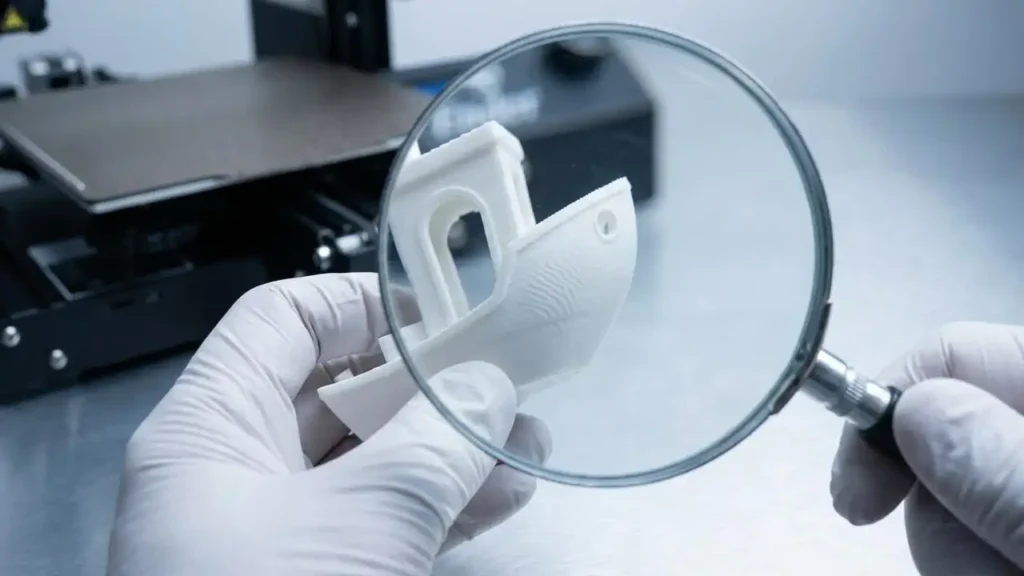
When your 3D prints show subtle, repeating patterns or “ghosting” artifacts, particularly around sharp corners or features, you are likely encountering a ringing 3D print. This common 3D printing issue manifests as echoes of the print’s geometry appearing on the surface, significantly detracting from the overall finish and precision. It’s a frustrating problem that many enthusiasts face, often indicating underlying mechanical or slicer setting imbalances.
Fortunately, addressing a ringing 3D print is typically a straightforward process involving systematic troubleshooting of your hardware and software. This guide will walk you through the most effective solutions, helping you diagnose the root cause and apply targeted fixes. By understanding the mechanics behind these ripples, you can achieve cleaner, more professional-looking results from your 3D printer.
Understanding Ringing 3D Print: What Causes These Ripples?
A ringing 3D print, sometimes called ghosting or echoing, occurs when vibrations or inertia from rapid movements of the print head are transmitted through the printer frame and affect the extrusion process. These vibrations cause the nozzle to slightly deviate from its intended path, creating faint, wave-like patterns on the print surface. The effect is most noticeable immediately after the print head changes direction quickly, such as when printing sharp corners or small details.
The primary culprits behind a ringing 3D print typically involve mechanical stability, print speed, and acceleration/jerk settings in your slicer. If the printer’s frame is not rigid, or if components like belts and wheels are loose, these imperfections will be amplified during printing. High speeds and sudden changes in direction further exacerbate these mechanical weaknesses, leading to pronounced ringing effects.
Identifying Ringing vs. Other Artifacts
It’s important to distinguish ringing 3D print artifacts from other print quality issues. Ringing specifically appears as “ghosts” of features extending outwards from edges. This differs from “wobble,” which often presents as inconsistent layer lines throughout the print, or “VFA” (Vertical Fine Artifacts), which are extremely fine, high-frequency patterns. Accurate identification helps narrow down the troubleshooting scope significantly.
Mechanical Checks: Stabilizing Your Printer
Addressing the mechanical stability of your 3D printer is often the first and most effective step to eliminate a ringing 3D print. A rigid and well-maintained printer minimizes unwanted vibrations. Start by performing a thorough inspection of your machine’s physical components.
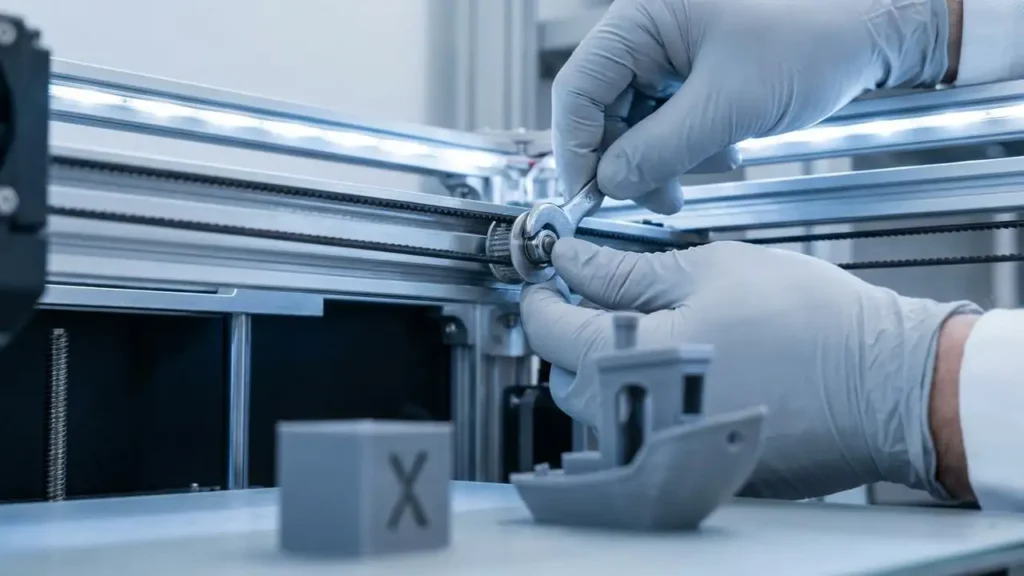
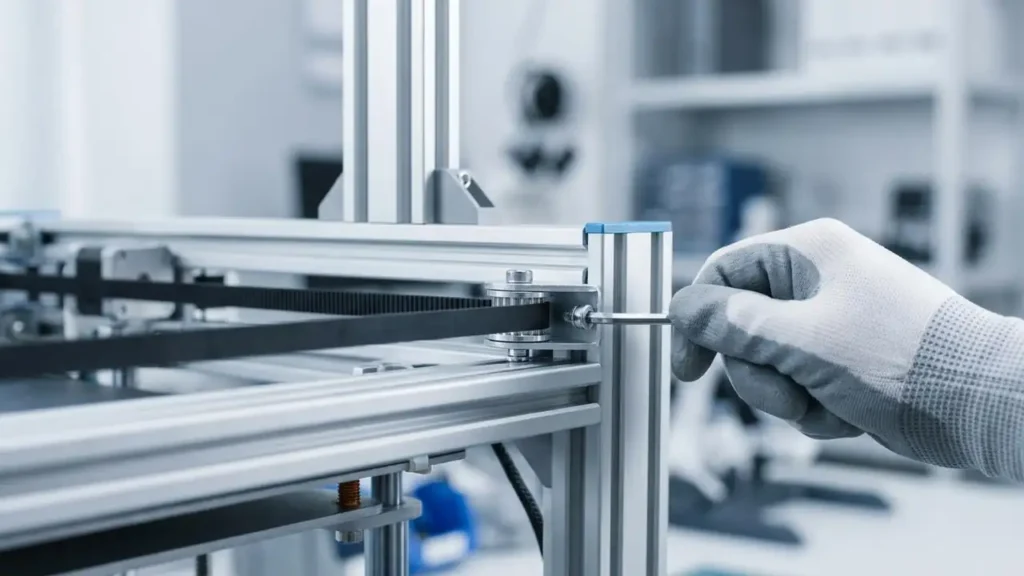
- Tighten Belts: Inspect the X and Y axis belts. They should be taut enough to produce a low bass note when plucked, without being overly tight which can strain motors. Loose belts are a primary cause of ghosting and inconsistent layer placement, directly contributing to a ringing 3D print.
- Check V-Wheels and Bearings: Ensure all V-wheels (or linear rails) are properly adjusted. Eccentric nuts should be tightened just enough so that the gantry moves smoothly with no “wobbling” or flat spots. Excess play in these components allows the print head to vibrate during fast movements.
- Secure Frame and Components: Verify that all frame bolts and screws are tight. Any looseness in the printer’s structure can lead to vibrations transferring throughout the machine. Ensure the hotend assembly itself is securely mounted and not wobbly.
- Stable Printing Surface: Place your 3D printer on a stable, vibration-dampening surface. A heavy slab of concrete or specialized anti-vibration feet can absorb significant movement, preventing the printer from shaking during operation and reducing the likelihood of a ringing 3D print.
Optimizing Slicer Settings for a Flawless Ringing 3D Print
Once mechanical aspects are sound, fine-tuning your slicer settings can significantly impact the presence of a ringing 3D print. Software adjustments directly control how the printer moves and extrudes filament.
- Reduce Print Speed: This is often the simplest and most impactful change. While faster prints are desirable, excessively high speeds can overwhelm your printer’s mechanical capabilities, leading to inertia-induced ringing. Try reducing your overall print speed by 10-20% and observe the change.
- Adjust Acceleration Settings: In your slicer’s advanced settings, find “acceleration” for the X and Y axes. This controls how quickly the printer speeds up and slows down. Lowering these values (e.g., from 3000 mm/s² to 1500-2000 mm/s²) gives the printer more time to reach target speeds, reducing sudden jerks and mitigating ringing 3D print artifacts.
- Modify Jerk Settings: Jerk settings determine the instantaneous change in velocity allowed at corners. High jerk values cause abrupt direction changes, increasing vibrations. Experiment with lowering jerk values (e.g., from 20 mm/s to 5-10 mm/s). Be cautious, as too low a jerk can make movements jerky or uneven.
- Consider Retraction and Temperature: While less directly related to ringing, incorrect retraction settings (e.g., stringing) or high nozzle temperatures (leading to a softer, more prone-to-deform filament) can sometimes exacerbate surface blemishes. Adjusting these can improve overall print quality, especially during detailed benchy troubleshooting.
Addressing Other Common Print Quality Issues
While focused on a ringing 3D print, other common 3D printer problems often emerge during troubleshooting. Addressing these can further refine your print quality.
- Stringing: If thin “hairs” connect parts of your print, increase retraction distance by 0.5-1mm or lower the nozzle temperature by 5-10°C. This prevents oozing filament during travel moves.
- Layer Shifting: If layers are misaligned, beyond tightening belts, ensure stepper motor drivers are properly cooled and not overheating. Overheated drivers can skip steps, causing shifts. Check that pulleys are secured tightly to stepper motor shafts.
- Bed Adhesion & First Layer Issues: If the print doesn’t stick or the first layer is messy, level the bed meticulously. Clean the build surface with 90%+ Isopropyl Alcohol (IPA) for most filaments. For stubborn cases, use adhesion aids like a glue stick or hairspray. Adjusting the bed temperature by 5°C can also improve bonding.
- Clogged Nozzle: For under-extrusion or no filament flow, heat the nozzle to the filament’s max temperature and manually push filament through, or perform a “cold pull.” This clears obstructions and ensures consistent extrusion, which is vital for all 3d printing issues and how to fix them.
Preventive Maintenance for Consistent Quality
Regular maintenance is key to preventing a ringing 3D print and other common 3D printer problems and how to fix them. A proactive approach ensures your printer operates at its best.
- Clear Filament Path: Ensure the filament spool rotates freely without snagging and that the filament path to the extruder is unobstructed. Regularly inspect the extruder gear for accumulated plastic dust, which can cause grinding and under-extrusion.
- Lubricate Moving Parts: Apply a small amount of lithium grease or super lube to lead screws and linear rods if your printer uses them. This reduces friction and promotes smoother motion, minimizing vibrations.
- Regular Bed Leveling: Make it a habit to check your bed level before critical prints, especially for larger objects or if you frequently remove the build plate. This ensures a perfect first layer and reduces stress on the printer during subsequent layers.
- Firmware Updates: Occasionally check for firmware updates for your 3D printer. Manufacturers often release updates that improve motion control, stability, and print quality, which can indirectly help with a ringing 3D print.
Safety and Warranty Note
Always unplug your 3D printer from the power source before performing any mechanical maintenance or disassembling components. Be cautious when working around the heated bed and hot nozzle, as they can cause burns. Avoid touching sensitive electronic components or optics directly. Opening or modifying your printer’s hardware may affect its warranty. If you are unsure about any troubleshooting step or if the problem persists, consider contacting an authorized service center or the manufacturer’s support for assistance.
Common Questions About Ringing 3D Print
By systematically working through these mechanical and software adjustments, you can effectively resolve a ringing 3D print and significantly improve the quality of your 3D printer’s output. Persistence and careful observation are key to achieving smooth, detailed prints. With these tips, you’re well-equipped to tackle this common 3D printing issue and how to fix it.