
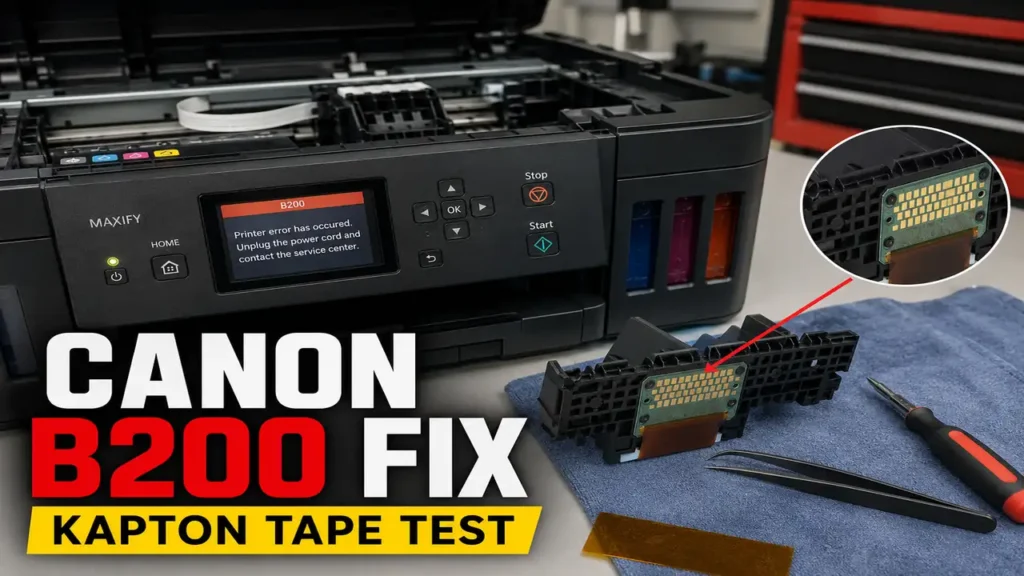
A Canon B200 Error Fix is one of the most complex diagnostic procedures encountered in printer maintenance.
When PIXMA and MAXIFY units halt and display this alphanumeric code (or a 10-flash sequence on the alarm LED), the printer may be detecting an abnormal printhead condition.
This error is often associated with overheating, printhead failure, or a possible electrical short within the printhead circuit.
While official service documentation typically recommends replacing the printhead or contacting an authorized service center, independent technicians often explore diagnostic pin isolation.
By utilizing polyimide tape to physically mask specific voltage pins, it is sometimes possible to isolate the faulty circuit.
This allows you to evaluate if the machine can be restored to basic monochrome functionality.
This technical manual details a hands-on diagnostic approach. It includes the capacitive discharge sequence, mechanical carriage extraction, and the Kapton tape masking method.
Safety Warning and Official Stance: According to Canon, Error B200 requires turning off the printer, unplugging the power cord, and seeking authorized service. The hardware interventions described below will void active manufacturer warranties. This guide is compiled from independent diagnostics and is intended strictly for out-of-warranty educational and troubleshooting purposes. Proceed at your own risk. Always exercise caution when handling internal electronics.
Before You Start: Essential Expectations
To align with best diagnostic practices, please review the following limitations before attempting this procedure:
-
Unofficial workaround: This is a community-reported diagnostic method, not a manufacturer-approved repair.
-
No color printing: If successful, this method does NOT restore color printing. The printer may function as a limited monochrome unit only.
-
Variable success rates: Success is not guaranteed. This method may not work for every printhead model, and it will fail if the printer’s motherboard (logic board) has already sustained secondary electrical damage.
Supported Printer Architectures and Pin Variations
This diagnostic tape method has been commonly reported by repair communities across several FINE printhead systems.
It is crucial to note that pin layouts can vary significantly depending on the specific printhead model (e.g., QY6-0082 vs. QY6-0086).
Identifying the correct voltage array requires careful visual reference.
Community Reported Models
| Printer Series | Notable Models (Community Reported) | Printhead Part Number |
| Canon PIXMA MX Series | MX922, MX722, MX892 | QY6-0082 / QY6-0086 |
| Canon PIXMA MG Series | MG5420, MG5520, MG6320, MG7120 | QY6-0082 / QY6-0083 |
| Canon PIXMA iP Series | iP7220, iP8720 | QY6-0082 |
| Canon MAXIFY Series | MB2020, MB2320, MB5320 | QY6-0087 (Varies by region) |
Diagnosing the Thermal Anomaly
The Canon FINE (Full-photolithography Inkjet Nozzle Engineering) printhead relies on localized thermal resistors.
Liquid ink actively cools these microscopic heating elements during standard operation.
When a cartridge runs severely dry, or if a persistent clog starves the chamber of liquid, the resistors may operate without adequate coolant.
Independent bench analyses of failed printheads suggest that these elements can exceed structural thermal thresholds and degrade.
This degradation can potentially create an unintended electrical bridge between the high-voltage (24V) nozzle power line and the lower-voltage logic lines.
During the Power-On Self-Test (POST), the motherboard detects this voltage anomaly. It then triggers the failsafe to prevent broader electrical damage to the main logic board.
Phase 1: Deep Capacitive Discharge
Before opening the chassis to attempt a Canon B200 Error Fix, it is recommended to rule out a phantom error state.
Transient power grid fluctuations can occasionally trap the NVRAM in a false loop.
-
Power down the printer via the control panel.
-
Disconnect the AC power cord entirely from the wall receptacle.
-
Open the primary top cover.
-
Allow the printer to sit unpowered for at least 60 minutes. This step is crucial to let the heavy electrolytic capacitors in the DC power supply bleed their residual charge.
-
Reconnect the AC power cord directly to a dedicated wall outlet and power on.
If the carriage initializes normally, the error was likely transient. If it locks and triggers the error code again, a physical fault is strongly indicated.
Phase 2: Mechanical Carriage Extraction
The failsafe usually locks the printhead carriage in the right-side capping station.
Forcing the carriage horizontally by hand can damage the drive gears. A manual unlock procedure is often necessary.
The Tactile Unlock Procedure
-
Verify the AC power cord is fully disconnected.
-
Locate the paper-feed roller gear assembly on the far left side of the carriage pathway. This is typically a cluster of white plastic cogs.
-
Apply gentle downward pressure to rotate the primary drive gear counter-clockwise.
-
After 2 to 3 rotations, you should feel a drop in physical resistance as the locking lever retracts.
-
Glide the carriage to the center access position.
-
Remove all ink tanks to prevent them from drying out.
-
Disengage the primary carriage retention lever and extract the printhead vertically.
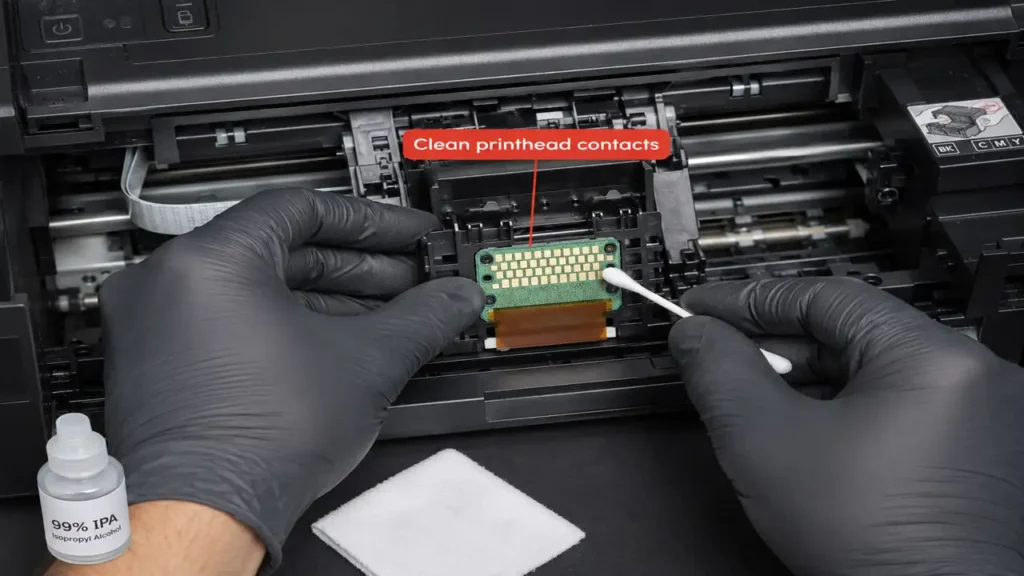
Contact Inspection
Examine the gold contact array on the rear of the printhead. Thermal anomalies can sometimes leave visible oxidation or carbon scoring.
Lightly saturate a lint-free cleanroom swab with 99% Isopropyl Alcohol (IPA).
Gently clean the gold pins to help remove surface oxidation, and allow ample time for complete evaporation.
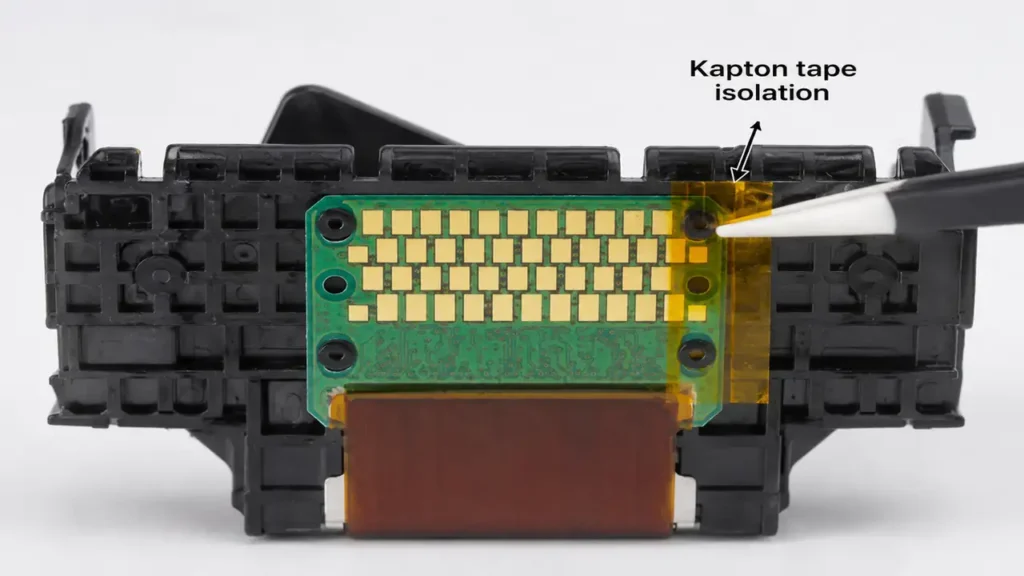
Phase 3: The Kapton Tape Isolation Protocol
In many observed instances, the fault is localized within the Cyan, Magenta, or Yellow resistor banks, while the Pigment Black (PGBK) array remains functional.
To execute this diagnostic, polyimide electrical tape (Kapton tape) is used to physically mask the potentially shorted color pins from the motherboard’s spring-contacts.
-
Cut a precise strip of Kapton tape. The strip typically needs to measure approximately 2mm wide by 10mm long.
(Note: If the tape is too wide, it may cover adjacent logic pins and trigger a U052 error).
-
Hold the printhead with the gold contacts facing you.
-
On common QY6-0082 printheads, locate the top two horizontal rows of pins on the far right side of the contact board. These pins generally manage the voltage supply to the color thermal resistors.
-
Apply the tape strip directly over these specific pins.
-
Compress the tape flat using a non-conductive tool. Ensure firm adhesion; lifted edges can catch on the motherboard pins, risking damage to the carriage socket.
-
Seat the modified printhead, engage the lever, reinstall the cartridges, and power on.
Phase 4: Operating System Driver Reconfiguration
If the printer boots to the operational home screen, the diagnostic isolation was successful.
Because the color nozzles are physically masked, the printer may function as a limited monochrome unit.
To prevent the print spooler from attempting to utilize the isolated color nozzles, you should reconfigure your operating system’s printing preferences. This prevents blank horizontal banding on the page.
Windows Reconfiguration
-
Navigate to Settings > Devices > Printers & scanners.
-
Select your Canon printer, click Manage, then Printing preferences.
-
Under the Main tab, locate the Color/Intensity section.
-
Check the box for Grayscale Printing.
-
Click Apply and OK.
macOS (CUPS) Reconfiguration
-
Select File > Print (Command+P) in any document.
-
Click Show Details to expand the print dialogue.
-
Select Quality & Media from the dropdown menu.
-
Check the box for Grayscale Printing.
-
Save this configuration as a new Preset (e.g., “Monochrome Isolation”) and use it for future jobs.