
A fuser error HP p2015 triggers a hard system halt, typically indicated by a “Fatal Error” light sequence on the physical control panel (all LEDs illuminated solid). Because the HP LaserJet P2015 lacks an LCD screen, users often blindly replace the entire fuser unit. However, if you query the HP Toolbox utility or print an event log, this fatal error breaks down into specific sub-codes: 60 (Open Heat), 62 (Low Heat), or 68 (Overheat).
Replacing the RM1-4247 (110V) or RM1-4248 (220V) assembly without diagnosing the underlying electrical fault is a waste of resources. A runaway triac on the DC controller will instantly destroy a brand-new fuser, while a simple dirty thermistor can trigger a false failure.
This technical diagnostic manual provides the exact multimeter testing protocols and teardown procedures to safely isolate and resolve the thermal failure at the component level.
Decoding the Fuser Error HP P2015 Event Log
The internal formatter board continuously monitors the thermal state of the ceramic heating element via a contact thermistor. When the expected voltage drop across the thermistor does not match the target heating curve (reaching ~180°C within a specific timeframe), the firmware cuts power to prevent a fire hazard.
Before disassembling the chassis, connect the printer via USB, open the HP Toolbox FX software, and check the status alerts to identify the exact sub-code triggering the lock-out.
Safety and Chassis Extraction Protocol
The fixing assembly operates at temperatures exceeding 200°C (392°F) and utilizes mains AC voltage (110V/220V).
-
Disconnect the AC power cord entirely. Do not rely on the front power switch.
-
Allow a mandatory 30-minute thermal dissipation period.
-
Remove the rear output bin by flexing the plastic hinges inward.
-
Remove the left and right side covers (secured by clips at the bottom and rear).
-
Disconnect the three primary wire harnesses routing from the fuser to the DC Controller board: The thick AC power cables (usually white/black) and the thin DC thermistor sensor cables.
-
Remove the three retaining screws securing the chassis, and pull the unit straight out.
With the assembly extracted, proceed to the specific diagnostic phase based on your sub-code.
Phase 1: Resolving Code 62 (Low Heat / Sub-Temperature)
When diagnosing a fuser error HP p2015 logging code 62, the formatter board detects that the ceramic heater is drawing power, but the surface temperature of the fixing film sleeve is climbing too slowly.
Thermistor Surface Contamination
The most frequent cause of a false Code 62 is baked-on toner isolating the thermistor. The thermistor sits directly against the inner circumference of the fixing film sleeve.
-
The Fix: Carefully peel back the film sleeve. Locate the small, pill-shaped thermistor sensor. If it is coated in a hard black crust, it is insulated from the heat. Use a lint-free swab saturated in 99% Isopropyl Alcohol to gently dissolve the carbonized toner. Do not scratch the Kapton tape covering the sensor.
Thermal Grease Degradation
Between the ceramic heating element and the film sleeve is a layer of high-temperature thermal grease. Over years of operation, this grease dries into a chalky powder, increasing physical friction and thermal resistance.
-
The Fix: Clean the old residue using alcohol and apply a fresh, 1-gram bead of specialized HP Fuser Grease (CK-0551 or equivalent). Standard PC thermal paste will vaporize and cause immediate failure.
Phase 2: Resolving Code 60 (Open Heat / Circuit Break)
The most common iteration of an open fuser error HP p2015 is Code 60. This explicitly means the physical circuit supplying AC voltage to the ceramic heater is broken. The firmware detects zero current draw.
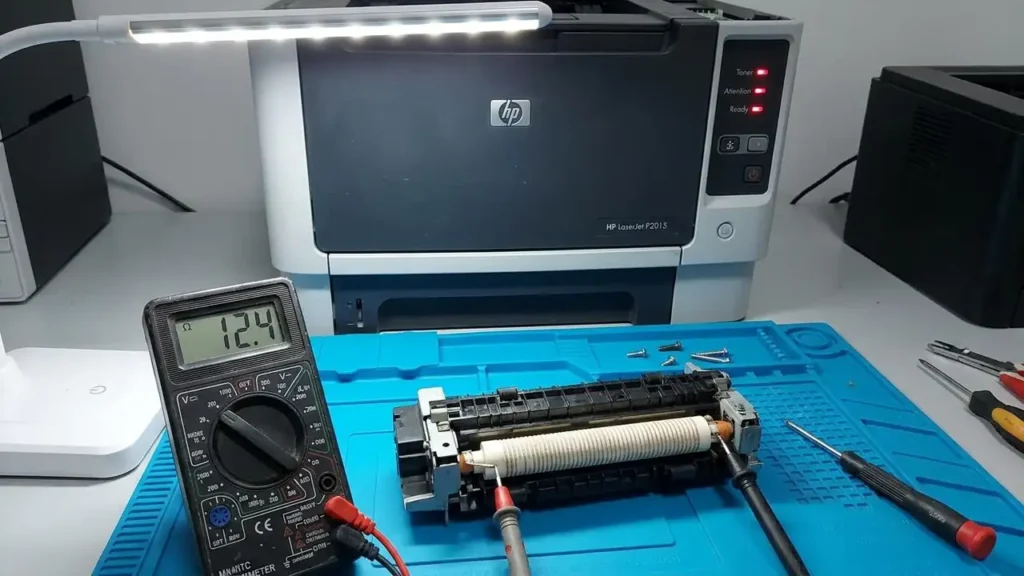
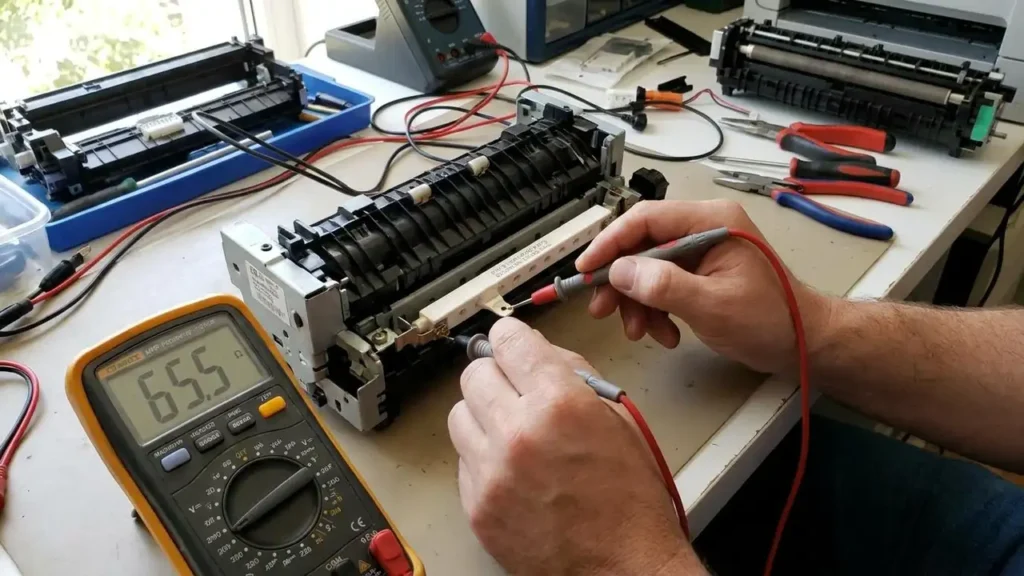
To diagnose this, you must use a digital multimeter set to measure resistance (Ohms/Ω).
1. Testing the Ceramic Heating Element
Locate the two thick wires (AC In) connected to the ceramic bar. Place one multimeter probe on each terminal.
-
110V Models (RM1-4247): A healthy ceramic heater should measure between 50 Ohms and 80 Ohms.
-
220V Models (RM1-4248): A healthy ceramic heater should measure between 110 Ohms and 140 Ohms.
-
The Verdict: If your multimeter reads “OL” (Open Loop) or infinite resistance, the ceramic trace is cracked. The heating element is destroyed and must be replaced.
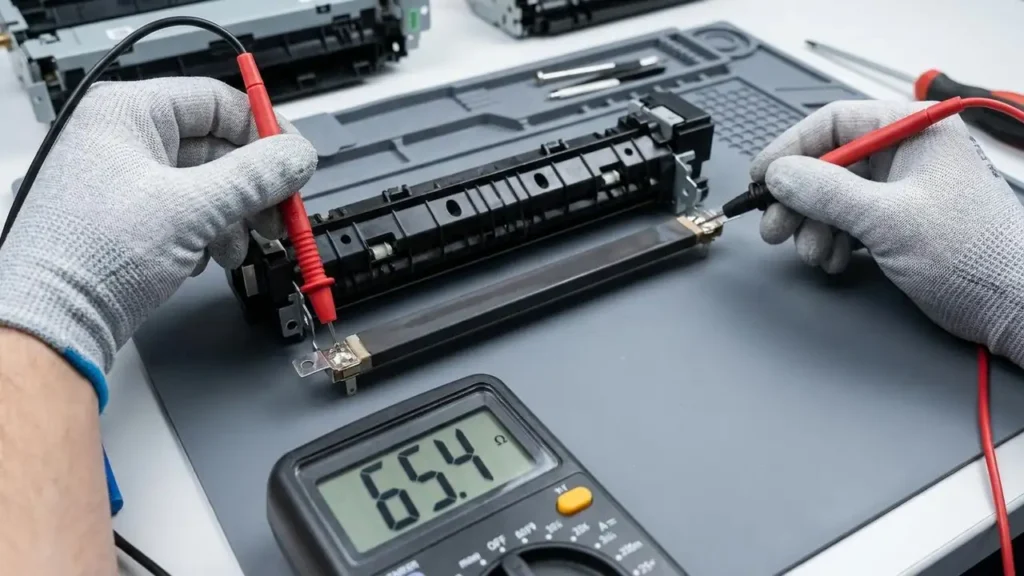
2. Testing the Thermal Switch (Safety Thermostat)
Wired in series with the AC power is a thermal switch (thermostat). This is a fail-safe device designed to pop open permanently if the temperature exceeds 220°C, severing power to prevent plastic ignition.
-
The Test: Place your probes on the two metal tabs of the thermal switch. It should read near 0 Ohms (Continuity) at room temperature.
-
The Verdict: If it reads “OL”, the switch has tripped. While some technicians attempt a “cold-shot” drop-test to reset it, a tripped switch indicates a prior overheat event. Replacing the thermal switch is mandatory for fire safety.
Phase 3: Resolving Code 68 (Overheat / Runaway Temperature)
A runaway fuser error HP p2015 indicating code 68 is the most dangerous state. The thermistor is reporting temperatures exceeding operational thresholds, prompting an emergency shutdown.
The DC Controller Triac Short
If you experience a Code 68, do not install a new fuser immediately. AC power to the heating element is toggled on and off rapidly by a Triac (a solid-state AC switch) located on the Engine Control Board (DC Controller). If a power surge causes this Triac to short-circuit, it fails in the “Closed” (Always On) position.
-
The Consequence: The moment you turn the printer on, the heater receives continuous, unregulated mains voltage. Within 10 seconds, it will melt the film sleeve and permanently blow the thermal switch.
-
The Diagnosis: If a replacement assembly instantly triggers a Code 68 or emits smoke upon boot, the DC Controller board is sending runaway voltage and must be replaced at the motherboard level.
Physical Print Quality Anomalies: The 82-92mm Rule
Sometimes the fixing assembly operates electronically but fails mechanically, degrading print quality before triggering a hard halt. It is crucial to differentiate between a sleeve tear and a fuser error HP p2015.
If you observe repeating ghosting patterns, toner smudging, or physical indents on the paper, measure the distance between the repeating defects using a metric ruler.
-
~82 mm Repetitive Defect: This circumference measurement points directly to the lower pressure roller. Look for physical flat spots, delamination of the orange rubber, or melted toner stuck to the roller surface.
-
~92 mm Repetitive Defect: This circumference matches the upper fixing film sleeve. Inspect the edge of the sleeve for tearing or missing teflon coating.
If these mechanical defects are present, you do not need to diagnose the electronics; the physical rollers require replacement.