
An HP LaserJet M1522nf fix crash scenario, characterized by the printer freezing infinitely on the “Initializing…” screen or experiencing continuous reboot loops, is rarely a simple firmware glitch. This specific mechanical lockout stems directly from the thermal degradation of the main ASIC’s BGA (Ball Grid Array) solder joints located on the formatter board.
Many outdated guides suggest placing your motherboard in a kitchen oven to “bake” the solder back into place. This is a destructive myth that melts plastic connectors and ruptures electrolytic capacitors. This technical diagnostic manual outlines the exact hardware protocols, physical BGA pressure tests, and NVRAM resets required to bypass the boot-loop permanently, without destroying your hardware.
Decoding the Infinite “Initializing…” Loop
To understand why the device hangs, you must understand the boot sequence of the HP M1522nf. When you power on the machine, the formatter board executes a three-phase POST (Power-On Self Test):
-
Phase 1 (ROM Execution): The basic input/output system checks for valid firmware.
-
Phase 2 (RAM & ASIC Initialization): The main processor attempts to read the internal memory and establish a communication bus.
-
Phase 3 (Engine Handshake): The formatter commands the laser scanner motor to spin up and tests the fuser thermistor.
An HP LaserJet M1522nf fix crash occurs exactly at Phase 2. The main processor attempts to send data to the RAM, but microscopic fractures in the solder balls beneath the processor physically sever the data lines. The firmware waits infinitely for a response that never arrives, leaving the screen stuck on “Initializing…”.
The Root Cause: RoHS Compliance and Thermal Fatigue
Why does this specific HP model fail so frequently? The answer lies in metallurgy. Around the time of manufacturing, the RoHS (Restriction of Hazardous Substances) directive forced electronics manufacturers to switch from traditional lead-based solder to lead-free alternatives (typically Tin-Silver-Copper or SAC alloys).
Lead-free solder is highly brittle. The main ASIC processor on the M1522nf runs exceptionally hot. During daily operation, the chip expands. When powered off, it contracts. After thousands of these thermal cycles, the brittle SAC solder balls beneath the chip crack. You cannot see these micro-fractures with the naked eye, but they completely disrupt the digital signal.
Phase 1: The BGA Physical Pressure Test
Before attempting software resets or component replacement, you must confirm if solder fatigue is the root cause. Technicians use the “Pressure Test” to temporarily bridge the broken solder joints.
-
Unplug the AC power cord entirely.
-
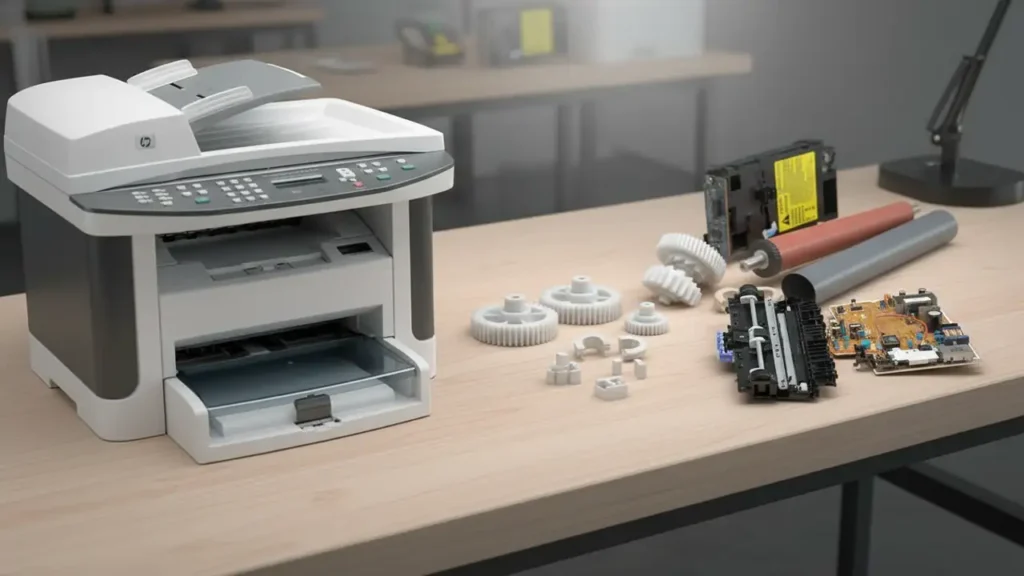
Remove the left-side plastic cover of the printer to expose the formatter board (the large green PCB with USB and Ethernet ports).
-
Locate the largest chip on the board; it usually has a small, square aluminum heatsink glued to it.
-
Place your thumb directly on the center of this heatsink. Apply firm, sustained downward pressure toward the board.
-
While maintaining this heavy pressure, plug in the AC power and turn the machine on.
The Verdict: If the printer bypasses “Initializing…” and reaches the “Ready” state while you are applying pressure, you have positively identified cracked BGA solder joints. Software updates will not fix this; you require a physical hardware intervention.
Phase 2: NVRAM and Super NVRAM Resets
If the pressure test fails to change the boot behavior, the formatter hardware might be intact, but the NVRAM (Non-Volatile Random Access Memory) is corrupted. A corrupted boot sector will simulate an HP LaserJet M1522nf fix crash perfectly. You must purge the memory.
The Standard NVRAM Initialization
This clears standard user configurations and network IP settings.
-
Turn the printer off.
-
Press and hold the Down Arrow and Cancel (X) buttons simultaneously.
-
Turn the printer on while keeping the buttons depressed.
-
Wait until the display reads “Permanent Storage Init” before releasing the buttons.
The Super NVRAM Reset (Hard Purge)
If the standard reset fails, you must execute a low-level format of the language and firmware partition.
-
Turn the printer off.
-
Press and hold the Left Arrow and Setup (Wrench icon) buttons simultaneously.
-
Turn the power on.
-
Hold the buttons until the screen goes blank or displays a low-level initialization message.
If the printer still hangs on the HP logo after a Super NVRAM reset, the formatter board is categorically defective.
Phase 3: SMD Reflow Rework (The Professional Protocol)
If you confirmed solder fractures via the physical pressure test, you have two options: replace the board or reflow the solder. Do not use an oven or a hardware store heat gun. A professional HP LaserJet M1522nf fix crash protocol requires a targeted Hot Air SMD Rework Station.
-
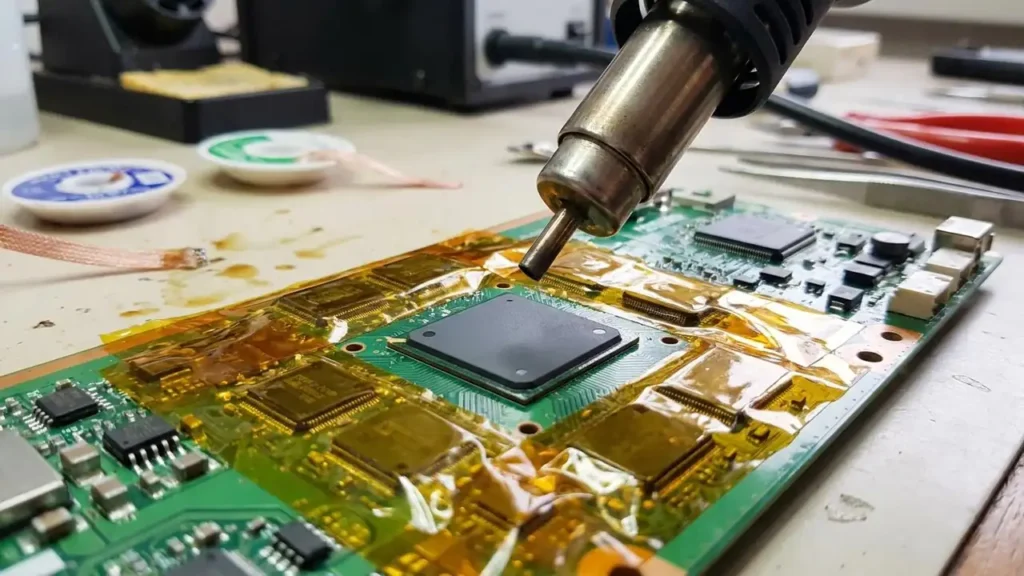
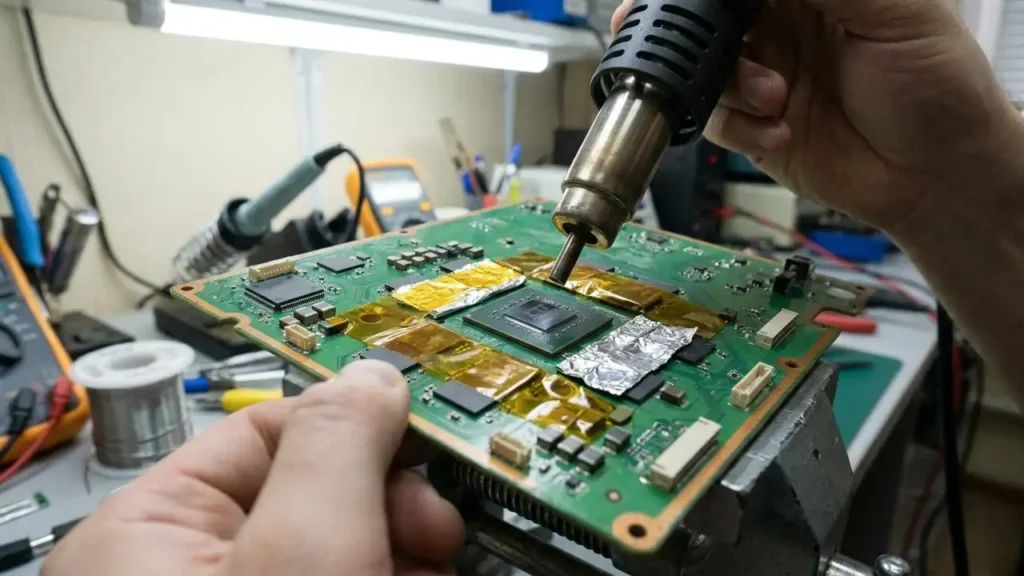
Board Extraction: Remove the formatter board completely from the chassis. Remove the CMOS battery to prevent explosion.
-
Thermal Shielding: Wrap the areas surrounding the main processor with Kapton tape (polyimide) and aluminum foil to protect adjacent plastic connectors and SMD capacitors from melting.
-
Flux Injection: Use a syringe to inject high-quality liquid, no-clean rosin flux (like Amtech NC-559) directly under the edges of the processor. Capillary action will pull it beneath the chip.
-
Targeted Reflow: Set the hot air station to 220°C (428°F) with a medium airflow. Keep the nozzle exactly one inch above the chip. Move in steady circles for exactly 90 to 120 seconds.
-
The Melt Phase: The flux will boil, cleaning the oxidation off the cracked solder. The solder will briefly reach a liquidus state, fusing the micro-fractures back together.
-
Cooling: Do not touch or move the board. Allow it to cool at room temperature for 30 minutes. Moving the board while the solder is molten will instantly destroy it.
Formatter Board Replacement Matrix
If reflowing the board is beyond your technical capability, replacing the formatter is the only durable solution. When sourcing a replacement, you must match the exact part numbers, as the base M1522 and the network-enabled M1522nf utilize different firmware architectures.
| Printer Model | Network Port (RJ45) | Fax Capability | Official Formatter Part Number |
| HP LaserJet M1522n | Yes | No | CC436-60001 |
| HP LaserJet M1522nf | Yes | Yes | CB534-60001 |
Warning: Purchasing a “refurbished” formatter from untrusted marketplace sellers is risky. Many vendors simply use the kitchen oven method to temporarily revive dead boards, which will fail again within 30 days. Always verify that the supplier uses professional re-balling techniques or offers a minimum 6-month warranty.