

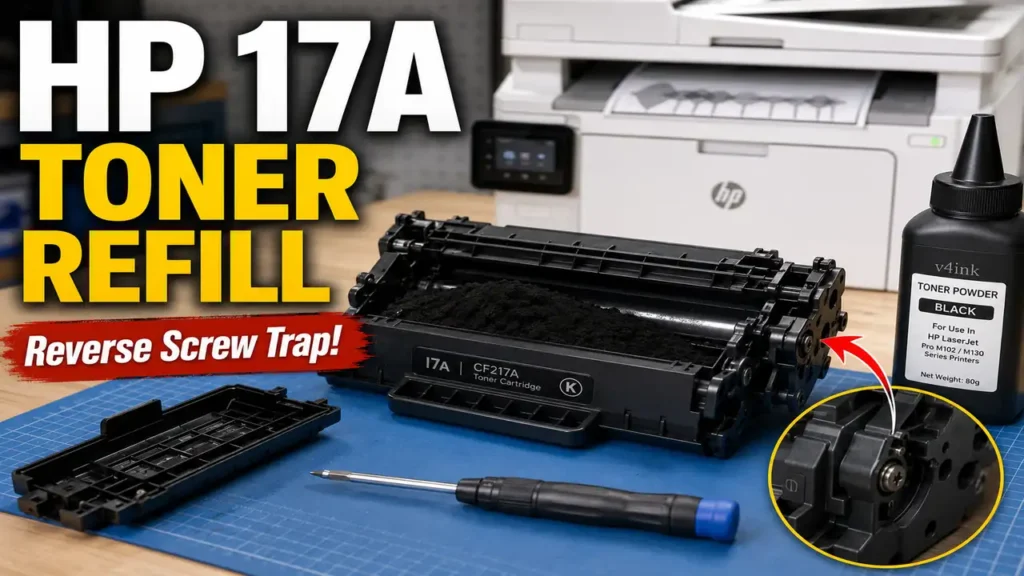
How to refill hp 17a toner cartridge safely depends entirely on your knowledge of a hidden mechanical trap: the reverse-threaded doctor blade screw. Standard teardown procedures will instantly destroy the CF217A plastic chassis. If you turn the right-side screw counter-clockwise to loosen it, you will strip the mounting post, rendering the cartridge permanently useless.
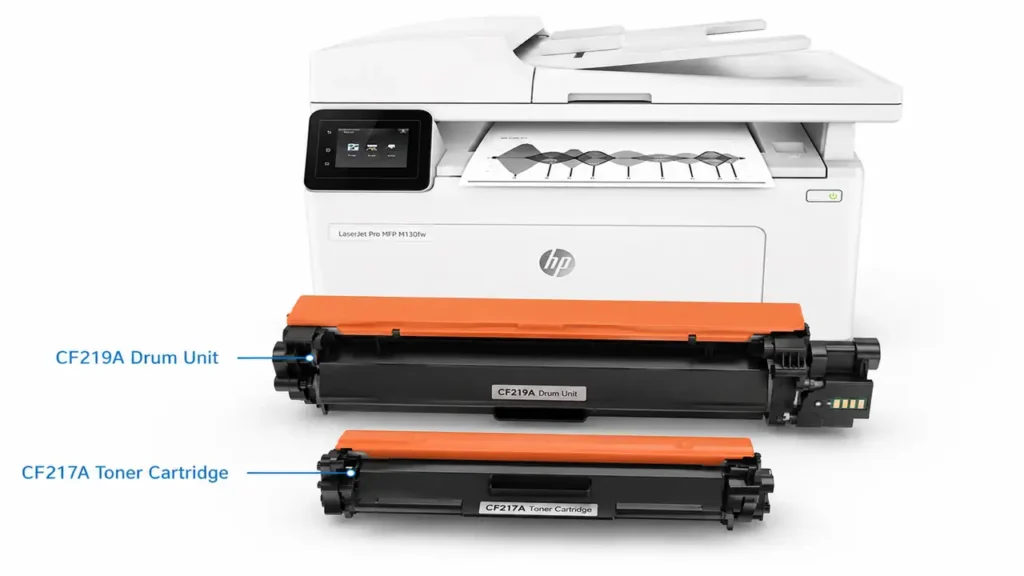
The HP LaserJet Pro M102 and M130 series utilize a dual-component architecture, separating the developer unit (CF217A toner) from the Organic Photo Conductor (CF219A drum). This split design makes refilling highly economical, provided you understand the mechanical tolerances and the chemical requirements of the toner powder.
This technical teardown manual details the exact 5-minute physical disassembly protocol, the chemical cleaning process for the magnetic roller, and the network-level bypass required to clear the cryptographic chip locks.
The Dual-Component Architecture Explained
Unlike legacy HP all-in-one cartridges, the CF217A contains no waste bin and no OPC drum. It is strictly a hopper, a developer roller (magnetic sleeve), and a metering mechanism (doctor blade).
Because the CF219A drum unit remains inside the printer, the toner formulation used in the 17A is highly specialized. It relies on precise triboelectric charging (static electricity friction) generated between the magnetic sleeve and the doctor blade. Mixing OEM toner with cheap aftermarket powder alters this static charge ratio, resulting in severe gray backgrounding. Total evacuation of the hopper is mandatory before refilling.
Phase 1: Tool Calibration and Safe Extraction
To execute a flawless refill without inducing micro-leaks, you must prepare a static-free workspace and gather precision tools. Do not use standard cotton swabs; they shed microscopic fibers that will snag on the doctor blade, causing permanent vertical print voids.
-
Precision Phillips Screwdriver (#1)
-
Flat Plastic Spudger (Nylon pry tool)
-
99% Isopropyl Alcohol (IPA) and Lint-Free Polyurethane Swabs
-
50 Grams of M102-Specific Chemical Toner Powder
-
Replacement EEPROM Chip (CF217A specific)
Power down the printer, extract the CF217A cartridge, and place it on a flat surface covered with disposable paper. Do not expose the internal components to direct sunlight, as UV radiation can warp the polyurethane seals.
Phase 2: The End Cap and Magnetic Roller Isolation
The right side of the cartridge (the side with the drive gears) houses the primary retention mechanism.
-
Locate the two Phillips screws securing the right-side end cap. Remove them using standard counter-clockwise rotation.
-
Insert your nylon spudger under the bottom tab of the end cap. Gently pry upward. Do not apply lateral force, or you will snap the internal alignment pins.
-
Slide the end cap straight off the gear shaft.
-
Carefully lift the magnetic roller assembly out of the cradle. Hold it by the metal shafts only. Do not touch the black coated sleeve with bare fingers; human skin oils will create “dead spots” that repel toner during printing. Set the roller aside in a dust-free area.
Phase 3: The Left-Hand Thread Trap (Crucial Step)
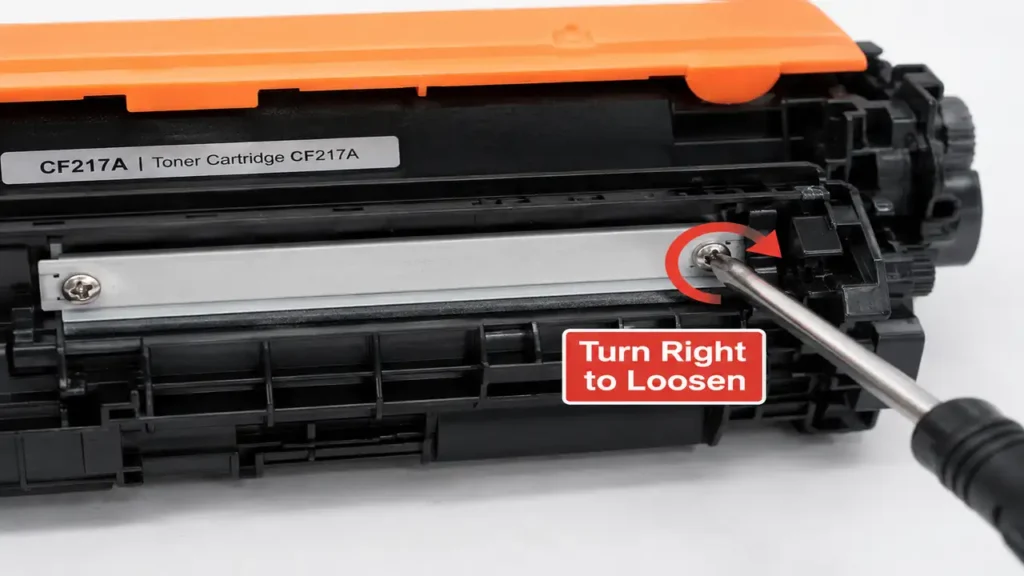
With the magnetic roller removed, the metal doctor blade is exposed. It is secured by two screws. This is where 90% of DIY refillers destroy their cartridges.
The left screw is a standard thread. The right screw is a left-hand (reverse) thread. Why did HP engineer it this way? The magnetic roller spins continuously against the doctor blade during printing. This rotational torque would naturally back out a standard screw over time. A reverse thread ensures that the friction from the roller continuously tightens the screw.
-
To remove the LEFT screw: Turn your screwdriver Counter-Clockwise (Standard).
-
To remove the RIGHT screw: Turn your screwdriver Clockwise (Reverse).
Once both screws are removed, lift the metal doctor blade straight up. Be careful not to tear the thin blue polyurethane sealing gasket located beneath the blade.
Phase 4: Hopper Evacuation and Chemical Cleaning
Never pour new toner directly over old toner. The differing melt points and static charge profiles will cause massive print defects.
-
Invert the cartridge over a waste bag and tap the plastic shell to evacuate all residual toner.
-
Use low-pressure compressed air to blow out the corners of the hopper. Warning: Keep the air nozzle at least 6 inches away from the blue sealing gasket to avoid blowing it out of its adhesive track.
-
Dampen a polyurethane swab with 99% IPA. Lightly wipe the metering edge of the metal doctor blade to remove caked-on carbonized toner.
-
Wipe the magnetic roller sleeve. Rotate it by the gears to ensure a 360-degree clean. Wait exactly 60 seconds for the alcohol to flash-evaporate entirely.
Phase 5: Payload Delivery and Precision Reassembly
The CF217A standard yield cartridge requires exactly 45 to 50 grams of toner powder to achieve the rated 1,600 pages.
-
Shake your bottle of M102-specific toner vigorously for 10 seconds to aerate the powder.
-
Pour the powder evenly across the length of the supply chamber. Do not overfill. Compacting toner into the hopper will jam the internal agitator paddles and snap the drive gears inside the printer.
-
Reinstall the doctor blade. Remember the threading rules: tighten the left screw clockwise, and tighten the right screw counter-clockwise.
-
Reseat the magnetic roller. The D-shaped magnetic shaft inside the roller must align perfectly with the D-shaped slot on the left side of the cartridge housing.
-
Snap the right-side end cap back into place and secure its two standard screws. Manually rotate the magnetic roller gear one full turn toward the doctor blade to ensure smooth mechanical operation.
Phase 6: EEPROM Chip Replacement and Network Bypass
The CF217A utilizes a 2-contact EEPROM cryptographic chip. Once the printer writes a “depleted” code to this chip, it cannot be electronically reset. You must physically replace it.
Using a precision flathead screwdriver, push the small plastic retaining tab down and slide the old chip out of its rail. Slide the new chip in, ensuring the gold contacts face outward and upward.
Disabling HP Cartridge Protection via EWS
Even with a new chip, modern HP firmware may block refilled cartridges if “Cartridge Protection” was previously enabled on your network. You must disable this lock via the Embedded Web Server (EWS).
-
Print a Network Configuration Page from the printer’s control panel to obtain its IP Address.
-
Type the IP Address into a desktop web browser.
-
Navigate to the System tab, then select Supply Settings.
-
Locate the Cartridge Policy dropdown and set it to Off.
-
Locate the Cartridge Protection dropdown and set it to Off.
-
Click Apply and restart the printer. Your refilled 17A is now ready for production.
Diagnostic Troubleshooting Matrix
If your first prints exhibit anomalies, reference this physical defect matrix to isolate the mechanical failure point made during reassembly.
| Print Defect | Root Cause | Necessary Intervention |
| Heavy Gray Background | Toner overfill or mixed OEM/Aftermarket powder charge clash. | Evacuate hopper entirely. Refill with only 45g of verified powder. |
| Perfectly Vertical White Lines | Microscopic debris (hair/fiber) wedged under the doctor blade. | Remove doctor blade. Wipe the metering edge with 99% IPA. |
| Squeaking Noise During Print | Right-side end cap is misaligned, causing gear binding. | Remove end cap. Re-seat the D-shaped shaft and snap cap firmly. |
| Faded Print on One Edge | Doctor blade is seated unevenly. | Loosen both screws. Press blade flat against the gasket, then re-tighten. |