

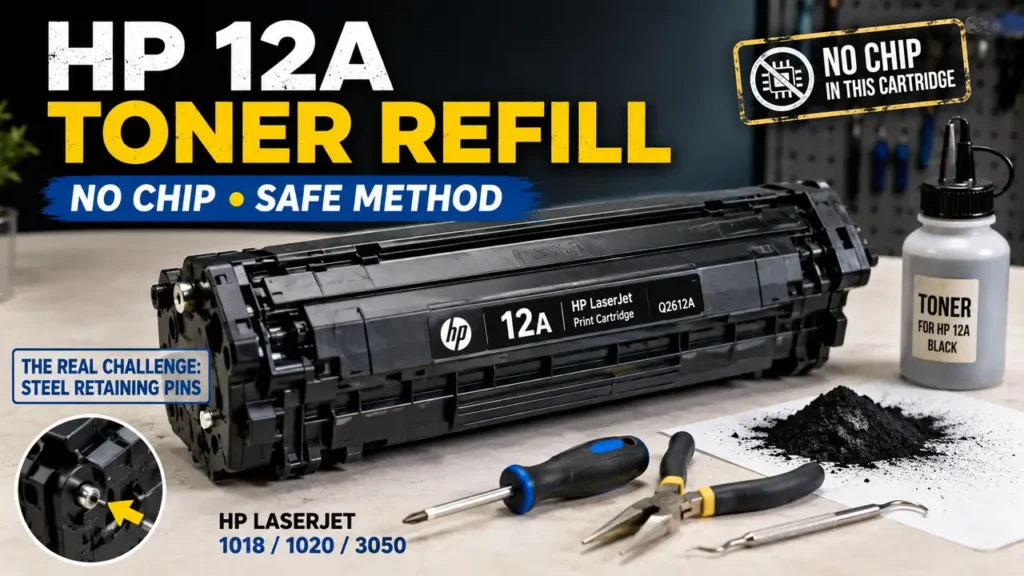
How to refill toner cartridge hp 12a is a process surrounded by catastrophic DIY mistakes and widespread internet misinformation. The most glaring myth found in generic guides is the instruction to “replace the EEPROM tracking chip.” The truth is absolute: The HP Q2612A (12A) is a purely mechanical, analog cartridge. It does not possess a smart chip. The true challenge of servicing this legendary cartridge—compatible with the HP LaserJet 1018, 1020, and 3050 series—lies in its dual-chassis architecture. The two halves of the cartridge are locked together by embedded steel retaining pins. Attempting to hammer these pins inward will shatter the plastic shell, permanently destroying the unit.
This technical engineering manual outlines the precise “inside-out” pin extraction protocol, the chemical decontamination of the Primary Charge Roller (PCR), and the exact 110-gram monocomponent toner payload required to achieve factory-grade 600 DPI text without gray backgrounding.
The Q2612A Dual-Chassis Architecture
Before learning exactly how to refill toner cartridge hp 12a, you must understand its mechanical anatomy. Unlike modern separated systems, the 12A is an “All-In-One” (AIO) consumable. It is split into two distinct operational halves:
-
The Waste Hopper (Drum Section): Houses the Organic Photo Conductor (OPC) drum, the PCR, the wiper blade, and the waste toner bin.
-
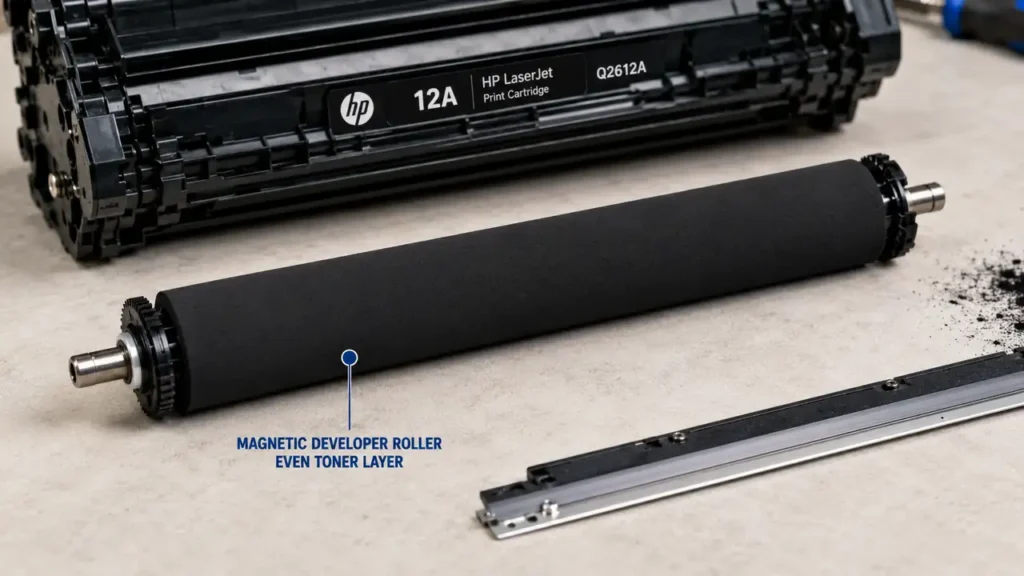
The Supply Hopper (Toner Section): Houses the magnetic developer roller, the doctor blade, and the fresh toner payload.
These two sections are hinged together and secured by two 10mm steel pins located on the left and right outer flanks. You cannot access the supply hopper without safely splitting the cartridge in half.
Phase 1: Tool Calibration and The Pin Extraction Trap
To execute this teardown without inducing micro-fractures in the styrene plastic casing, you must discard standard household tools.
-
Curved Awl (or 90-degree pick tool)
-
Precision Needle-Nose Pliers
-
#1 Phillips Screwdriver
-
Zinc Stearate Powder (Drum Padding Powder)
-
110 Grams of Dedicated Q2612A Magnetic Toner
-
99% Isopropyl Alcohol (IPA) & Distilled Water
The Inside-Out Extraction Protocol
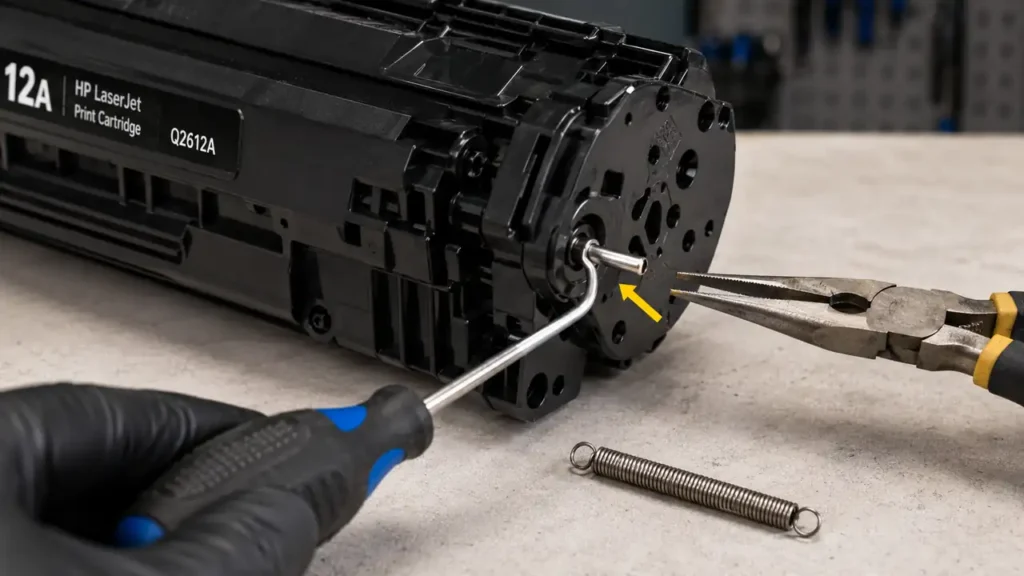
If you look at the outer sides of the cartridge, you will see the silver heads of the steel pins recessed into the plastic. Do not drill them. Do not hammer them inward.
-
Open the spring-loaded OPC drum shutter door and hold it open.
-
Look deep into the gap between the drum and the plastic shell. You will see the inner tips of the steel retaining pins.
-
Insert your curved awl into this gap, position the tip against the inside of the pin, and push outward.
-
Once the pin protrudes 2mm from the outside of the shell, grab it with your needle-nose pliers and pull it completely out. Repeat for the opposite side.
-
Disconnect the small tension spring connecting the two halves.
-
Gently pull the two halves apart. You have successfully split the chassis.
Phase 2: Waste Decontamination and OPC Physics
The waste section is responsible for 90% of print defects. If you simply refill the supply hopper and ignore the waste bin, the excess toner will overflow onto the transfer belt, destroying your printouts.
-
Drum Removal: Remove the single Phillips screw securing the drum axle plate on the gear side. Slide the OPC drum out. Keep it covered; the blue/green coating is destroyed by UV light exposure.
-
PCR Extraction: Lift the black rubber Primary Charge Roller out of its white saddles.
-
The Wiper Blade: Remove the two screws holding the metal wiper blade. Dump the accumulated waste toner from the bin below it into a sealed bag. Vacuum the chamber using a specialized HEPA toner vacuum (standard vacuums will explode from static ignition).
The PCR Chemical Warning
Never clean the black rubber PCR with 99% Isopropyl Alcohol. The PCR regulates the exact AC/DC voltage required to charge the OPC drum. Alcohol strips its specialized conductive coating, resulting in severe gray backgrounding. Clean the PCR exclusively with distilled water and a lint-free foam swab. Let it air dry.
The Wiper Blade Flip Prevention
Before reinstalling the OPC drum, you must lubricate the rubber edge of the wiper blade. If installed dry, the high friction will cause the blade to fold backward (flip) upon the first rotation, jamming the printer engine. Dust the OPC drum lightly with Zinc Stearate (padding powder) before sliding it back into place.
Phase 3: The Supply Hopper Teardown
Now, turn your attention to the second half of the cartridge to continue the process of how to refill toner cartridge hp 12a.
-
Remove the two Phillips screws on the right-side end cap (the non-gear side). Remove the cap.
-
Carefully slide the magnetic developer roller out of its housing. Note the small plastic alignment bushings on both ends; if you lose these, the roller will grind against the chassis.
-
The metal doctor blade is now exposed. Remove its two screws and lift it out.
-
Clean the doctor blade’s metering edge with 99% IPA to remove crystallized carbon deposits.
Phase 4: Payload Injection and Reassembly
The Q2612A mechanism is specifically calibrated for Styrene Acrylate copolymer toner laced with iron oxide. Using generic, non-magnetic powder will result in blank pages, as the magnetic roller cannot attract the toner particles.
-
Shake your bottle of 12A-specific toner vigorously to aerate the powder.
-
The standard yield (2,000 pages) requires exactly 110 grams of toner. Pouring more than 110g will compress the agitator paddle, causing the drive gears to snap.
-
Reinstall the doctor blade perfectly flat.
-
Wipe the magnetic roller sleeve with a dry cloth (no liquids) and reinstall it, ensuring the D-shaped magnetic core locks into its keyed slot.
-
Secure the end cap. Spin the magnetic roller gear by hand. You should see a perfectly even, velvet-like layer of toner on the magnetic sleeve. If you see bald spots or thick ridges, the doctor blade is seated incorrectly.
Phase 5: Mating the Halves
To complete the core protocol of how to refill toner cartridge hp 12a, you must reunite the chassis.
-
Align the waste hopper and the supply hopper.
-
Ensure the tension springs on both ends are seated in their designated plastic channels.
-
Compress the halves together tightly.
-
Insert the two steel retaining pins from the outside and push them in until they are perfectly flush with the plastic shell.
-
Reattach the drum shutter door spring.
Manually rotate the OPC drum gear counter-clockwise for three full rotations. The movement should be smooth, with no clicking or harsh resistance.
The Defect Circumference Matrix
If your post-refill test print exhibits anomalies, use a metric ruler to measure the distance between the repeating defects. Every roller inside the Q2612A has a specific circumference, allowing you to pinpoint the exact component failure without guessing.
| Circumference / Distance | Component at Fault | Root Cause Diagnosis |
| ~75 mm (2.9 inches) | OPC Drum | Light scratch on the drum coating, or UV light damage. Replace OPC. |
| ~43 mm (1.7 inches) | Magnetic Roller | Dent in the aluminum sleeve or bad ground contact. Replace Mag Sleeve. |
| ~38 mm (1.5 inches) | PCR (Charge Roller) | Chemical damage from alcohol, or lack of conductive grease on saddles. |
| Perfectly Vertical Lines | Doctor Blade | Micro-debris stuck under the blade edge. Teardown and wipe blade. |