
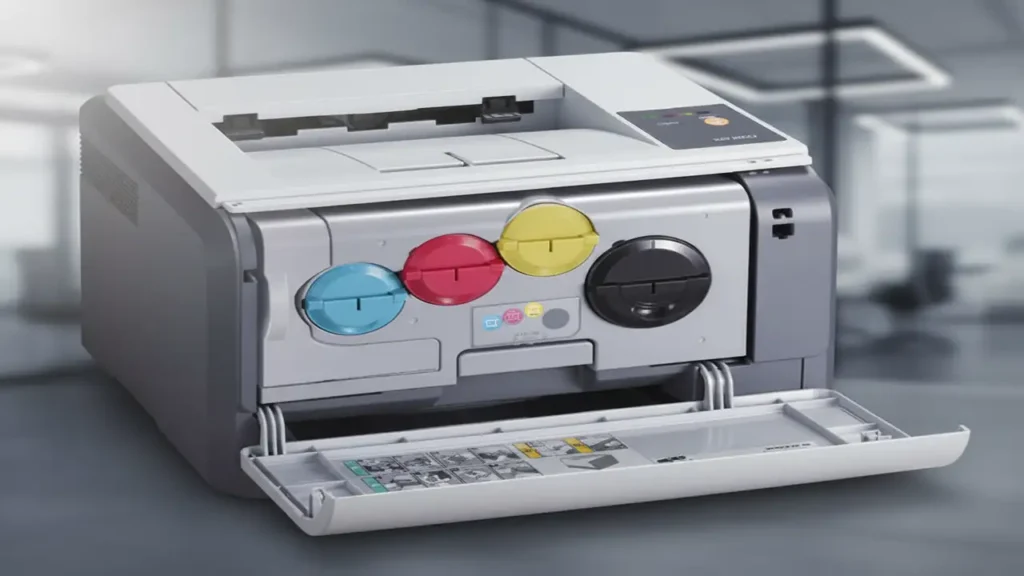
Reset Samsung CLP 300 chip toner — know the EEPROM and the safe way to proceed
Reset Samsung CLP 300 chip toner is about understanding that each CLP-300 color cartridge (K/C/M/Y) carries a tiny EEPROM the printer updates as you print. That memory (commonly AT34C02 / 24C02-class, I²C protocol) stores page counts and a simple serial number. When the stored budget is reached, the printer treats the cartridge as “empty” even if you’ve just refilled the toner. This guide explains how the chip works, what tools are used to read/backup/edit its contents, and the safest sequence to follow—plus the limits (burnt/locked chips), and when to choose a replacement chip instead.
What this chip is (and isn’t)
Type & protocol: AT34C02-family (roughly equivalent to 24C02), 2-Kbit I²C EEPROM. Some variants add write-protection on a lower address block (e.g., 0x0000–0x003F).
What gets stored: Counters, status flags, and a simple serial number. The printer’s mainboard writes to it during use.
Why resets work: The printer believes the chip; if you present a chip with “fresh” counters and a new serial, it assumes a new cartridge.
Limits: Startup (“starter”) chips can become burned/locked after a threshold—sometimes not recoverable. In those cases, a new chip is the practical route.
Legal & safety notice: You’re acting on your own hardware. Still, changing firmware/protection or mis-editing an EEPROM can void warranties or break components. Proceed at your own risk, use ESD care, and keep original backups.
Tools & prep (two viable routes)
Route A — Use a ready USB/I²C programmer (simplest, safest)
Any common USB EEPROM/I²C programmer with SOIC-clip or pogo-probe.
Software that supports 24C02/AT34C02 read/write.
Pros: Stable voltage levels, fewer wiring mistakes, easy backups.
Cons: Small cost if you don’t own one.
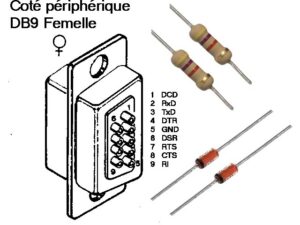
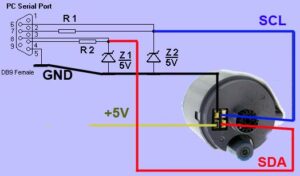
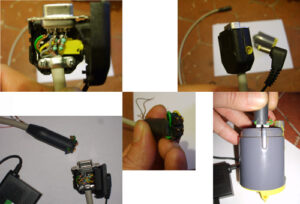
Route B — DIY serial interface (legacy RS-232 approach)
Parts used in older community projects: DB9 female, two 4.7 kΩ resistors, two 5.1 V Zener diodes, some wire, soldering iron, and a regulated 5 V DC source.
Software such as PonyProg2000 can talk I²C over that simple interface.
Pros: Almost free if you have the bits.
Cons: Easier to mis-wire; not all PCs have true RS-232; voltage margins matter.
Whichever route you pick, work over a non-conductive surface, wear an ESD strap, and disconnect the cartridge from the printer.
Identify and back up the chip first
Locate the chip: On each CLP-300 cartridge, find the small 8-pin IC (the EEPROM). Note pin-1 orientation (dot/notch).
Attach your clip/probe: Connect SDA, SCL, VCC, GND (and WP if exposed). Do not exceed 5 V; many programmers run at 3.3 V which is safer.
Select device type: In your software (e.g., PonyProg), choose 24C02/AT34C02.
Read & save twice: Perform two reads and save as original.bin and verify.bin. Compare files (hash or byte-diff). If they match, you have a clean backup. Keep this file safe.
If the upper block reads all FFs or the lower protected block can’t be written, that may be normal for your variant. If everything reads as FF even after reseating the clip, recheck power and pinout.
Editing strategy that typically works
Your aim is to present the printer with a “new” cartridge by:
Zeroing the usage fields (where writable), and
Incrementing the stored serial number by +1 so the printer doesn’t recognize the previous one.
Exact addresses vary by batch/region; community conventions often change counters to 00 in writable areas and tweak a serial field (e.g., at/near 0x0039 on some batches). Because layouts differ, always compare before/after and keep your original.bin.
General steps in the editor (illustrative):
Open your original.bin.
Find the serial field string/bytes (compare across your own chips if you have multiple colors; the pattern is often obvious).
Increment the serial minimally (e.g., from …388 to …389).
Set writable counters to 00 where applicable (do not touch factory IDs or areas that return write-protected errors).
Save as reset.bin.
Write back & verify:
6) Reattach the clip, write reset.bin to the EEPROM, then read back and compare. If verify passes, you’re done.
7) Reinstall the cartridge, power the printer, and print a supplies report. The cartridge should register as new/full.
Special cases (starter/“burned” chips)
Some starter chips become grilled/locked after the device has produced roughly 800–1000 color / 1500–2000 black pages. When you read those, you may see mirrored records or fixed values that won’t clear. A pragmatic recovery attempt used by technicians is:
Fill 0x0000 → 0x0043 with FF (only if your read shows those addresses as user-data and not factory IDs), write back, then power-cycle and re-read.
If the area reverts or verify fails, consider the chip not recoverable and install a replacement chip.
Again: behaviors vary by revision. If writes fail consistently while power and wiring are correct, don’t force it—replace the chip.
Frequently Asked Questions
Practical tips to avoid common pitfalls
Voltage discipline: Don’t inject more than the device’s VCC rating. Prefer 3.3 V from a proper programmer when possible.
Solid contact: Most failures are poor clip alignment. Practice on a scrap SOIC first.
One color at a time: K, C, M, Y each holds its own serial; track edits per color.
Change the serial every refill: The printer remembers the last used number. Increment by +1 with each cycle.
Keep per-cartridge backups: Save files like CLP300-C-orig.bin and CLP300-C-reset-2025-10-06.bin for easy reuse.
When in doubt, buy a new chip: They’re inexpensive compared to your time and the risk of repeated failures.
Troubleshooting
Printer still says “empty” after edit
You didn’t change the serial, or you altered the wrong field.
Your write didn’t take (clip contact). Re-read and diff against reset.bin.
EEPROM reads all FFs
No power or wrong pin-1 orientation; some programmers need a separate VCC jumper.
Write verification fails
You’re hitting a write-protected page. Only modify writable regions; leave protected blocks alone.
Startup cartridge won’t reset
It may be in the burned state. Replace with a standard chip.
Colors desync (e.g., Magenta resets, Yellow won’t)
CLP-300 tracks each color independently; repeat the process per color with its own serial.
After reset, prints still look poor
That’s a toner/drum issue, not the chip. Run a cleaning cycle and confirm you used CLP-300-compatible toner.
Responsible use & disclaimer
The information here is for maintenance and cost-saving on your own cartridges. Editing an EEPROM is at your own risk and can void warranties. We do not host or endorse third-party binaries. If you’re uncomfortable with electronics or can’t achieve stable reads/writes, use a pre-programmed replacement chip—it’s the fastest, lowest-risk solution.
Download Link
Samsung CLP-300_Black. Download
Samsung CLP-300_Cyan. Download
Samsung CLP-300_Magenta. Download
Samsung CLP-300_Yellow. Download
Ponyprog Resetter. Link