HP MFP 477 printer is a reliable and efficient printer that is widely used in offices and homes. However, like any other electronic device, it can encounter errors from time to time. One common error that users may come across is the fuser error. This error can be frustrating, but it is usually easy to fix with a few simple steps. In this blog post, we will guide you on how to fix the fuser error on your HP MFP 477 printer.
Before we dive into the steps to fix the fuser error, let’s first understand what a fuser is and why it is important in the printing process. The fuser is a component in the printer that uses heat and pressure to bond the toner onto the paper.
It plays a crucial role in ensuring that the printed documents have a professional finish and do not smudge or fade easily.
Now, let’s move on to the steps to fix the fuser error. The first thing you should do when you encounter a fuser error on your HP MFP 477 printer is to turn off the printer and unplug it from the power source. This will ensure your safety and prevent any further damage to the printer.
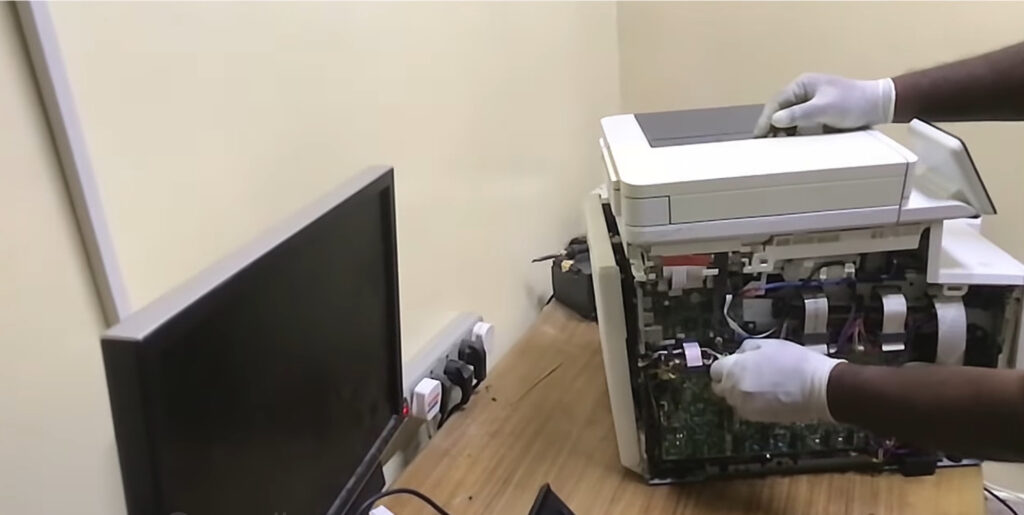
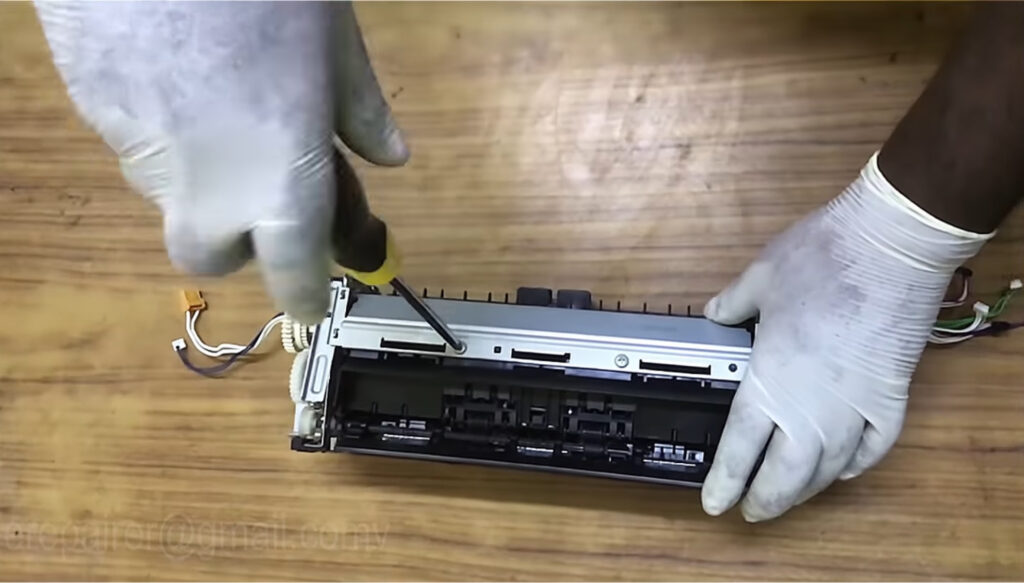
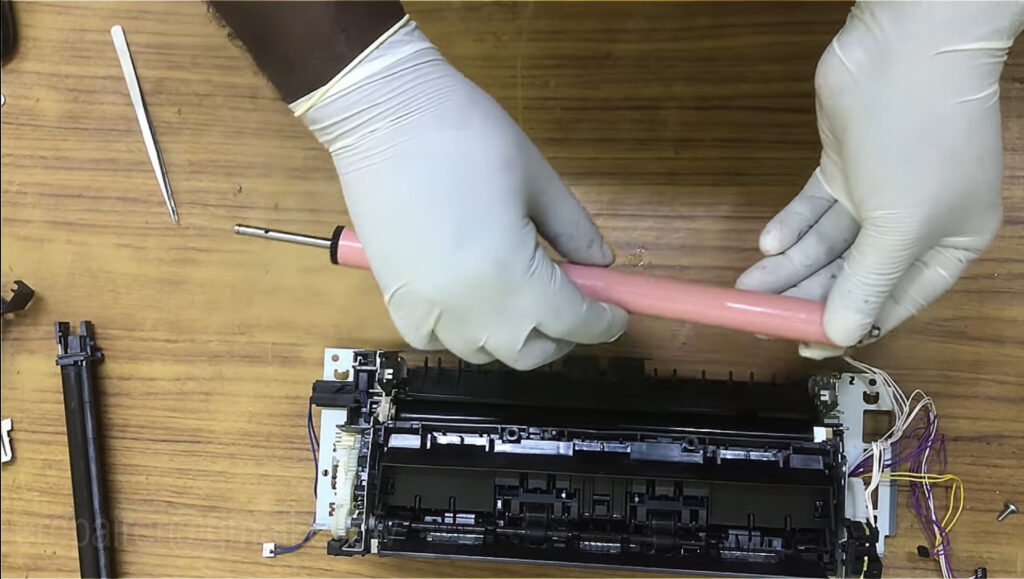
Once the printer is unplugged, you can carefully open the printer’s access panel to locate the fuser. The fuser is usually located at the back of the printer and can be easily identified by its cylindrical shape. It is important to handle the fuser with care as it can be hot to the touch.
After locating the fuser, you can check for any visible signs of damage or obstruction. Sometimes, the fuser error can be caused by a paper jam or a foreign object stuck in the fuser. In such cases, gently remove the obstruction and ensure that the fuser is clean and free from any debris.
If there are no visible signs of damage or obstruction, you can try resetting the fuser by turning off the printer, unplugging it from the power source, and waiting for a few minutes. This will allow the printer to cool down and reset any internal components that may be causing the fuser error.
After the cooling period, you can plug the printer back in and turn it on. Check if the fuser error still persists. If the error message is gone, you can try printing a test page to ensure that the fuser is functioning properly. If the error message reappears, you may need to replace the fuser with a new one.
Replacing the fuser is a relatively simple process. You can refer to the printer’s user manual or the manufacturer’s website for detailed instructions on how to replace the fuser. Make sure to purchase a compatible fuser for your HP MFP 477 printer to ensure compatibility and optimal performance.
In conclusion, the fuser error on the HP MFP 477 printer can be easily fixed by following a few simple steps. By understanding the role of the fuser in the printing process and taking the necessary precautions, you can resolve the fuser error and continue using your printer without any interruptions.
What is a fuser error?
Before we dive into the steps to fix the fuser error, let’s first understand what it is. The fuser in a printer is responsible for melting the toner onto the paper, creating a permanent bond. A fuser error occurs when there is a problem with the fuser unit, preventing it from functioning properly. This can result in poor print quality or the printer not working at all.
The fuser unit is a critical component of a laser printer or copier. It consists of two heated rollers that apply pressure to the paper as it passes through, effectively fusing the toner particles onto the paper. The fuser unit operates at high temperatures to ensure that the toner is properly bonded to the paper, resulting in smudge-free prints that are resistant to fading or smearing.
However, like any mechanical component, the fuser unit is prone to wear and tear over time. This can lead to various issues such as paper jams, wrinkled prints, or even complete printer failure. When a fuser error occurs, it is important to diagnose and resolve the issue promptly to restore the printer’s functionality.
There are several common causes of fuser errors. One of the most common causes is a buildup of toner or debris on the fuser rollers. This can occur over time as the printer is used, and it can prevent the rollers from properly applying heat and pressure to the paper. Another common cause is a faulty fuser unit, which may require replacement to resolve the error.
In some cases, a fuser error may be caused by an electrical issue. This can occur if there is a problem with the power supply or if the fuser unit is not receiving the proper voltage. Additionally, a fuser error can also be triggered by a malfunctioning sensor or a software glitch in the printer’s firmware.
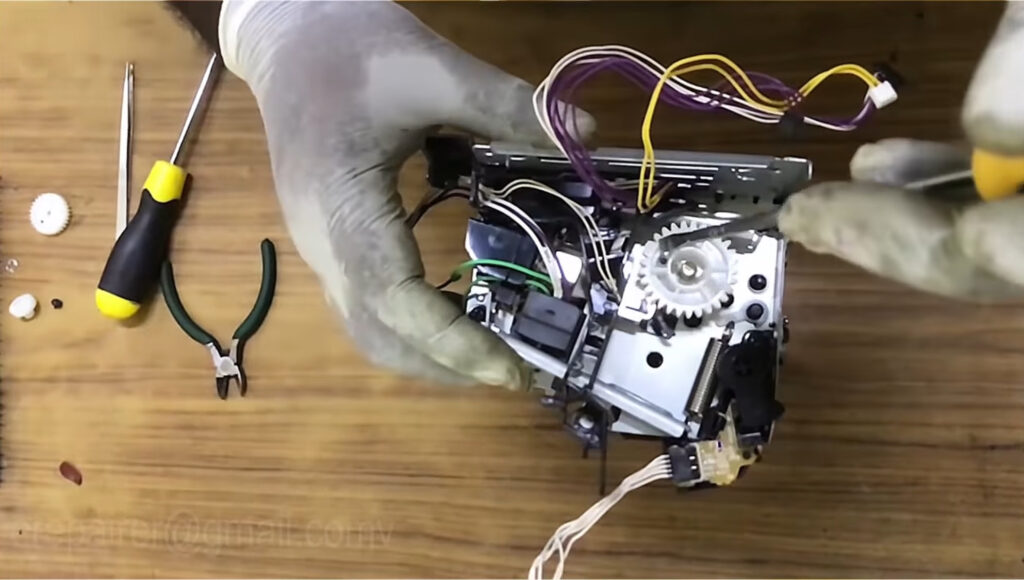
To troubleshoot and fix a fuser error, there are several steps you can take. First, you should check for any visible signs of damage or debris on the fuser unit. If you notice any buildup or physical damage, you can try cleaning the fuser rollers with a lint-free cloth and some isopropyl alcohol. This can help remove any toner or debris that may be causing the error.
If cleaning the fuser unit does not resolve the issue, you may need to replace the fuser unit altogether. This can be done by contacting the printer manufacturer or a qualified technician who can provide you with a replacement unit and guide you through the installation process.
In some cases, a fuser error may be more complex and require further troubleshooting. This can involve checking the printer’s power supply, inspecting the electrical connections, or updating the printer’s firmware. If you are not familiar with these technical aspects, it is recommended to seek professional assistance to avoid causing further damage to the printer.
In conclusion, a fuser error is a common issue that can occur in laser printers and copiers. It is caused by a problem with the fuser unit, which is responsible for melting the toner onto the paper. By understanding the causes and troubleshooting steps for fuser errors, you can effectively resolve the issue and restore your printer’s functionality.
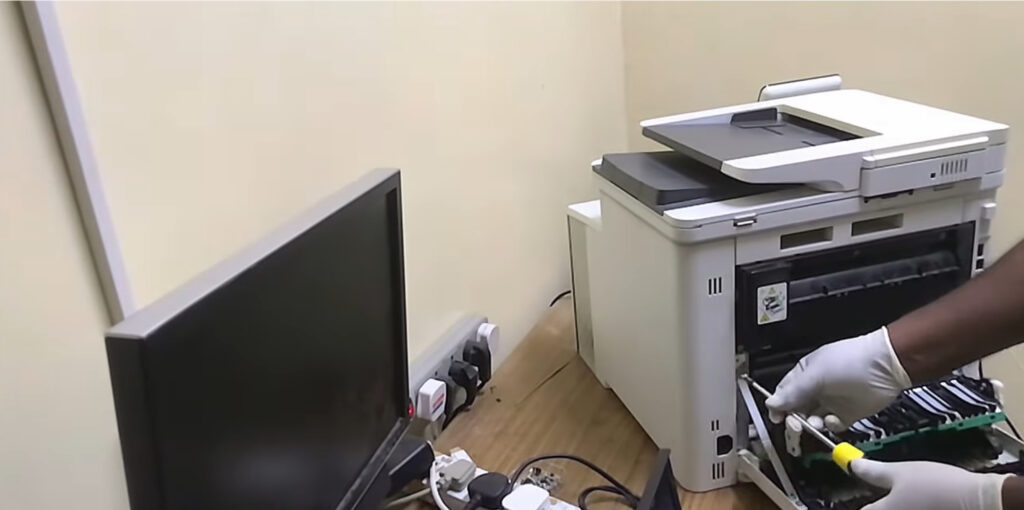
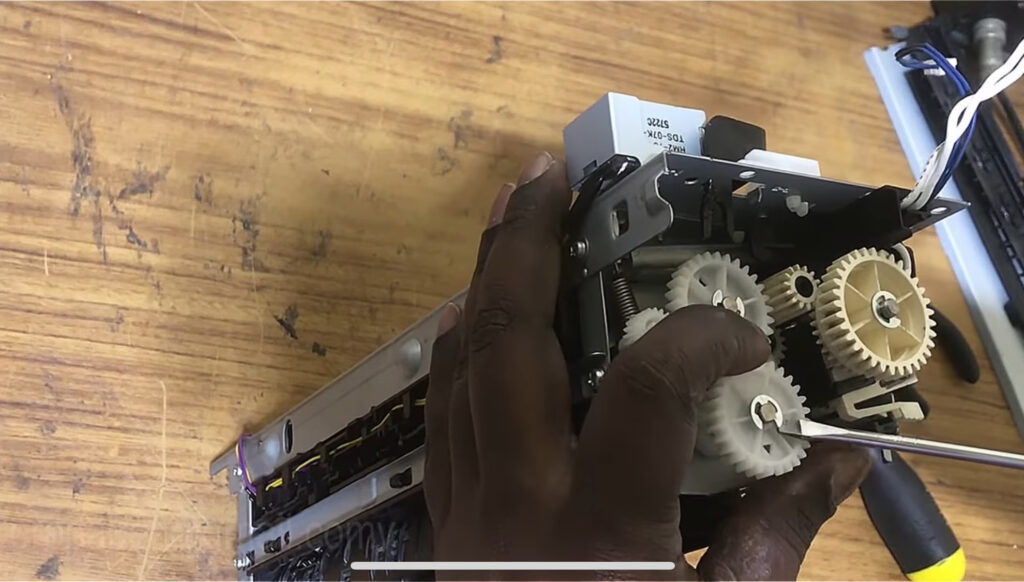
Step 2: Check the fuser assembly
If power cycling the printer did not resolve the fuser error, the next step is to check the fuser assembly. The fuser assembly is responsible for heating and bonding the toner to the paper, so any issues with it can result in a fuser error. Here’s what you can do:
- Open the printer’s front cover and locate the fuser assembly.
- Inspect the fuser assembly for any visible signs of damage, such as burnt or melted parts.
- If you notice any damage, you may need to replace the fuser assembly. Consult the printer’s user manual or contact the manufacturer for guidance on how to do this.
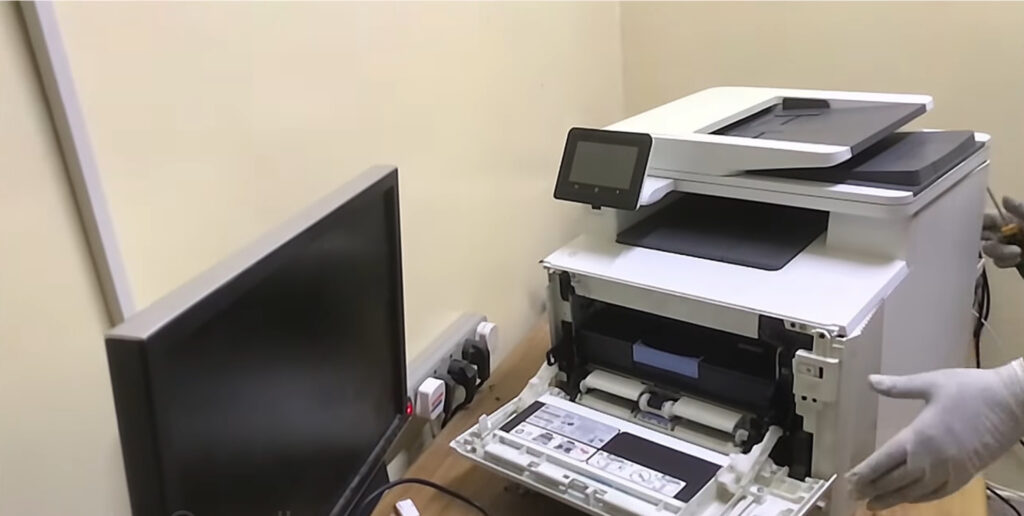
- If there are no visible signs of damage, try removing the fuser assembly and reseating it back into the printer. Sometimes, the fuser assembly may not be properly connected, causing the fuser error.
- Close the printer’s front cover and turn on the printer to see if the fuser error has been resolved.
If the fuser error still persists after checking the fuser assembly, you may need to try other troubleshooting steps. Proceed to the next step for further instructions.
Step 2: Check the fuser unit
If power cycling the printer did not resolve the fuser error, the next step is to check the fuser unit. The fuser unit is located at the back of the printer and can be accessed by opening the rear door. Follow these steps to inspect the fuser unit:
- Turn off the printer using the power button.
- Unplug the power cord from the back of the printer.
- Open the rear door of the printer.
- Locate the fuser unit.
- Check for any visible damage or obstruction.
- If you see any damaged or obstructed parts, contact a professional technician for further assistance. It is important not to attempt to repair or replace any parts yourself, as this could potentially cause further damage to the printer.
- If there are no visible issues, close the rear door of the printer.
- Plug the power cord back into the printer.
- Turn on the printer using the power button.
After checking the fuser unit, test the printer to see if the fuser error has been resolved. To do this, try printing a test page or running a printer diagnostic. If the error message no longer appears and the printer is functioning properly, then the issue may have been resolved. However, if the fuser error persists, it is recommended to proceed to the next step for further troubleshooting.
Step 4: Check the power source
In some cases, a fuser error can be caused by an issue with the power source. It is important to ensure that the printer is receiving a stable power supply to function properly. Here are some steps you can take to check the power source:
- Make sure the power cord is securely plugged into both the printer and the power outlet.
- Check if the power outlet is working by plugging in a different device.
- If the power outlet is not working, try plugging the printer into a different outlet.
- Consider using a surge protector to protect the printer from power fluctuations.
After checking the power source, turn on the printer and see if the fuser error persists. If the error message still appears, proceed to the next step.
Step 5: Clean the printer
If the fuser error persists even after resetting the printer, it may be necessary to clean the printer to ensure optimal performance. Over time, dust and debris can accumulate inside the printer, affecting its functionality. Here are some steps to clean your printer:
- Turn off the printer and unplug it from the power source.
- Open the printer’s cover or access panel to expose the internal components.
- Using a soft, lint-free cloth, gently wipe away any visible dust or debris from the printer’s exterior and interior surfaces. Pay special attention to areas around the fuser unit, as this is where the error is occurring.
- If there are any removable parts, such as toner cartridges or ink cartridges, carefully remove them and clean them using a clean, dry cloth.
- Inspect the fuser unit for any signs of damage or excessive buildup. If necessary, use a can of compressed air to blow away any dust or debris that may be trapped inside.
- Once you have cleaned all the necessary components, carefully reassemble the printer and plug it back into the power source.
- Turn on the printer and check if the fuser error has been resolved.
If the error persists even after cleaning the printer, it is advisable to seek professional assistance to diagnose and repair the issue. A trained technician will have the expertise and tools necessary to identify and resolve any underlying problems with the printer.
To communicate directly with us, please contact us from here