
How to Fix Canon Paper Jam Error: A Step-by-Step Restoration Guide
Experiencing a sudden halt in productivity due to a printer malfunction is a common frustration for home office users and corporate professionals alike. Among the various mechanical hiccups a printer can encounter, the most frequent is a misalignment in the paper path. Knowing how to fix Canon paper jam error signals effectively can save significant time and prevent unnecessary wear on the internal rollers and gears. While these errors often seem catastrophic on the display panel, they are usually the result of a small physical obstruction or a sensor that has been temporarily confused by a paper sliver.
To resolve these issues, it is essential to approach the printer with patience and a systematic methodology. Forcefully yanking on paper or ignoring the manufacturer’s safety protocols can lead to permanent damage to the FINE cartridge holder or the delicate timing strips that dictate print head movement. By following a structured cleaning and resetting process, you can clear the path and return your device to its optimal state.
Prioritizing Safety and Initial Inspection
Before attempting any physical intervention inside the printer, you must prioritize electrical safety. The internal components of a Canon printer, particularly the fuser area in laser models or the electrical contacts in the PIXMA series, can carry residual heat or electrical charges. The first step is to turn the printer off using its power button and then completely disconnect the power cord from the wall outlet. This ensures that the print head carriage does not move unexpectedly while your hands are inside the unit, which could cause injury or break the carriage belt.
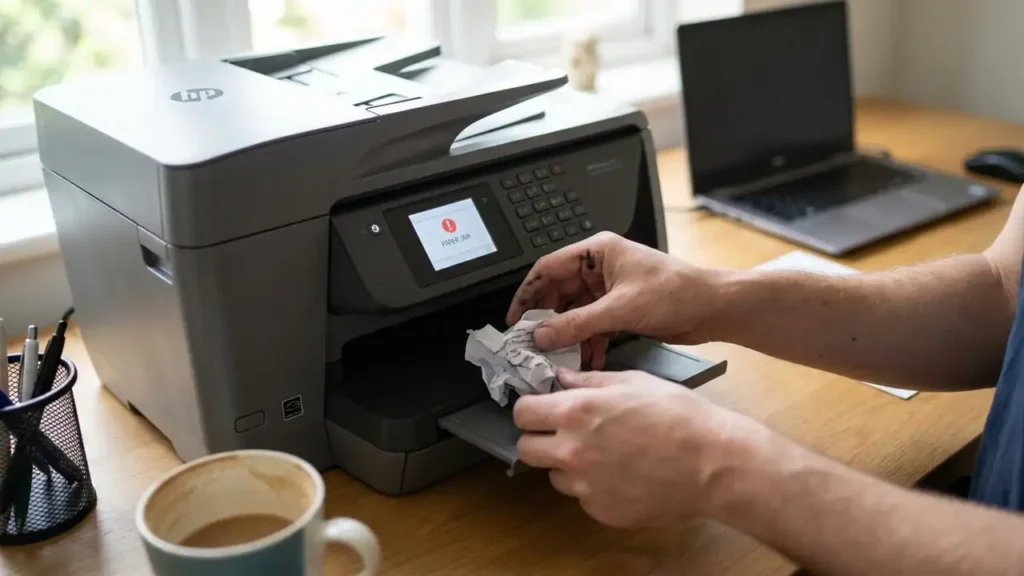
The most logical place to start your physical search is the output tray. This is where paper typically exits the machine. If you see the edge of a sheet protruding from the exit rollers, use both hands to grasp the paper firmly but gently. Pulling with both hands ensures that the tension is distributed evenly across the sheet, significantly reducing the risk of the paper tearing. If the paper tears while you are pulling it, the remaining fragments can become lodged deeper in the rollers, creating a “ghost jam” that is much harder to diagnose.
Accessing the Internal Compartment
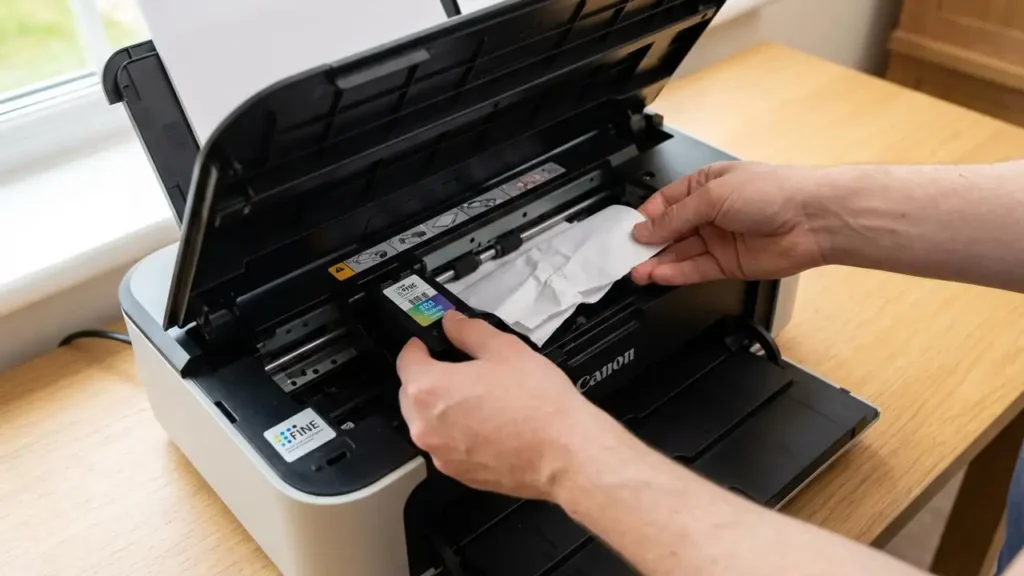
If the output tray is clear, the obstruction is likely deeper within the machine. For most Canon inkjet models, you will need to open the scanning unit or the main access cover. Once opened, you will see the internal mechanisms and the print head carriage. In many cases, the carriage may be positioned directly over the jammed paper, making it difficult to reach.
If the FINE cartridge holder is blocking your access, do not force it if it feels locked. However, in many states, you can slowly and gently slide the holder to the far right or far left to reveal the paper path underneath. Once the carriage is out of the way, look for any crumpled sheets. Again, use a steady, two-handed grip to pull the paper toward you. It is vital to check the area directly under the cartridge holder for small scraps. Even a piece of paper the size of a fingernail can trigger a persistent error code if it blocks the path of the sensors.
Checking the Rear Tray and Duplex Unit
A common oversight when learning how to fix Canon paper jam error codes is neglecting the back of the machine. Many modern Canon printers feature a duplex unit—the component responsible for two-sided printing—or a rear feeding tray. If you cannot find the jam in the front or middle of the printer, turn the unit around to inspect the rear.
Many models have a rear cover or a duplex unit that can be completely removed or hinged open. When you open this section, you are often looking at the “turnaround” point of the paper path, where the sheet is flipped. This area is a frequent culprit for jams, especially if the paper being used is slightly too thick or has a high moisture content. Inspect the rollers in this section for any wrapped paper or debris. When closing this compartment, ensure the cover clicks firmly into place. If the rear cover is not perfectly latched, the printer may continue to display a paper jam error even if no paper is present, as the “cover open” sensor and the paper path sensor are often integrated.
Addressing Torn Paper and Persistent Sensors
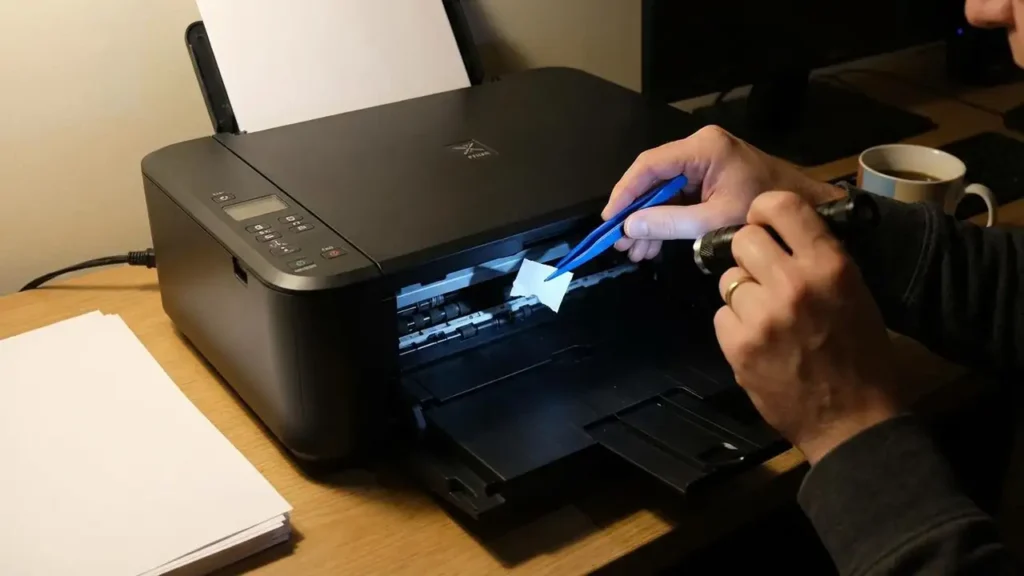
One of the most difficult scenarios involves paper that has shredded or torn during the removal process. If you are left with small fragments stuck inside, do not use sharp metal objects like scissors or screwdrivers to dig them out, as these can scratch the delicate surface of the rollers or damage the timing strip. Instead, use a pair of plastic tweezers or a flashlight to locate and remove every tiny bit of debris.
If you have cleared every visible piece of paper but the machine still insists there is a jam, you are likely dealing with a sensor issue. This is often referred to as a “canon paper jam error reset” requirement. Printer sensors are typically small plastic flags or optical eyes that detect the presence of paper. If a flag is stuck in the “up” position or an optical sensor is blocked by paper dust, the machine will report a jam.
A reliable trick to clear a stubborn sensor is to use a single sheet of stiff paper, such as cardstock or a heavy-duty photo paper. With the printer off, manually and gently feed the stiff sheet through the paper path from the input tray toward the output. This can often nudge a stuck sensor flag back into its neutral position or push out a hidden scrap of paper that was too small to see.
Performing a Canon Paper Jam Error Reset
Once the physical path is confirmed to be clear, the printer’s internal logic may still need a “hard” refresh to clear the error state from its memory. This is particularly true for the Canon PIXMA paper jam error codes, which can sometimes hang in the cache of the device.
To perform a proper reset, keep the printer unplugged for approximately 30 minutes. This duration allows the capacitors on the logic board to fully discharge, which often clears the volatile memory associated with the error state. After the waiting period, plug the printer back in and power it on. If the error persists, check the printer’s status on your computer. Sometimes, the “print queue” on your PC or Mac is still trying to send the “jammed” job to the printer, causing it to cycle back into an error. Clearing the print queue in your operating system settings is a vital final step in the reset process.
Strategies for Preventing Future Jams
Once you have successfully navigated the steps of how to fix Canon paper jam error messages, implementing a few preventive habits can ensure the issue does not recur. Most jams are not caused by the printer itself, but by environmental factors or improper loading.
- Regulate Paper Loading: Never overfill the paper tray. Every Canon tray has a “limit” mark, usually indicated by a small plastic tab. Loading paper above this line increases the likelihood that the rollers will grab multiple sheets at once, leading to a multi-feed jam.
- Align the Guides: Ensure the paper guides in the tray are snug against the edges of the stack. If they are too loose, the paper may enter the machine at an angle (skewing), which causes it to catch on the internal housing. If they are too tight, the rollers will struggle to pull the paper, causing a “no feed” error that the printer often misinterprets as a jam.
- Check for Foreign Objects: Staples, paper clips, and even dust buildup can interfere with the paper path. Always fan your paper before loading it to remove static and ensure that no small objects have fallen into the rear tray.
- Verify Paper Quality: Avoid using paper that is curled, wrinkled, or damp. If you live in a high-humidity environment, keep your paper sealed in its original wrapper until you are ready to use it, as moisture makes the sheets “sticky” and prone to jamming in the duplex unit.