Canon Printer Alignment: Fix Blurry or Crooked Prints
by Helen J. Halladay
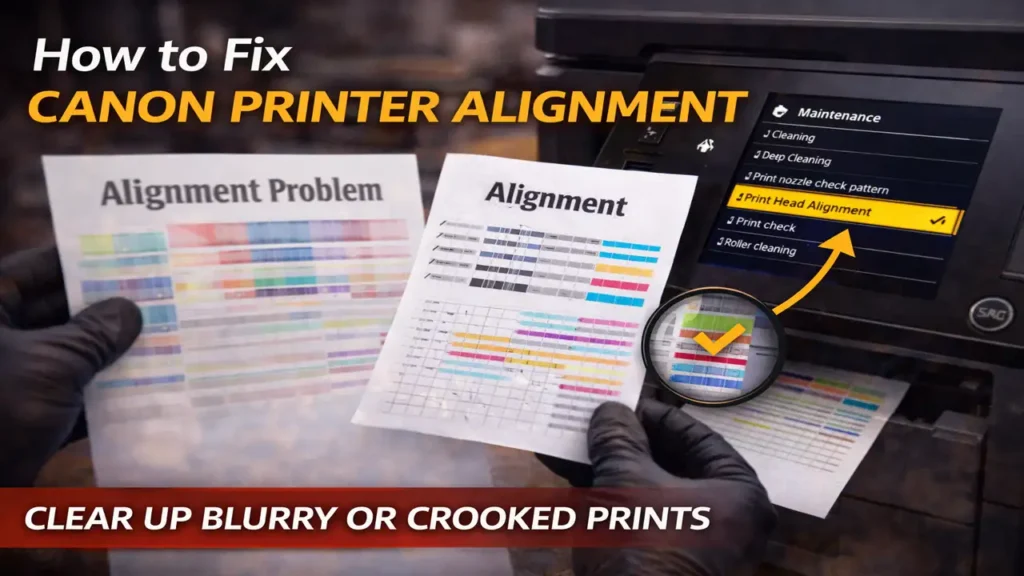
How to Fix Canon Printer Alignment
If your prints look blurry, colors do not line up, or straight lines appear crooked, the most effective fix is usually Canon printer alignment. This maintenance process adjusts the print head position so the printer can place ink more accurately on the page.
In many cases, you do not need to replace cartridges or assume the printer is failing. A simple Canon printer alignment from the maintenance menu can restore clean text, straighter lines, and better overall print quality. The key is to use the right method for your model and to follow the steps carefully.
What Canon printer alignment fixes
A proper Canon printer alignment is meant to correct printing defects caused by misaligned print head positions. You will usually notice the problem in one or more of these ways:
Text looks slightly doubled or fuzzy. Vertical lines look uneven or shaky. Horizontal lines do not appear straight. Colors look slightly offset from black text or outlines. Charts, tables, or borders print with visible misalignment.
If your prints show these symptoms, alignment should come before more aggressive troubleshooting. It is one of the safest and most useful maintenance steps for Canon inkjet printers.
Start with automatic Canon printer alignment
For most users, automatic Canon printer alignment is the best first option. It is easier, faster, and usually accurate enough for normal home and office printing.
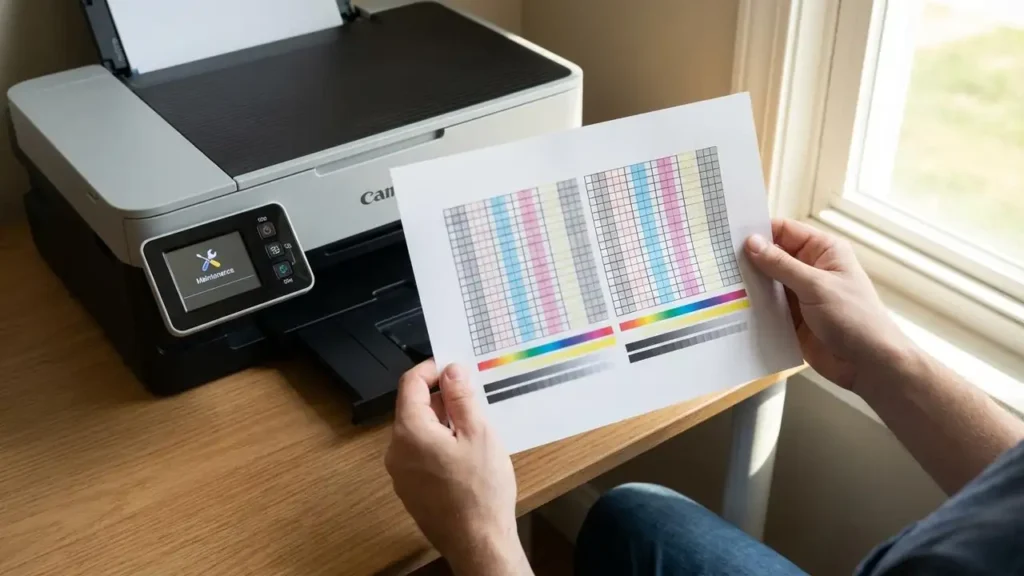
Before you begin, load clean A4 or Letter-size plain white paper. Make sure the paper is flat and not curled. Plain white paper matters because the printer needs to read the printed alignment marks correctly. If the paper is colored, glossy, or unusually textured, the reading can fail or become inaccurate.
On many Canon models, the path is simple. Go to the printer’s main settings area, open the maintenance section, and choose the print head alignment option. On some models, this appears as Auto head alignment. On others, it may be listed more generally as Print Head Alignment.
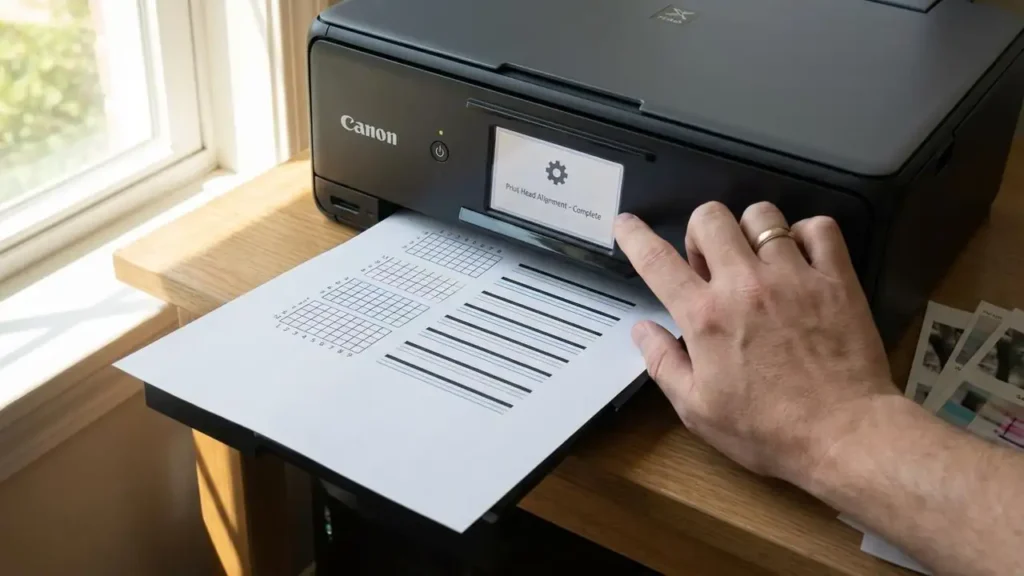
Once you start it, the printer will print an alignment sheet and, on supported models, scan or read the sheet automatically. This is why automatic alignment is often the cleanest fix for mild print quality issues.
If your Canon printer has a screen and built-in maintenance options, this should usually be the first method you try.
Canon Printer Alignment Fix Blurry or Crooked Prints
How to run Canon printer alignment from a Windows PC
If you prefer using your computer, or if the printer screen options are limited, you can perform Canon printer alignment through the printer driver on Windows.
Open the printer settings from your computer, then access the Canon printing preferences or assistant tool. From there, go to the Maintenance tab and choose Print Head Alignment. This usually starts the guided process from the computer side.
This method is useful because it gives you a larger interface and can be easier to follow than a small printer screen. It is also helpful when you want to switch from automatic to manual alignment without navigating through the printer panel.
If the automatic alignment option is available in the driver, start there first. If the results remain poor, move to manual alignment next.
When to use manual Canon printer alignment
Manual Canon printer alignment is the better choice when automatic alignment does not fully solve the problem. It is also useful when the printed output is still visibly uneven after an automatic attempt.
In a manual alignment, the printer prints one or more pattern sheets. You then examine the groups of lines and choose the pattern in each group that looks the cleanest or least broken. On some models, this means selecting values or entering numbers shown beside the best pattern.
This part takes more attention, but it can give better results for stubborn alignment issues. If automatic alignment improves the print only slightly, manual Canon printer alignment is often the next step that makes the difference.
Take your time during this stage. Do not rush your choices. Pick the pattern where the lines appear most even, least streaked, and least shifted.
Why paper choice matters more than people think
A lot of users run Canon printer alignment on whatever paper is already in the tray. That can lead to poor results. Alignment works best on plain white paper in the correct size recommended by the printer.
Curled paper can distort the printed pattern. Colored paper can make the pattern harder for the machine to detect. Very thin or low-quality paper can also affect how cleanly the alignment sheet prints.
So if the printer says the alignment failed, or if the results still look wrong after the process, do not immediately blame the printer. First make sure you used the right paper and loaded it correctly.
If Canon printer alignment does not solve the issue, the next step is not to repeat it endlessly. Instead, check whether the real problem is something else.
A dirty print head can create symptoms that look similar to alignment trouble. So can partially clogged nozzles. In that case, running a nozzle check and then a standard cleaning cycle may be necessary before trying alignment again.
Ink cartridge problems can also interfere with results. If a cartridge is low, improperly seated, or failing, the printed patterns may not be reliable enough for alignment to help. The same is true if the print head itself is worn or damaged.
So the correct order is usually this: verify paper, run automatic alignment, try manual alignment if needed, then check nozzle condition and cartridge health if the print still looks wrong.
Canon Printer Alignment Fix Blurry or Crooked Prints
A simple rule for choosing the right method
Use automatic alignment first when the issue is mild or recent. Use manual alignment when the problem is persistent, when lines still look crooked, or when automatic alignment does not fully correct the output.
That simple rule saves time. It also prevents people from jumping straight into more complicated fixes when Canon printer alignment alone could have solved the problem.
Frequently Asked Questions
What problems does Canon printer alignment fix?
It mainly fixes blurry text, uneven lines, and misaligned colors or borders caused by print head position errors.
Should I use automatic or manual alignment first?
Start with automatic alignment. If the result is still poor, move to manual Canon printer alignment for finer adjustment.
Can I run Canon printer alignment from my computer?
Yes. Many Canon printers allow alignment through the printer driver or Canon printer utility on Windows, and some models also support it through Canon utility tools on Mac.
Why did alignment fail?
The most common reasons are wrong paper type, curled paper, dirty nozzles, or a print head problem that alignment alone cannot fix.
If alignment does not work, should I replace the cartridge?
Not immediately. First check nozzle condition and run a cleaning cycle. If the problem remains, then cartridge or print head condition becomes more likely.
A good Canon printer alignment can fix a surprising number of print quality problems without replacing parts. Start with the automatic option, use plain white paper, then move to manual alignment only if needed. In many cases, that is enough to bring your Canon printer back to clean, straight, readable output.
Helen J. Halladay is a technical writer and printing technology researcher specializing in printers, toner cartridges, imaging systems, and office printing solutions. She creates detailed, research-based content designed to help users diagnose printer problems, understand hardware components, compare printing technologies, and make informed purchasing decisions.
Her work covers a broad range of topics, including laser and inkjet printer troubleshooting, print quality issues, toner and ink cartridge compatibility, maintenance procedures, firmware behavior, error code analysis, and long-term printer reliability. Every article is carefully reviewed to ensure technical accuracy, practical value, and clear explanations suitable for both everyday users and IT professionals.
Helen follows manufacturer documentation whenever available and complements it with industry best practices, technical references, and hands-on repair knowledge. Her goal is to publish reliable, easy-to-understand resources that solve real printing problems while maintaining high editorial standards.
Through Tonercom.net, she contributes authoritative educational content focused on printer maintenance, office printing technology, consumables, and device optimization, helping readers extend the lifespan and performance of their printing equipment.
It looks like an ad blocker or browser ad shield is active. Ads help us keep this content free. Please disable ad blocking for this website, then reload the page.
How to fix it
Click the ad blocker or shield icon in your browser toolbar.
Choose allow ads, disable blocking, or pause protection for this site.