
Recent silent firmware deployments by HP (specifically build iterations 2602A/B and later) have introduced aggressive Dynamic Security protocols. Consequently, numerous users encounter critical interruption messages, predominantly “Cartridge Blocked,” “Non-HP Chip Detected,” or “Supply Memory Error (Code 10.00.XX),” immediately following a system restart.
These errors do not indicate a mechanical failure within the printer or a physical defect in the toner reservoir. Instead, they signify a cryptographic rejection where the printer’s updated firmware refuses to validate the aftermarket Customer Replaceable Unit Monitor (CRUM) chip.
This technical manual outlines the diagnostic procedures to bypass this digital restriction, reset the hardware communication lines, and execute a firmware downgrade to restore third-party cartridge compatibility.
Immediate Mitigation: Disabling Network Updates and Isolation
Before attempting physical or software-level repairs, it is critical to sever the printer’s connection to HP’s update servers to prevent the system from overwriting legacy configurations.
-
Disconnect the printer from the active Wi-Fi network or unplug the Ethernet cable.
-
Access the printer’s control panel and navigate to Setup > Printer Maintenance (or Service).
-
Select Update the Printer > Printer Update Options.
-
Change the configuration from “Install Automatically” to “Do Not Check” or “Off”.
-
Select No when the system prompts you to confirm if you want to turn updates back on.
-
Power cycle the machine. This isolates the firmware environment, preventing further background cryptographic updates.
Technical Diagnosis: The Mechanics of Dynamic Security
To effectively bypass cartridge blocks, it is necessary to understand the underlying authentication architecture. HP’s Dynamic Security operates via a digital handshake between the printer’s formatter board and the microcontroller (chip) attached to the toner cartridge.
During the Power-On Self-Test (POST), the firmware requests a specific cryptographic response from the cartridge chip.
-
The Failure Mechanism: Third-party chips are reverse-engineered to mimic the responses of an original HP chip based on a specific firmware version. When HP pushes an update (like the 2026 build), it alters the required handshake algorithm.
-
The Result: The aftermarket chip provides the legacy response. The new firmware registers a mismatch and triggers the 10.00.10 (Supply Memory Error) or explicitly locks the cartridge mechanism via the Cartridge Blocked state, severing voltage to the developer roller.
This is a software-enforced hardware lock. Replacing the toner cartridge with another identical aftermarket unit will yield the same error.
Advanced Resolution Protocols
If isolating the network and performing a standard power cycle does not clear the error state, technical intervention is required to modify the printer’s operational parameters.
Phase 1: Microchip Surface Normalization
Occasionally, electrostatic discharge (ESD) or carbon buildup exacerbates firmware rejection. Isolating the physical connection is the first diagnostic step.
-
Step 1: Power down the machine and remove the rejected toner cartridge.
-
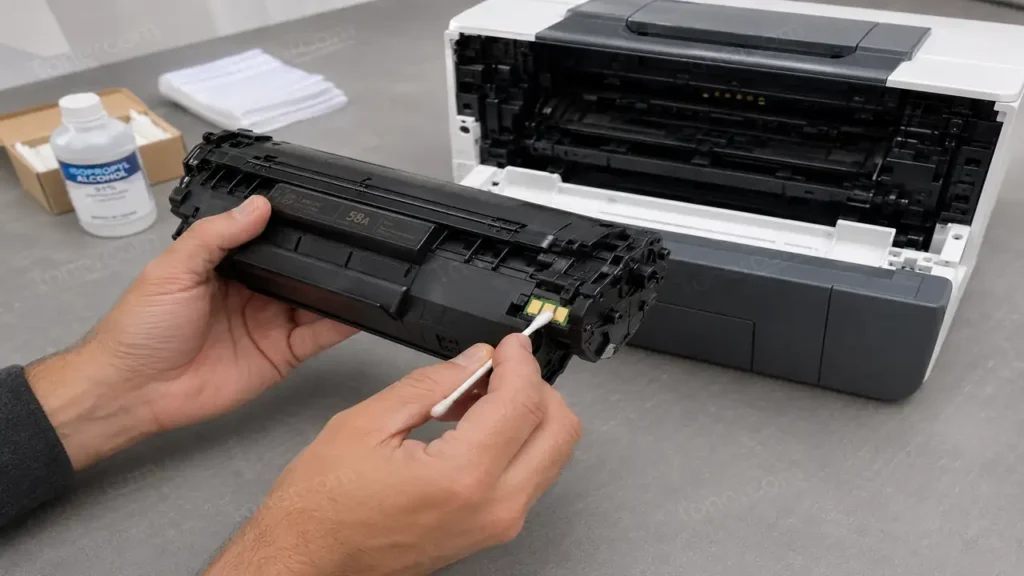
Step 2: Place the cartridge on an anti-static surface. Locate the small, green printed circuit board (the chip).
-
Step 3: Lightly clean the copper contact pads using a lint-free swab dampened with 99% Isopropyl Alcohol.
-
Step 4: Inspect the corresponding contact pins inside the printer chassis for physical damage or depression.
-
Step 5: Allow the alcohol to evaporate completely, reinsert the cartridge, and execute a cold boot.
Phase 2: The Firmware Downgrade Execution (Rollback)
The definitive solution for a cryptographically blocked cartridge is to revert the printer’s internal operating system to a legacy version released prior to the Dynamic Security patch.
-
Step 1: Obtain the legacy firmware file (typically with a
.exeor.rfuextension) specific to your printer model, dating back to 2022 or 2023. These files must be sourced from certified technical archives, as HP removes legacy builds from their official servers. -
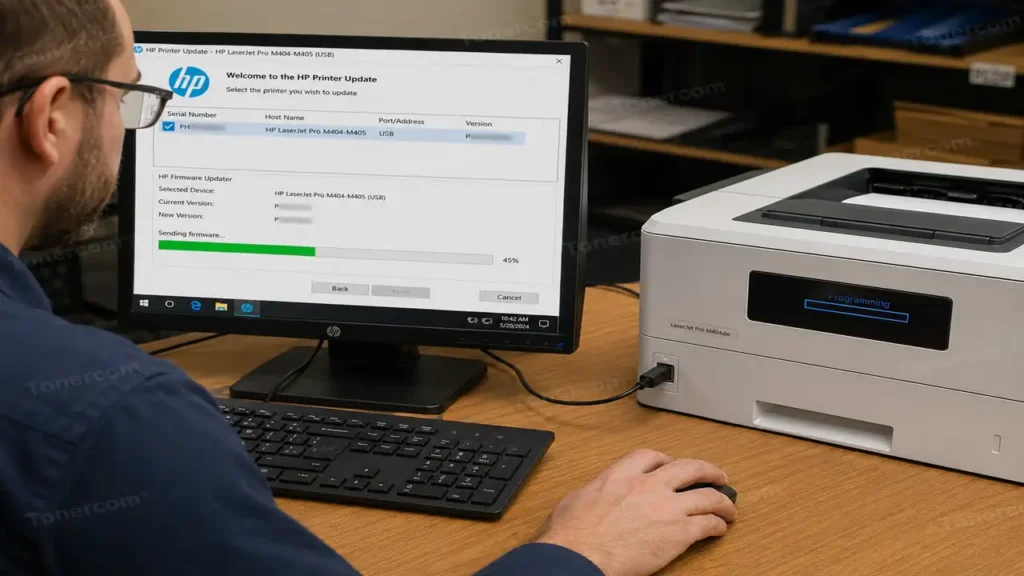
Step 2: Connect the printer directly to a Windows workstation via a High-Speed USB Type-B cable. (Do not perform downgrades over Wi-Fi to prevent packet loss and motherboard bricking).
-
Step 3: Ensure the printer is in a “Ready” state. If the printer is locked on an error screen, press the “Home” or “Back” physical buttons to bypass the warning temporarily.
-
Step 4: Execute the legacy firmware application on the workstation. Select the USB-connected printer from the dropdown menu and select “Send Firmware.”
-
Step 5: The printer display will indicate “Reflashing” or “Programming.” Do not interrupt power during this 3-to-5-minute window. Once rebooted, the printer will operate on the legacy code, instantly clearing the Cartridge Blocked error.
Hardware Vulnerability Matrix: Most Affected HP Architectures
The recent firmware iterations have targeted specific printer families equipped with highly integrated network boards. The following models are highly susceptible to the Cartridge Blocked error:
| HP Printer Series | Common Toner SKU | Primary Error Trigger | Recommended Action |
| Color LaserJet Pro M255 series | 206A / 206X | “Non-HP Chip Detected” | Downgrade to 2022 Firmware |
| LaserJet Pro M404 / M428 series | 58A / 58X | “Cartridge Blocked” | Disable Updates & Downgrade |
| Color LaserJet Pro M454 / M479 | 414A / 414X | “Supply Memory Error 10.00.04” | Chip Transfer or Downgrade |
| LaserJet M209dwe / M234e | 134A / 134X | HP+ Network Lock (e-series) | Non-downgradable (Requires OEM) |
Note: Printers with an “e” suffix (e.g., M404e) are locked into the HP+ ecosystem. These models require constant cloud authentication and cannot be downgraded via standard USB protocols.