

Written by: Helen J. Halladay, Printer Repair Technician
Bench-tested on:
-
ECOSYS M2040dn — Firmware: 2S0_2000.001.011
-
FS-1320D — Firmware version not recorded during bench test.
Quick Answer
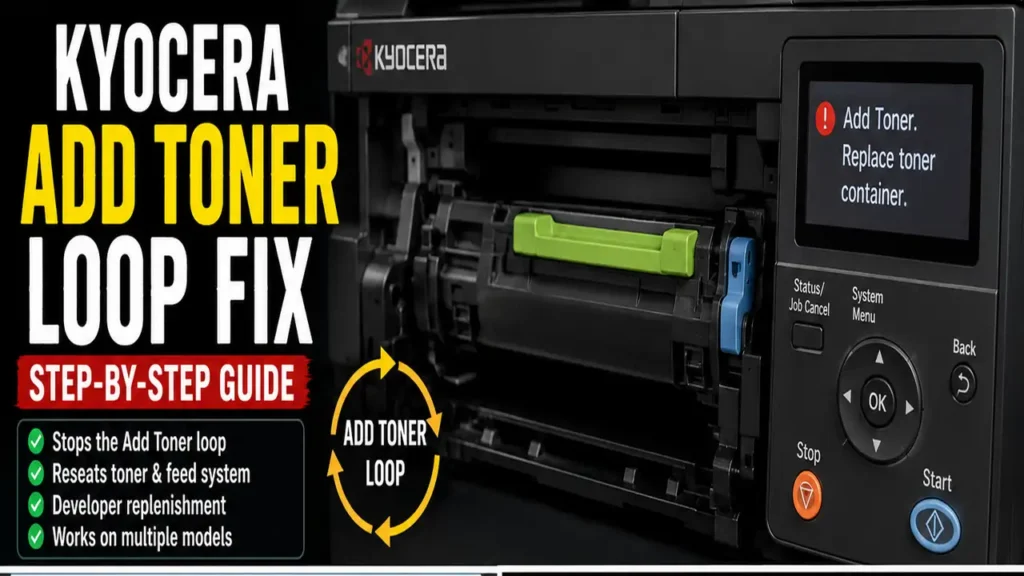
A persistent Kyocera “Add Toner” loop usually means the machine is not receiving or accepting toner as expected. Attempting a Kyocera Add Toner Loop Fix requires understanding that possible causes include an incorrectly seated or incompatible toner container, a blocked or damaged toner-feed mechanism, a supply-detection problem, or a developer system that has not been replenished correctly. Service-level toner installation routines such as U130 are model-specific and should only be used when specified by the exact service manual.
Applies To
-
Bench-tested Configurations: Kyocera ECOSYS M2040dn, FS-1320D.
-
Similar symptom only (procedure must be verified separately): ECOSYS M2540 series, P2235 series, FS-1040 / FS-1060DN.
-
Associated Supplies: Region-specific Kyocera TK-series toner containers. Verify the exact toner reference from the product label or regional Kyocera support page before troubleshooting.
-
Target Components: Developer Unit (DV), Toner Container (TK), and Toner container identification chip/reader (where fitted).
Symptoms
-
The control panel persistently displays “Add Toner” or the Toner LED flashes red, even after inserting a brand-new toner container.
-
The printer’s main drive motor spins loudly for a period, then abruptly stops and returns to the error state.
-
Printing is completely disabled, and opening/closing the front cover simply restarts the spinning cycle.
Likely Causes
-
Developer System Not Replenished: Toner is not being replenished correctly from the toner container into the developer system.
-
Mechanical Feed Failure: Broken feed gears, drive couplings, or a jammed toner-container mechanism prevent toner powder from dropping into the inlet.
-
Supply-Detection Problem: The toner identification chip is missing, incompatible, or cannot be read by the machine’s interface.
-
Clumped Toner: Hardened toner powder blocking the cartridge exit port or developer inlet due to humidity or poor manufacturing.
Before You Start
-
Safety Warning: Never force the toner cartridge into the locking mechanism. If the blue or green locking lever is stiff, forcing it may snap the developer drive gear.
-
Waste Toner Note: Do not repeatedly execute toner-installation routines without first confirming that toner is physically feeding. Repeated unsuccessful cycles can worsen toner accumulation or mechanical stress.
-
Required Tools: A flashlight for visual gear inspection.
Diagnosis Before Resetting
Before diving into software service modes, isolate a mechanical failure:
-
Turn off the printer and open the front access door.
-
Remove the new toner container (TK).
-
Inspect the toner-container outlet and locking mechanism for visible damage. Do not force the shutter or drive coupling by hand unless the service manual explicitly identifies a safe inspection method.
-
Look inside the printer cavity at the Developer Unit inlet. Ensure the receiving hole is free of clumped paper dust or hardened toner blockages.
-
Result: If the visible toner path appears unobstructed, continue with model-specific diagnostics. The remaining possibilities include toner-supply detection, drive-system failure, developer replenishment control, or an incompatible toner container.
Fixes: Safest to Most Invasive
Fix 1: Force Toner Replenishment (Kyocera Client Tool)
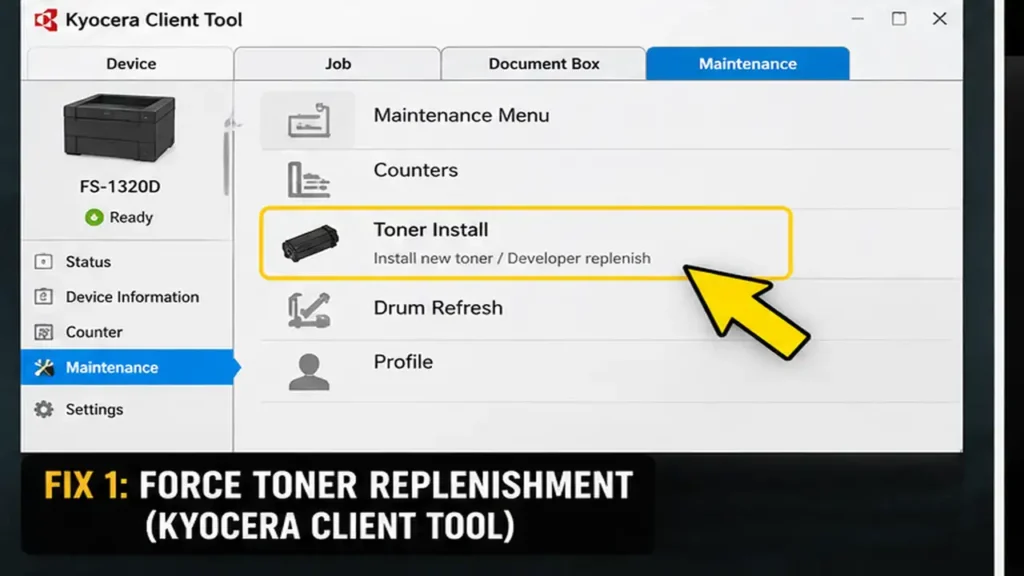
On the bench-tested FS-1320D configuration, the KYOCERA Client Tool provided a developer/toner replenishment function. Menu names may differ by Client Tool version, regional software package, and printer firmware.
-
Make sure the printer is turned on, connected via USB, and loaded with the new cartridge.
-
Open the Kyocera Client Tool on your connected Windows PC.
-
Navigate to the Maintenance tab.
-
Click on New Developer or Toner Install (terminology varies).
-
Confirm the action. The cycle may run for several minutes depending on the engine and toner state. Do not interrupt power while the service routine is active.
-
Expected Outcome: The machine completes the toner installation routine and re-evaluates the toner supply condition, returning to a Ready state.
Fix 2: Technician-Only Toner Installation Routine
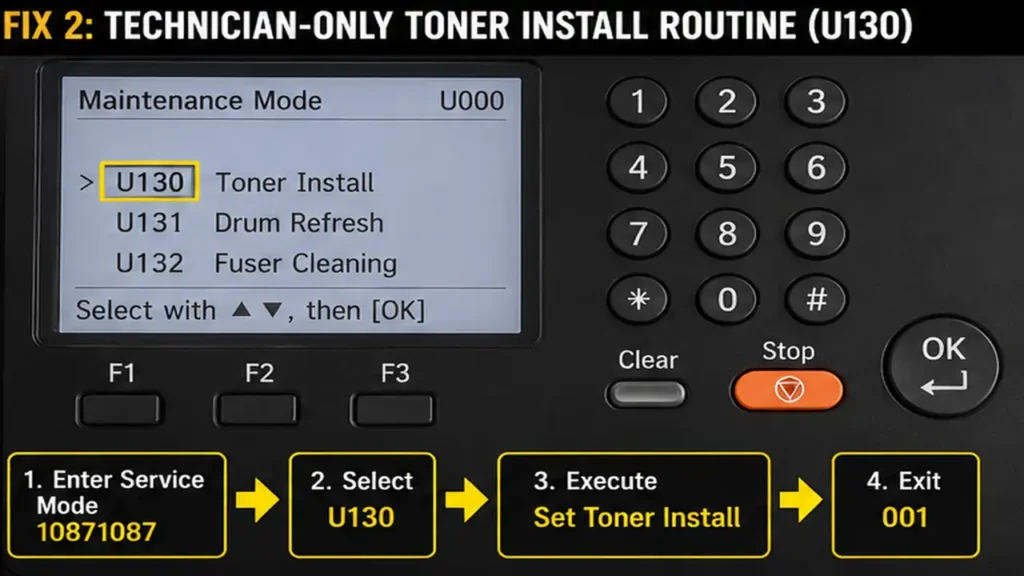
Some Kyocera service manuals include a maintenance-mode toner installation or replenishment routine. The maintenance code, entry sequence, and execution procedure vary by engine and firmware.
Note: Use U130 only when the exact service manual for the target model explicitly specifies it. This specific Kyocera Add Toner Loop Fix sequence was executed during bench testing on the ECOSYS M2040dn configuration.
Service Mode Warning: Maintenance Mode contains settings unrelated to toner replenishment. Do not execute, initialize, or modify any maintenance item other than the procedure verified for the exact machine.
-
Power on the printer. When it reaches the “Add Toner” screen, carefully enter the service-mode entry sequence. On the tested ECOSYS M2040dn, the sequence was
10871087. Do not assume this sequence applies to other Kyocera engines. -
The screen will change to Maintenance Mode (U000).
-
Use the up/down arrows or the numeric keypad to navigate to U130.
-
Press OK or Start.
-
Select Execute or Set Toner Install and press Start.
-
This initiates a service-level toner installation/replenishment routine intended to feed toner into the developer system.
-
Once completed, press Stop to return to the main menu. On the tested M2040dn configuration, enter
001and press Start to exit the Maintenance Mode session.
Fix 3: Inspect the Toner Identification Chip
If the printer spins but immediately stops and asks for toner, it may not be detecting the container’s supply chip correctly.
-
Remove the toner cartridge.
-
Locate the small identification chip on the front edge of the cartridge.
-
Ensure the chip is not misaligned, covered in toner dust, or scratched. Clean the contact points gently with a dry swab.
-
Important Note: Transferring a previously used chip is not a reliable reset method. A depleted or previously registered identification chip may still be rejected or may continue to report an exhausted toner condition. Use a correct region- and model-compatible toner container or replacement identification device where legally and technically appropriate.
How to Verify the Repair
-
Ensure the machine displays the “Ready” status without returning to the Add Toner prompt.
-
Navigate to the printer menu and select Report -> Print Status Page.
-
If the machine remains in Ready state and the status page prints with normal, consistent density, toner delivery is functioning correctly at the time of verification.
If the Error Returns
| Symptom | Likely Cause | Next Action |
| Error returns immediately after a service cycle | Defective cartridge chip or broken feed gear on the container. | Test with a different, region-compatible OEM or high-quality compatible container. |
| Prints are extremely faint, then error returns | Toner hopper inlet is physically blocked. | Inspect the toner inlet and feed path according to the service manual. Do not vacuum or disturb the developer unit unless the procedure explicitly requires it, because removing developer material can alter image density and require service calibration or unit replacement. |
| Loud grinding noise during the spin cycle | Broken developer drive gear inside the chassis. | Hardware replacement required; contact an authorized technician. |