
How to refill toner mlt-D115L — clean, repeatable method
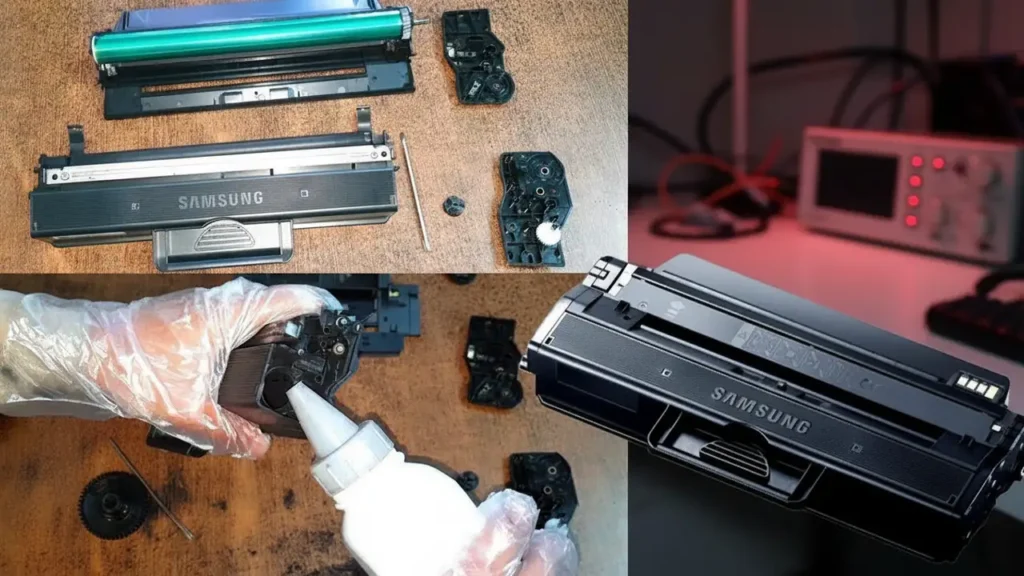
How to refill toner mlt-D115L is a practical way to cut costs on Samsung Xpress mono printers while keeping crisp, consistent output. The MLT-D115L cartridge does not include a built-in drum shutter; new units ship with a removable two-piece plastic drum cover/shield that also clips into the PCR holders so the PCR doesn’t rest on the drum during storage—helping prevent flat spots. This guide consolidates the exact steps you need: safe disassembly, cleaning, refill, chip replacement, and reassembly, plus troubleshooting for streaks, gray background, and light prints.
Supported printers and yields
Compatible models: Xpress SL-M2620, M2670, M2671, M2820DW, M2870FW (and close variants).
Yield: MLT-D115L ~3,000 pages.
Chip: Required each cycle; OEM chips are region-coded—match your region when purchasing.
Safety, tools & materials
Nitrile gloves, paper towels, waste bag/newspaper.
Small Phillips screwdriver; thin plastic spudger.
Chisel-blade knife or sharp flat screwdriver (to remove plastic rivet heads).
Pin vise or drill + small screws (to replace rivets during reassembly).
Soft brush and gentle compressed air.
Lint-free foam swabs and isopropyl alcohol (IPA 90%+) for metal/plastic parts (but not for an OEM PCR—see note below).
PCR cleaner (preferred for OEM PCR) and a tiny dab of conductive grease for contacts.
High-quality MLT-D115L-compatible toner powder.
Replacement chip for MLT-D115L (correct region).
Important: Do not clean an OEM PCR with alcohol; it can strip the semiconductive coating. Use a dedicated PCR cleaner. Aftermarket PCRs should be cleaned per their manufacturer’s instructions.
Step-by-step disassembly (outer caps, shield, separation)
Position the cartridge with the handle up and the contact side toward you.
Remove plastic rivet heads: Using a chisel blade or sharp flat screwdriver, slice off the heads of the three plastic rivets on the contact-side end cap; leave the cap/arm in place for now.
Repeat on the drum-gear-side end cap: remove its three rivet heads.
Remove the drum shaft arm (contact side): Rotate the arm straight down and pull straight out. It’s labeled “R” for the right side.
Release tabs and remove the contact-side end cap (top/bottom/front tabs).
On the gear-side end cap, remove the drum drive gear and the arm (labeled “L”). Press the top/bottom tabs and remove the cap.
Lift the middle top cover slightly; separate the cartridge halves a bit and slide the cover off.
Free the drum/waste section: Lift up the drum/waste hopper, unclip both sides from the side tabs, then rotate so the bottom curved clips release. Support the drum to avoid scratches, and lift the drum/waste assembly out.
Service the drum/waste section (wiper, PCR, chip)
Remove the PCR and set aside.
Clean the PCR with PCR cleaner (not alcohol for OEM).
Remove the wiper blade: Take out the three screws, lift the blade slightly, and slide it out beneath the PCR holders. Don’t bend alignment pins.
Clean the waste chamber with gentle vacuum/air. Wipe the PCR saddle contact with IPA and a foam swab; let it dry.
Replace/seat the wiper blade and reinstall the three screws evenly.
Apply a tiny dab of conductive grease in the PCR holders; reinstall the PCR.
Replace the chip (right side of waste chamber)
Carefully lift the seal above the chip holder (right side).
Swap the chip: Ensure it sits in the top slot with contacts facing out toward the chamber edge.
Re-seal the chip cover. If it won’t stick, use thin double-sided tape. Reapply the small seal with a tiny amount of neutral silicone if needed for a tight fit.
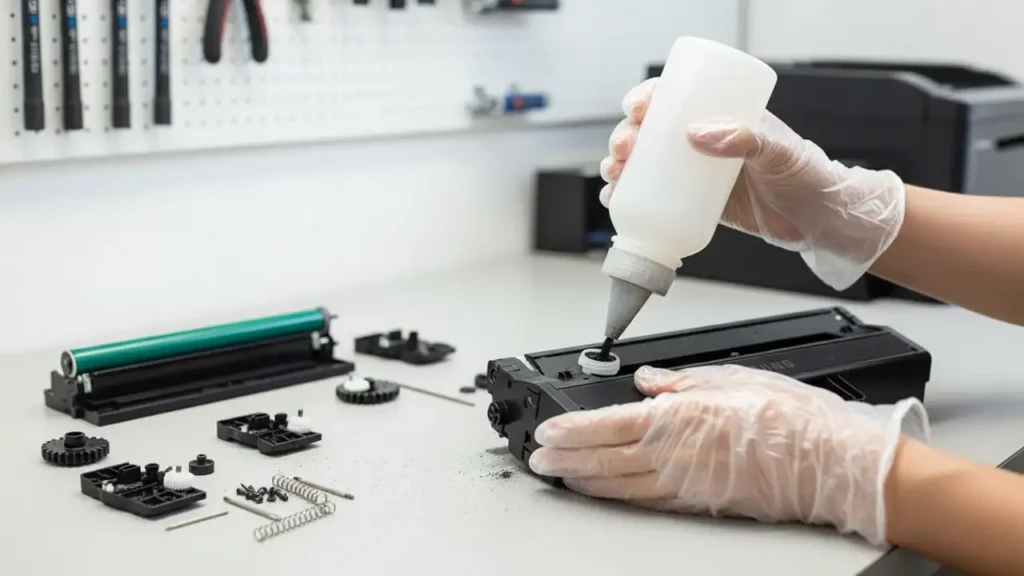
Refill and service the toner (supply) hopper
On the toner hopper, gently pry out the recessed fill plug (black or orange). Work around the edges until it releases.
Empty old toner completely (don’t mix different formulations). Make sure the seal port plug on the side remains in place—this model uses a foam/plastic plug, not a pull-seal.
Fill with MLT-D115L-compatible toner to the recommended weight. Do not overfill; overfill causes backgrounding and density swings.
Reseat the fill plug firmly; check for leaks.
Reassemble the cartridge (caps, arms, cover)
Join the halves: Hook the wavy bottom clips of the waste section into the toner hopper, roll the waste section up until both side tabs snap into place.
Slide the middle top cover back in; ensure the long lower edge slips under the waste hopper lip.
Gear-side end cap: Clean contacts, apply fresh conductive grease to the large gear-side drum shaft, and snap the cap on. Drill three small holes where the rivets were and install three screws.
Contact-side end cap: Snap in, drill three holes to match your screw size, then install three screws.
Reinstall the two drum shaft arms: “L” to the contact side and “R” to the gear side (same orientation as removed). Press straight in and rotate slightly toward the rear to lock.
Install the drum drive gear on the gear side.
Rotate gears by hand—movement should be smooth with no binding.
First prints, calibration & quick fixes
Install the cartridge and print 3–5 dense pages to stabilize. If your driver/EWS offers it, run cleaning/calibration.
If pages are gray: likely overfill, worn seals, or a contaminated sleeve/wiper. Remove a small amount of toner, re-wipe the sleeve edge and blade.
If streaks appear: check the wiper edge, PCR seating, and drum surface for nicks.
If the printer won’t accept the cartridge: verify the new, region-correct chip is seated and the contacts are clean.
Frequently Asked Questions
Pro tips to keep output crisp
Buy high-quality MLT-D115L-compatible toner powder; poor blends cause backgrounding and fast blade wear.
Keep tools and swabs dedicated to toner work to avoid cross-contamination.
Store cartridges in a dry, room-temperature place.
Vacuum printer intake paths occasionally to reduce dust load on charge components.