

Understanding how to clear Xerox error codes requires knowing whether your printer has encountered a temporary sensor interruption or a protective hardware lockout stored in Non-Volatile Memory (NVM). Across Xerox VersaLink, AltaLink, and WorkCentre multifunction printers, error codes are divided into transient operational faults that clear after a full power discharge and latched safety codes—most commonly thermal fuser errors—that remain locked on the screen even if you unplug the machine.
When a routine restart fails to restore the printer to a Ready state, accessing the hidden UI Diagnostic Mode (Service Mode) with the default Customer Service Engineer passcode 6789 allows you to clear fault logs, reset maintenance counters, or change latched NVM fault bits back to zero after repairing the underlying component.
How to Clear Xerox Error Codes by Fault Category
Xerox diagnostic firmware categorizes malfunctions into Printer Engine Error Codes (hardware failures, paper path stalls, consumable end-of-life alerts, and thermal faults) and System Error Codes (controller software hangs, corrupt print jobs, or network configuration mismatches). Before entering service menus, match the displayed code to its recovery category so you do not waste time editing memory values for a simple paper path jam or, conversely, repeatedly rebooting a machine with a locked heater circuit.
| Fault Category | Typical Code Examples | Clears via Reboot? | Required Recovery Procedure |
| Transient Paper Path & Finisher Faults | 078-223 (Transport Jam), 012-160, 012-237 (Finisher Faults) |
Yes (after clearing media) | Clear paper path and perform a two-stage power cycle |
| Controller & Spooler System Errors | 116-324, 116-331, 117-355 |
Yes (with queue isolation) | Disconnect network cable, delete corrupt print job, and power cycle |
| Consumable & HFSI Counter Alerts | 05-01 (Waste Toner Full), 06-01 (Developer Life), Fuser Life Warning |
Only if CRUM chip resets | Replace consumable or reset counter via Admin Tools / dC135 |
| Latched Thermal Fuser Faults | 010-320 (Over-Temp), 010-327 (Warm-Up Failure) |
No (Locked in NVM) | Inspect fuser hardware, enter Service Mode (6789), and reset NVM value to 0 |
Stage 1: Performing a Two-Stage Power Reset for Transient Faults
Many users press the glowing button on the control panel, wait a few seconds, and turn the machine back on, only to find the exact same fault code waiting on the screen. On Xerox VersaLink (such as the B620, B625, B7000, B7100, C7000, C7100, and C8000/C9000 series), AltaLink, and WorkCentre copiers, the control panel button is only a secondary power/wake switch. Fully clearing volatile controller memory and resetting optical paper-path sensors requires switching off the physical Main Power Switch located behind the front cover or side service door.
-
Clear obstructions and isolate corrupt print jobs: If the code references a paper jam (
078-xxx) or finisher fault (012-xxx), open all paper trays, transfer doors, and finisher covers to remove any torn sheets. If the printer displays a controller error such as116-324that recurs as soon as it boots, unplug the Ethernet or USB cable first so a corrupted print job on a PC cannot immediately crash the controller again. -
Initiate a controlled software shutdown: Press the Power/Wake button on the control panel and touch Power Off on the screen. Do not flip the main breaker switch while the hard drive or processor is still writing data.
-
Wait for complete panel shutdown: Wait until the touchscreen goes completely dark and all internal cooling fans stop spinning, then wait an additional 10 seconds.
-
Cut main AC power: Open the front door of the printer and flip the Main Power Switch to the Off position. On larger production presses or stubborn finisher faults (
012-160,012-237), Xerox service bulletins recommend waiting up to 5 minutes before restoring power so residual charge drains completely from the engine boards. -
Restore power in sequence: Flip the Main Power Switch back to the On position, close the front cover, and press the control panel Power/Wake button if the printer does not start automatically.
If the error code clears and the machine reaches the Ready state, print a Configuration Report to confirm normal paper feeding. If the code reappears before you even send a print job, the fault is either caused by a still-failed component or locked in NVM.
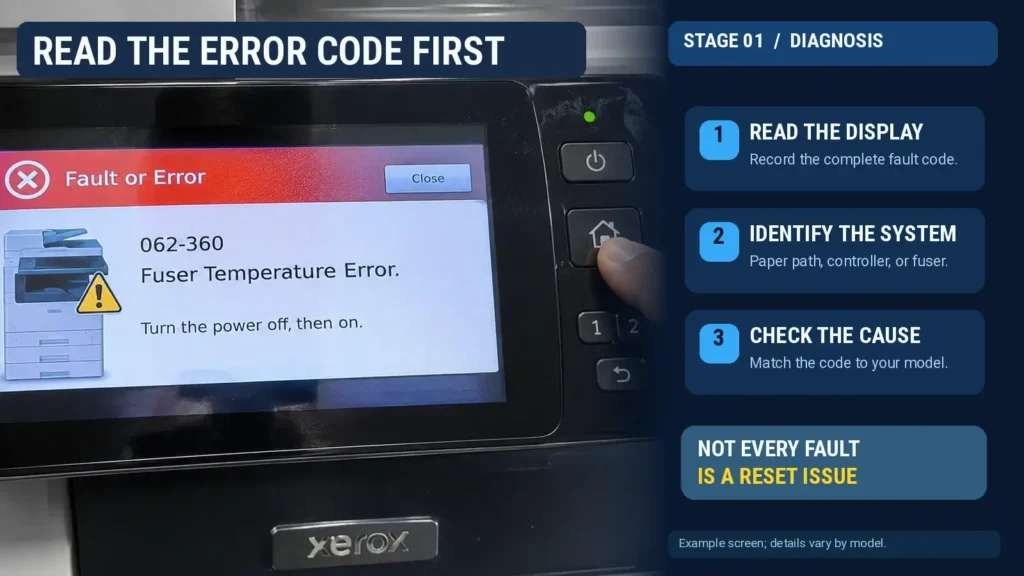
How Do You Clear Error Codes on Xerox VersaLink and AltaLink Models?
When administrators and technicians ask how do you clear error codes on Xerox touchscreen copiers that lack a physical numeric keypad—including the Xerox VersaLink B7100 series (B7125, B7130, B7135), VersaLink B7000/C7000/C7100 series, and Xerox AltaLink C8030, C8035, C8045, C8055, and C8070—the gateway is the hidden UI Diagnostic Mode (Service Mode). Entering this mode unlocks fault history reset tools, hardware diagnostic routines (dC codes), and NVM editing menus.
Entering UI Diagnostic Mode (Service Mode) on VersaLink and AltaLink
-
Start from the active control panel: Make sure the printer is powered on.
-
Hold the physical Home button: Press and hold the physical Home button on the control panel for 5 to 7 seconds, then release it.
-
Enter the service passcode: A hidden login prompt will appear on the touchscreen. Type
6789using the on-screen keypad and touch Enter or OK. -
Verify service access: On compact VersaLink interfaces, the screen returns to the home display with the logged-in user indicator showing Service Mode. On A3 VersaLink and AltaLink systems, the dedicated UI Diagnostics menu opens directly, listing five routine groups along the left side: General Information, Service Information, Diagnostics, Adjustments, and Maintenance.