Part 1: Clearing the Carriage Path and Cleaning the Encoder Strip Safely
If your printer makes a loud grinding noise, slams the printhead carriage against the internal frame, or began acting up right after ink spilled inside the housing, start with the mechanical and optical checks inside the top cover. These steps require no casing disassembly.
Preparation and Chemical Precautions
-
Disconnect AC power completely: Turn the printer off and unplug the power cord from the wall outlet. Never reach into the carriage path while the printer is plugged in.
-
Never use high-concentration alcohol or harsh solvents on the encoder strip: Do not wipe the translucent plastic encoder strip with 70%–99% isopropyl alcohol (IPA), acetone, paint thinner, or ammonia-based glass cleaners. The timing lines on an Epson carriage scale are printed with delicate ink; strong solvents dissolve the markings or cloud the plastic, permanently blinding the carriage sensor and forcing a strip replacement.
-
Do not touch or degrease the metal carriage shaft: Directly below the plastic encoder strip sits a steel rod or guide rail lubricated with specialized factory grease. Wiping grease off that metal shaft will cause the carriage to bind and trigger genuine motor overload errors.
-
Gather supplies: Distilled water (or a mild, water-based inkjet cleaning solution heavily diluted with distilled water), lint-free microfiber cloths or foam tip swabs, tweezers, and a small flashlight.
Step 1: Inspect the Carriage Path and Paper Feed Rollers
-
With the power cord unplugged, lift the scanner unit or top cover to expose the internal printhead path.
-
Check whether the printhead carriage moves freely off its right-side capping station. If the carriage is locked in its home position, do not force it; turn the printer on, wait two seconds for the carriage to unlock and move toward the center, and immediately pull the AC power plug from the rear of the printer.
-
Shine a flashlight into the far-right capping station and the far-left turnaround area. Use tweezers to remove any shredded paper fragments, label adhesive, or encrusted ink buildup blocking the carriage’s full travel.
-
Check the rear paper feed path and the underside roller cavity. If a sheet of paper was recently yanked backward out of the rear tray, inspect the white plastic gear cluster on the far-left side of the chassis and ensure the circular transparent PF encoder disc beside those gears is free of paper dust or smeared grease.
Step 2: How to Clean the Encoder Strip on an Epson Printer
Readers troubleshooting carriage slams alongside fatal error codes frequently ask: “Should I clean the encoder strip on my Epson first, and what is the safest way to do it?” If you see black ink mist, fingerprints, or white gear grease on the thin translucent ribbon running horizontally behind the printhead carriage, clean it using this procedure:
-
Gently slide the unlocked printhead carriage to the left side so you can reach the right half of the encoder strip.
-
Moisten a clean, lint-free microfiber cloth or foam swab with distilled water and squeeze it until it is barely damp. Water must never drip down into the printhead or carriage circuit board.
-
Hold the left side of the encoder strip steady with one hand so you do not stretch the small tension spring anchoring the strip to the left frame.
-
Pinch the encoder strip lightly between two folds of the damp microfiber cloth and wipe slowly from left to right using gentle, short strokes. Clean both the front and back surfaces of the translucent band without bending, kinking, or pulling upward on the strip.
-
Slide the printhead carriage to the right side and repeat the gentle wipe across the left half of the strip, stopping just short of the tension spring mount.
-
Wipe the entire length of the strip once more with a dry section of the lint-free cloth to remove any remaining moisture or lint.
Step 3: Reattach a Dislodged Encoder Strip
If the carriage slammed violently before stopping, the encoder strip may have popped off one of its mounting hooks:
-
Inspect both ends of the strip. The right end hooks over a fixed plastic or metal post on the frame, while the left end hooks onto a delicate metal tension spring.
-
Verify that the strip passes directly through the narrow optical sensor slot on the back of the printhead carriage rather than sitting loose behind or in front of the carriage.
-
If unhooked, guide the slotted hole on the right end over its fixed post first, then use tweezers to gently pull the left slotted hole over the tension spring hook until the strip sits taut, level, and parallel to the carriage rail.
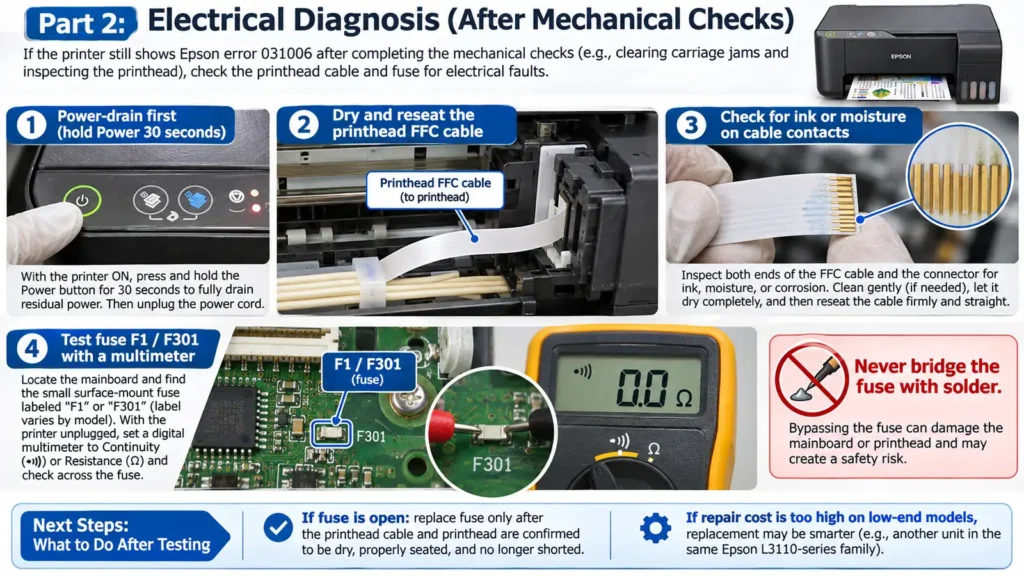
How to verify the result: Close the scanner unit, reconnect the power cord, and turn the printer on. If the fault was caused by optical tracking blindness or a physical jam, the carriage will sweep smoothly left and right without grinding and return to its home position ready to print. If the carriage does not slam, yet the printer immediately locks up with error code 031006 (or all lights blinking silently), the encoder strip is not the root cause—move to the electrical diagnosis below.