

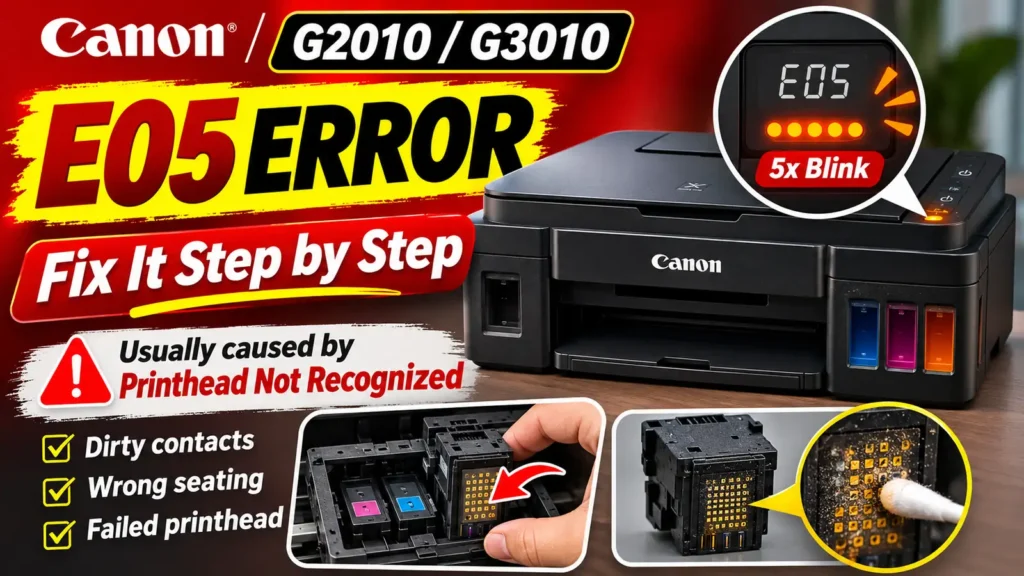
How to Fix Error E05 Canon G3411 and MegaTank G3010 Series Printers
If you are dealing with error e05 canon g3411 (or closely related models in the Canon PIXMA G3010, G3410, G2410, and G2411 series), the fault almost always traces back to one of three issues: the two carriage joint buttons were not pressed down until they clicked, ink mist or oxidation has coated the gold contact pads on the CA91 (QY6-8002) Black or CA92 (QY6-8018) Color print head, or one of the print heads has suffered an internal electrical failure (Support Code 1403).
Critical Ink Tube Precaution Before Opening the Carriage
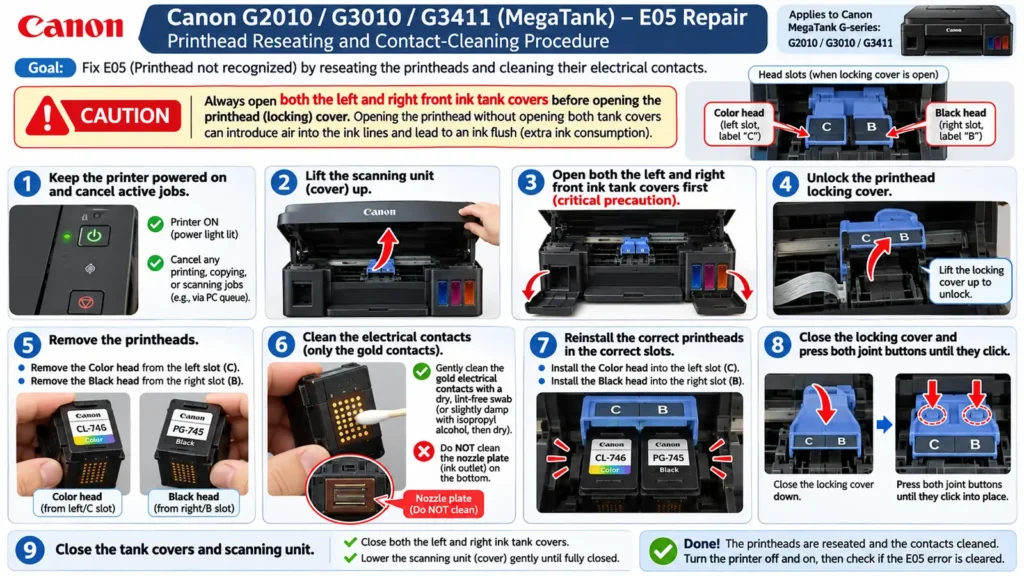
Before unlocking the print head cover on a Canon PIXMA G3411, you must open both the left and right front ink tank covers. Opening the ink tank covers closes an internal valve mechanism that prevents ink in the supply tubes from siphoning back into the tanks when air enters the print head joint. According to Canon’s G3010 series service documentation, removing the print heads without opening the ink tank covers first will introduce air into the lines and require a full Ink Flush that consumes a large volume of ink.
Step-by-Step Print Head Reseating and Contact Cleaning on the Canon G3411
-
Cancel active jobs and keep the power on: If a print job is waiting, press the Stop button (marked with an upside-down triangle inside a circle). Leave the printer powered ON so the carriage automatically moves to the center maintenance position when you lift the lid.
-
Lift the scanning unit: Raise the scanner cover completely until the support stay locks it upright. Do not touch the clear plastic encoder strip stretched behind the carriage or the white ink supply tubes.
-
Open both ink tank covers: Flip open the left (Black) and right (Color) ink tank covers on the front of the printer.
-
Unlock the print head locking cover: Wait until the print head holder stops moving in the center access slot. Grasp knob (A) on the front lip of the print head locking cover and lift it straight up to unlatch the assembly.
-
Remove both print heads carefully: Lift the C (Color) print head out of the left slot and the B (Black) print head out of the right slot. Hold each unit by its plastic sides in an upright position so residual ink does not drip onto the carriage wiring.
-
Inspect and clean the electrical contacts: Examine the grid of gold contact pads on the back of both print heads and the corresponding spring-loaded gold pins inside the carriage holder. Wipe the gold contact pads gently in one direction using a dry, lint-free microfiber cloth or a cotton swab lightly moistened with 90%+ isopropyl alcohol to remove dried ink residue. Never touch or wipe the bottom nozzle plate where ink is ejected, and ensure all contacts are completely dry before proceeding.
-
Verify slot positions and reinstall: Insert the C (Color) print head into the left compartment and the B (Black) print head into the right compartment. Slide each unit down gently so the rear housing does not strike or bend the delicate spring pins at the back of the holder.
-
Lock the cover and engage both joint buttons: Lower the print head locking cover over the print heads and press it down until the front latch clicks. Next, press down firmly on both the left and right joint buttons on top of the locking cover until each button clicks into its lowered position. Leaving either joint button popped up prevents the carriage from sealing and contacting the print head properly.
-
Close the tank covers and scanner unit: Close both the left and right ink tank covers. Lift the scanning unit slightly to release its prop stay, then lower it gently until it closes.
-
Verify the display: The printer will initialize the carriage. If the connection is restored, the alternating
E,0,5code will disappear and the segment display will return to1with a steady green ON lamp.
Performing a Canon E05 Error Reset on FINE Cartridge PIXMA Models
On standard two-cartridge Canon PIXMA printers—such as the PIXMA MG2250, MG2522, MP250, MP280, TS3122, TS3320, TS3450, and TS3700 series—error E05 occurs when the carriage cannot read the chip matrix on the front of the Black or Color FINE cartridge. This frequently happens immediately after installing a refilled, remanufactured, or newly unpacked cartridge.
Follow this sequence to clean the contacts, verify compatibility, and execute a hardware recognition reset:
-
Open the cartridge access door with the printer powered on: With the printer turned on, open the front paper output tray and lift the cartridge access cover (or scanner unit). Wait for the FINE cartridge holder to slide to the center replacement position and come to a complete stop.
-
Release and remove both FINE cartridges: Depending on your specific PIXMA model, either push down firmly on the top of the cartridge until it unclips from the spring latch, or pinch and lift the gray locking lever covering the slot. Slide the Color cartridge out of the left slot and the Black cartridge out of the right slot.
-
Check cartridge model numbers and slot orientation: Confirm that the Color cartridge is installed on the left and the Black cartridge is installed on the right. Check the model code printed on the top label against the compatibility sticker inside your printer lid. Canon uses physically identical cartridge shells for different global regions (for example, PG-245/CL-246 in North America, PG-445/CL-446 in the Middle East and Eastern Europe, and PG-545/CL-546 in Western Europe). Installing a cartridge from a different region triggers Support Code 1485 and displays E05, which cannot be bypassed without installing the matching regional number.
-
Clean the cartridge and carriage contacts: Place the cartridges upright on a clean paper towel. Using a dry, lint-free cloth or a lightly dampened lint-free wipe, gently clean the gold metallic contact strip on the front face of each cartridge (facing the back of the printer when installed). Unplug the printer’s power cord while the carriage is parked in the center, and gently wipe the matching gold pin contacts inside the empty carriage slots. Allow two minutes for any moisture to evaporate completely.
-
Reinstall the cartridges firmly: Slide the Color cartridge into the left slot and the Black cartridge into the right slot at a slight upward angle. Push each cartridge firmly up and toward the back of the carriage until it snaps into place with an audible click (or close the locking lever until it latches).A cartridge resting even a millimeter too low will fail to meet the upper row of carriage pins and will trigger error E05.
-
Perform a cold power reset: Close the cartridge access cover while the printer is still unplugged. Wait three to five minutes to allow the mainboard capacitors to discharge, plug the power cord back into the wall outlet, and press the ON button.
-
Run a test print: Once the carriage completes its startup movement and the
E05message clears, print a Nozzle Check pattern from the printer maintenance menu or by holding the Stop button until the Alarm lamp flashes once (or twice on select models) to confirm both cartridges are firing properly.